My Massive I30 Revival and Build Thread


 07-08-2023, 07:45 AM
#882

Oooh, I'm getting all warm just thinking about your CO's and plates, not to mention the little bushing and it's personal shield, so cool. When I did mine I too never got good communication back from Ground Control, shame given all their Sentra work. Back then I went the Hypercoil route only because they offered a 7" length for my fronts. Can't wait to see the on track results!
07-09-2023, 07:39 AM
#883

Oooh, I'm getting all warm just thinking about your CO's and plates, not to mention the little bushing and it's personal shield, so cool. When I did mine I too never got good communication back from Ground Control, shame given all their Sentra work. Back then I went the Hypercoil route only because they offered a 7" length for my fronts. Can't wait to see the on track results!
 07-09-2023, 09:54 AM
#884
I finally published the 6 speed installation guide I wrote a long time ago, I think it's a substantial improvement over the two existing guides. Check it out and let me know what you think!
09-11-2023, 08:08 AM
#886
Time for some updates!
I had to re-do my control arm bushing heat/oil shield, as it rotated all the way around when I torqued down the nut. I decided to drill a little hole in the control arm, hopefully it won't affect the strength of the arm Excuse the blurry pic. Now I can take it on and off easily and it stays in the correct orientation.
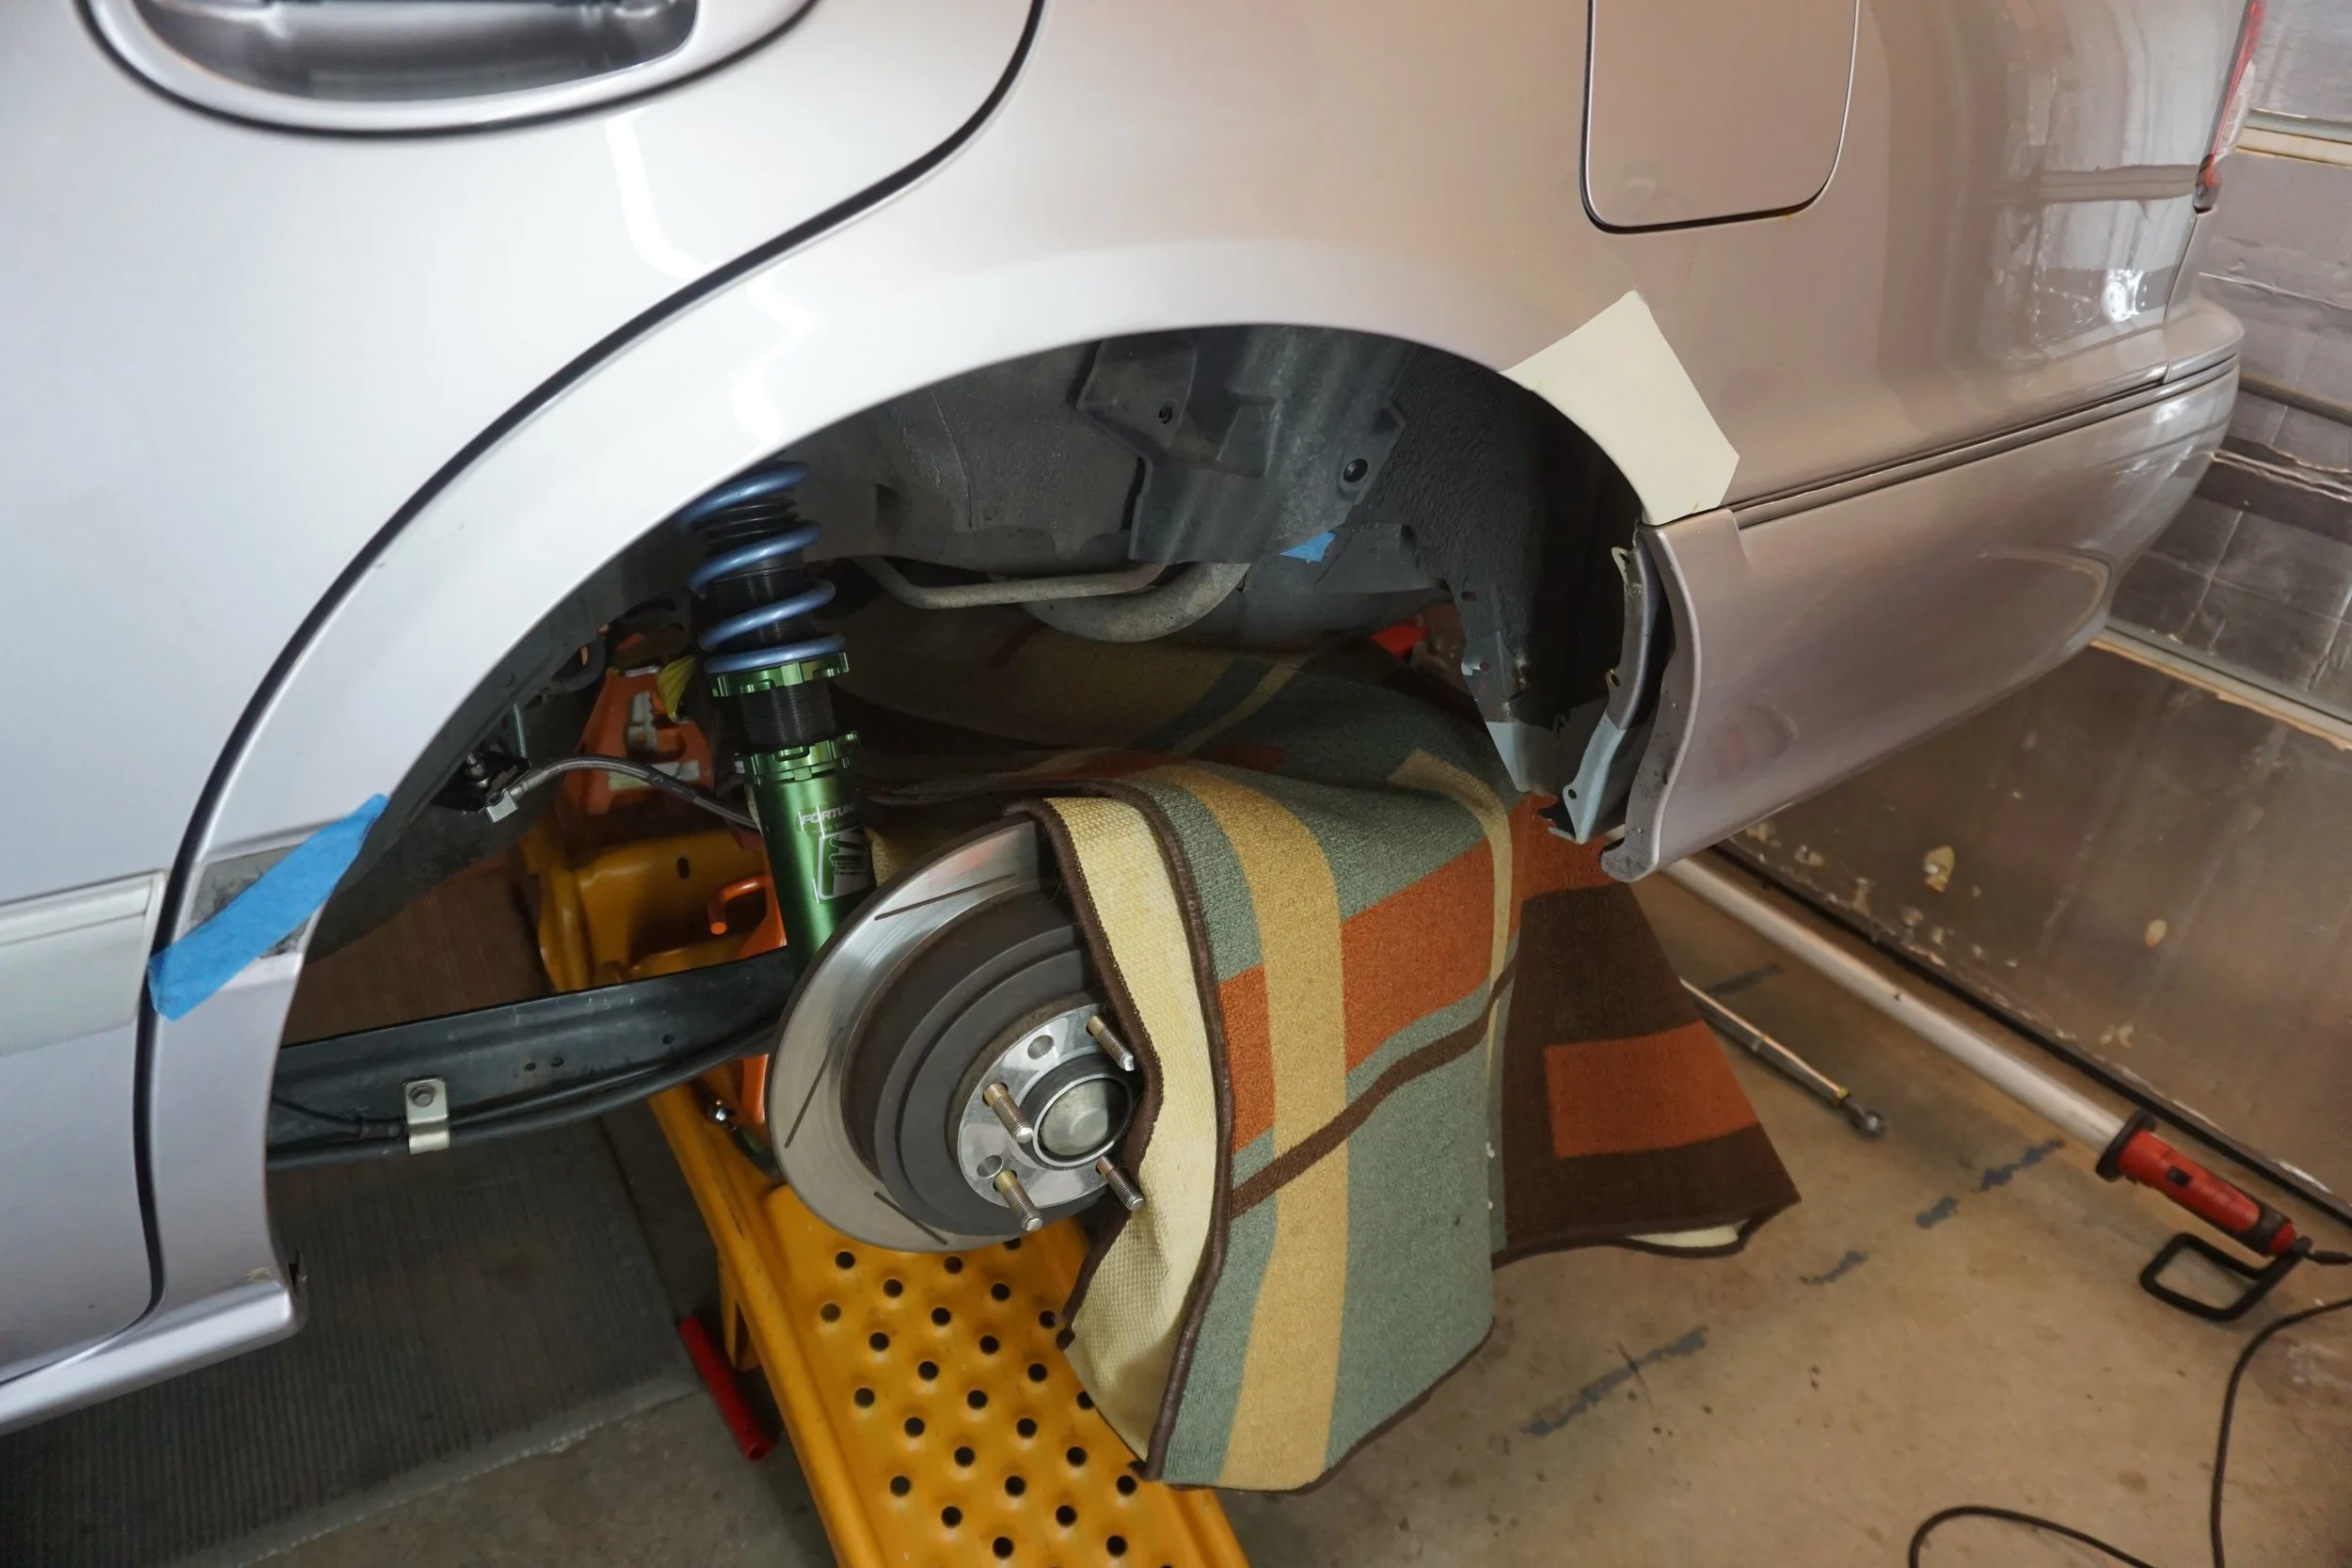
Next up was the 5th gen FSTB. Ever since I installed the 3.5 in my car I haven't had a FSTB since my old Stillen bar wouldn't fit. I bought a cheap Megan Racing bar a while back, but didn't want to install it (and re-drill the holes) until the new coilovers/camber plates were installed. With the Fortune Autos installed, I installed the bar, but there was interference with my hood and insulation. Sprinkling some flour on top of the bar confirmed where the problem was:
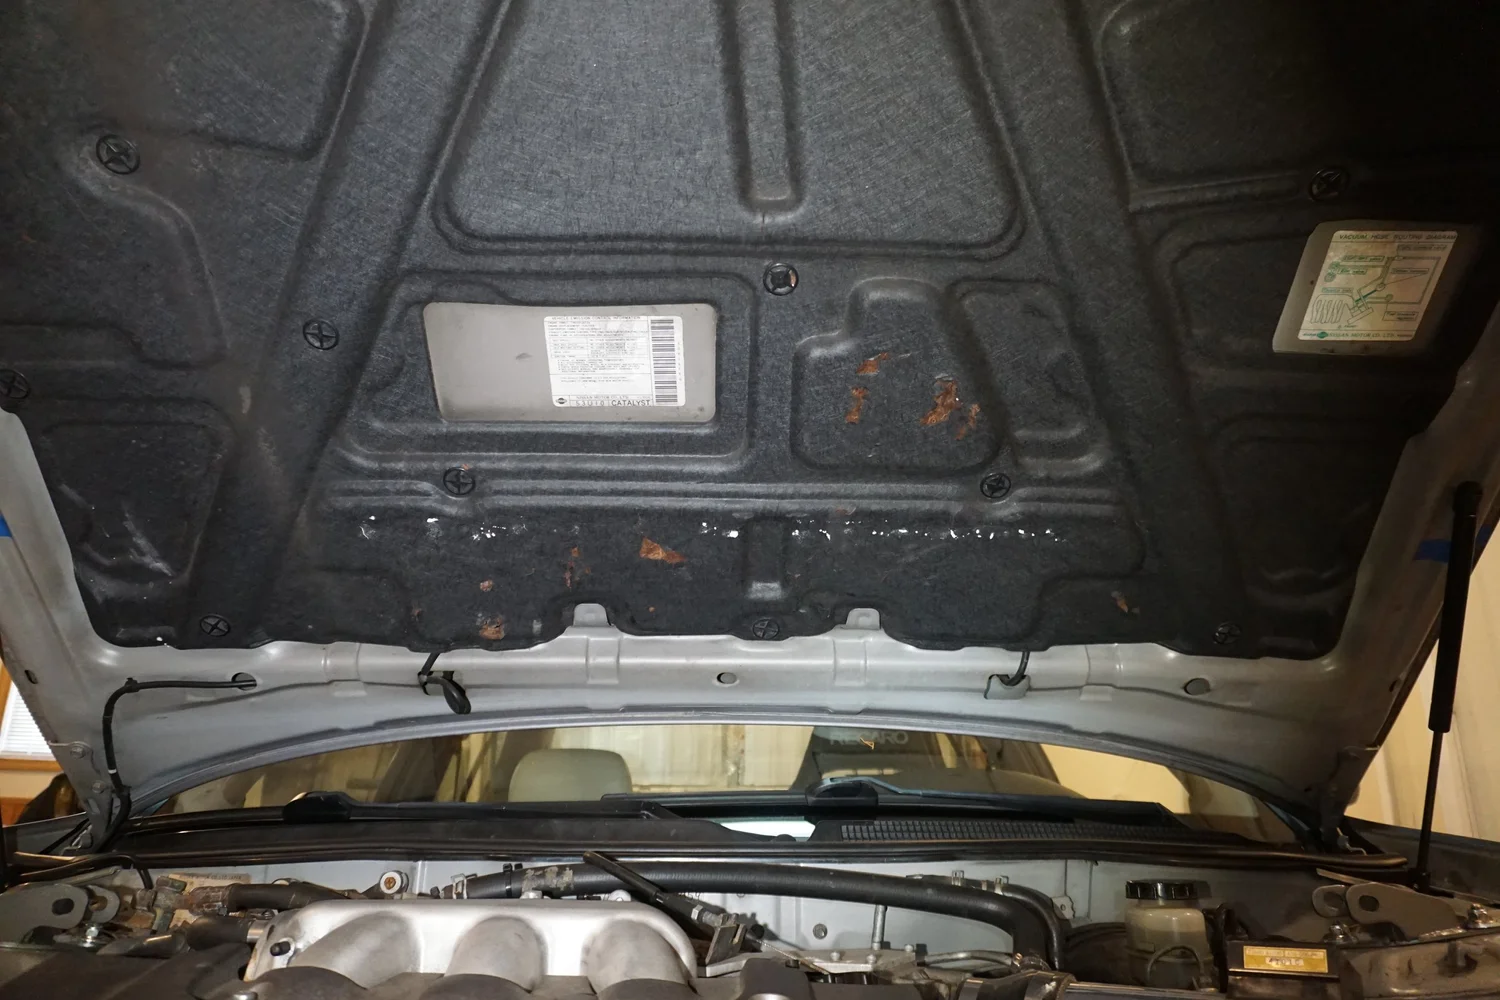
So I cut out the insulation in that area.
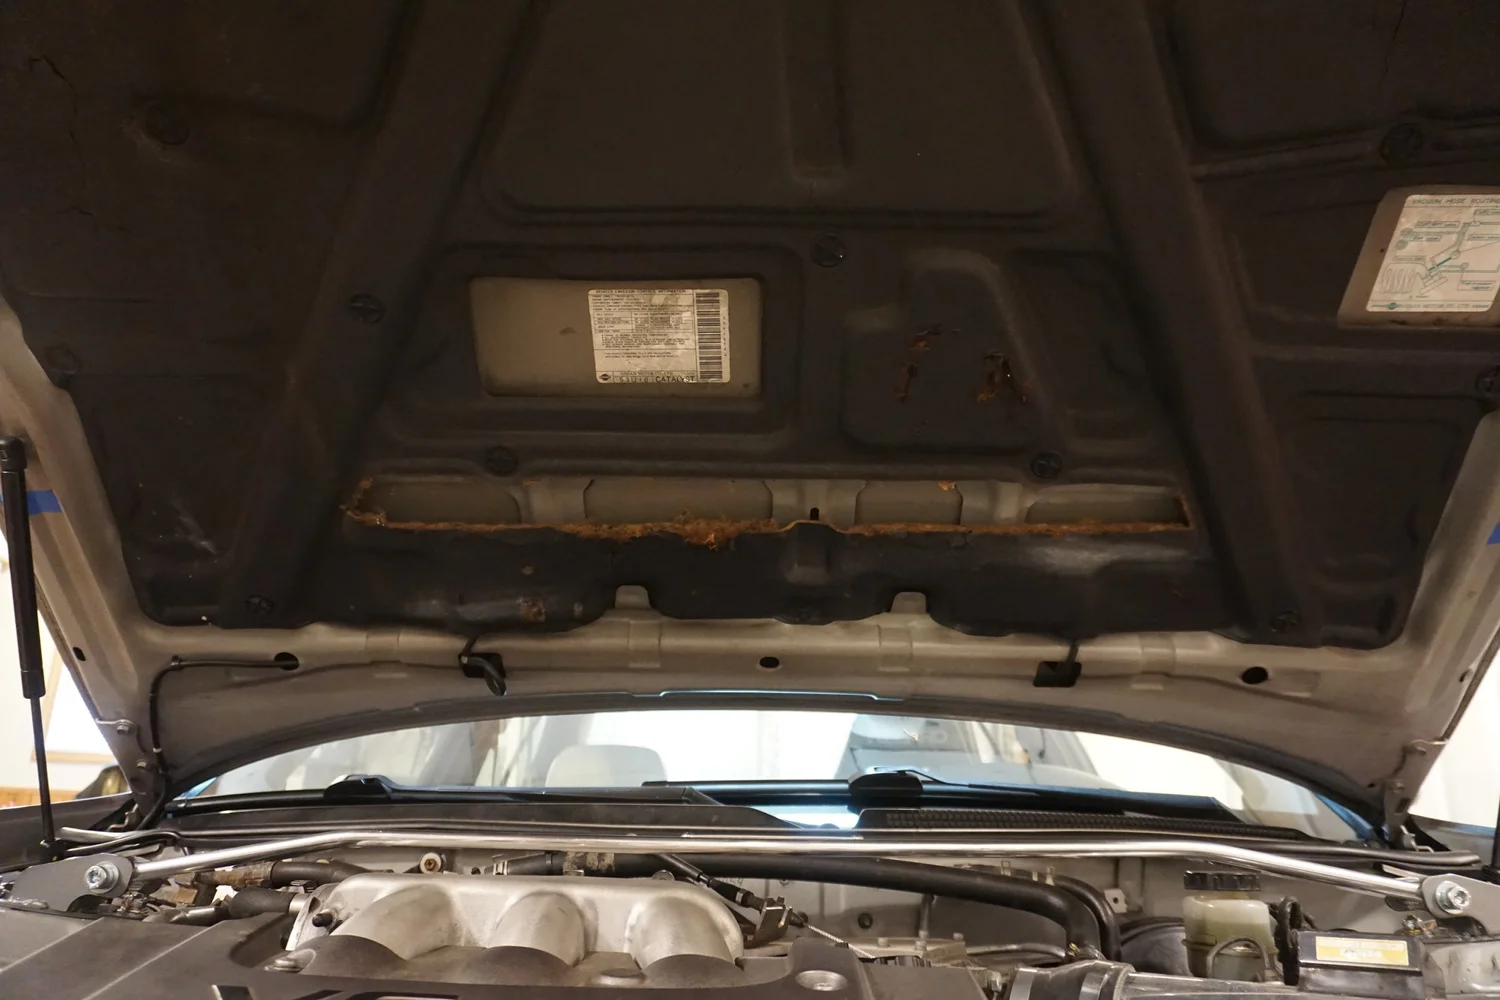
I drove around like that for a while, but when I checked on it later I saw there were marks on the bar from the hood, so I carefully cut out some sections from the hood reinforcements to get some more space.
And then got some black tape around the edges of the insulation since I was tired of it making a mess.
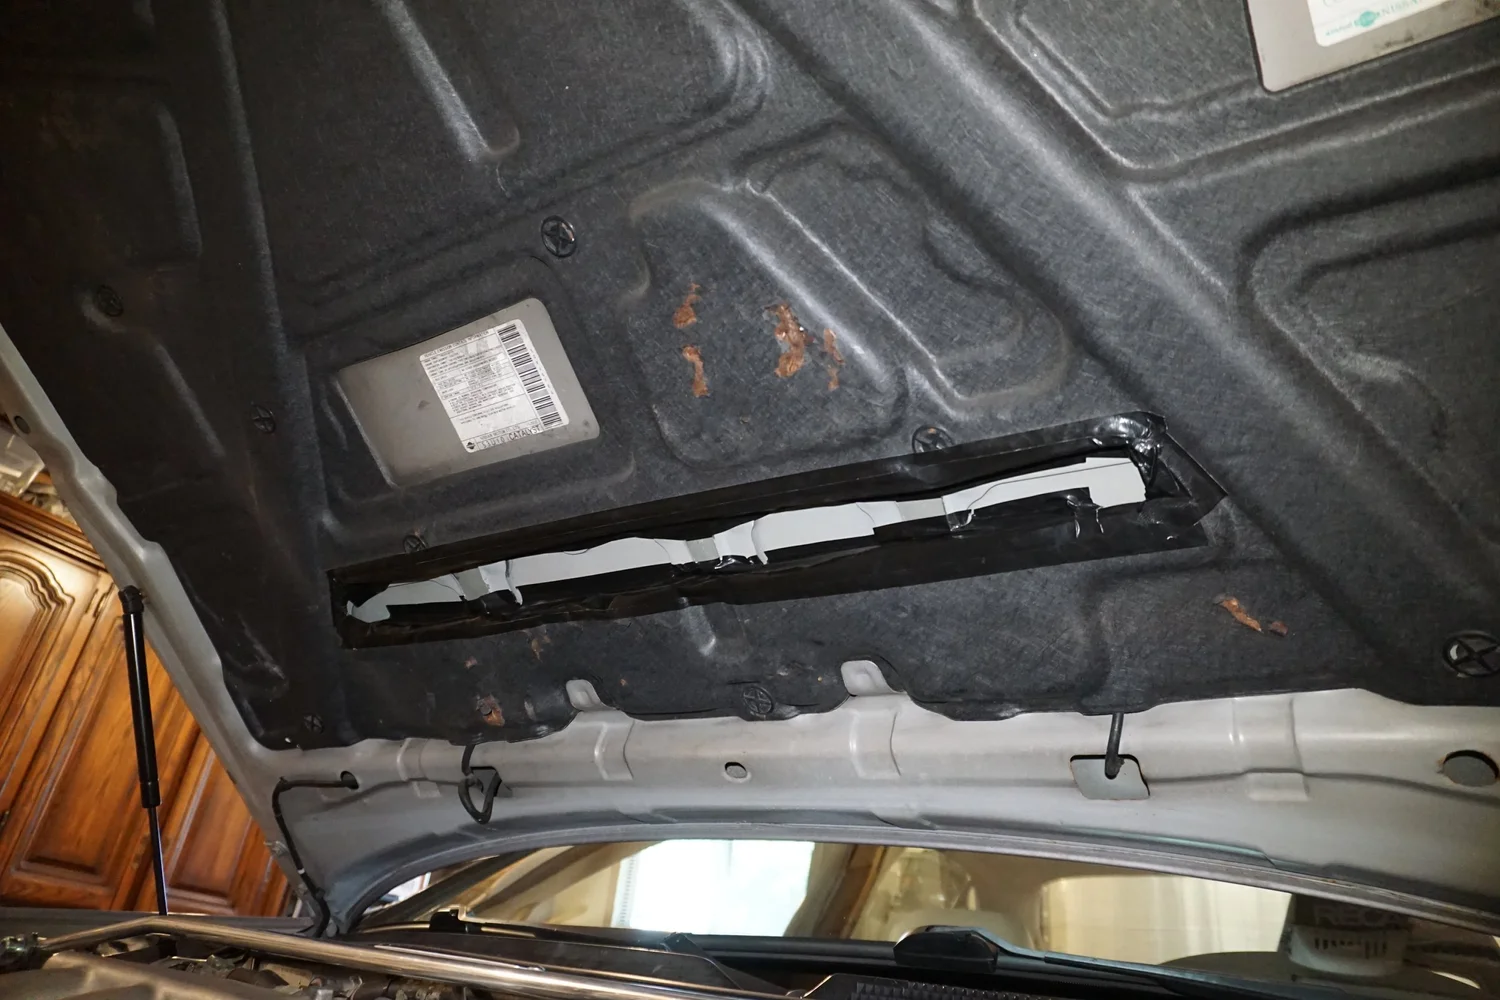
Problem solved!
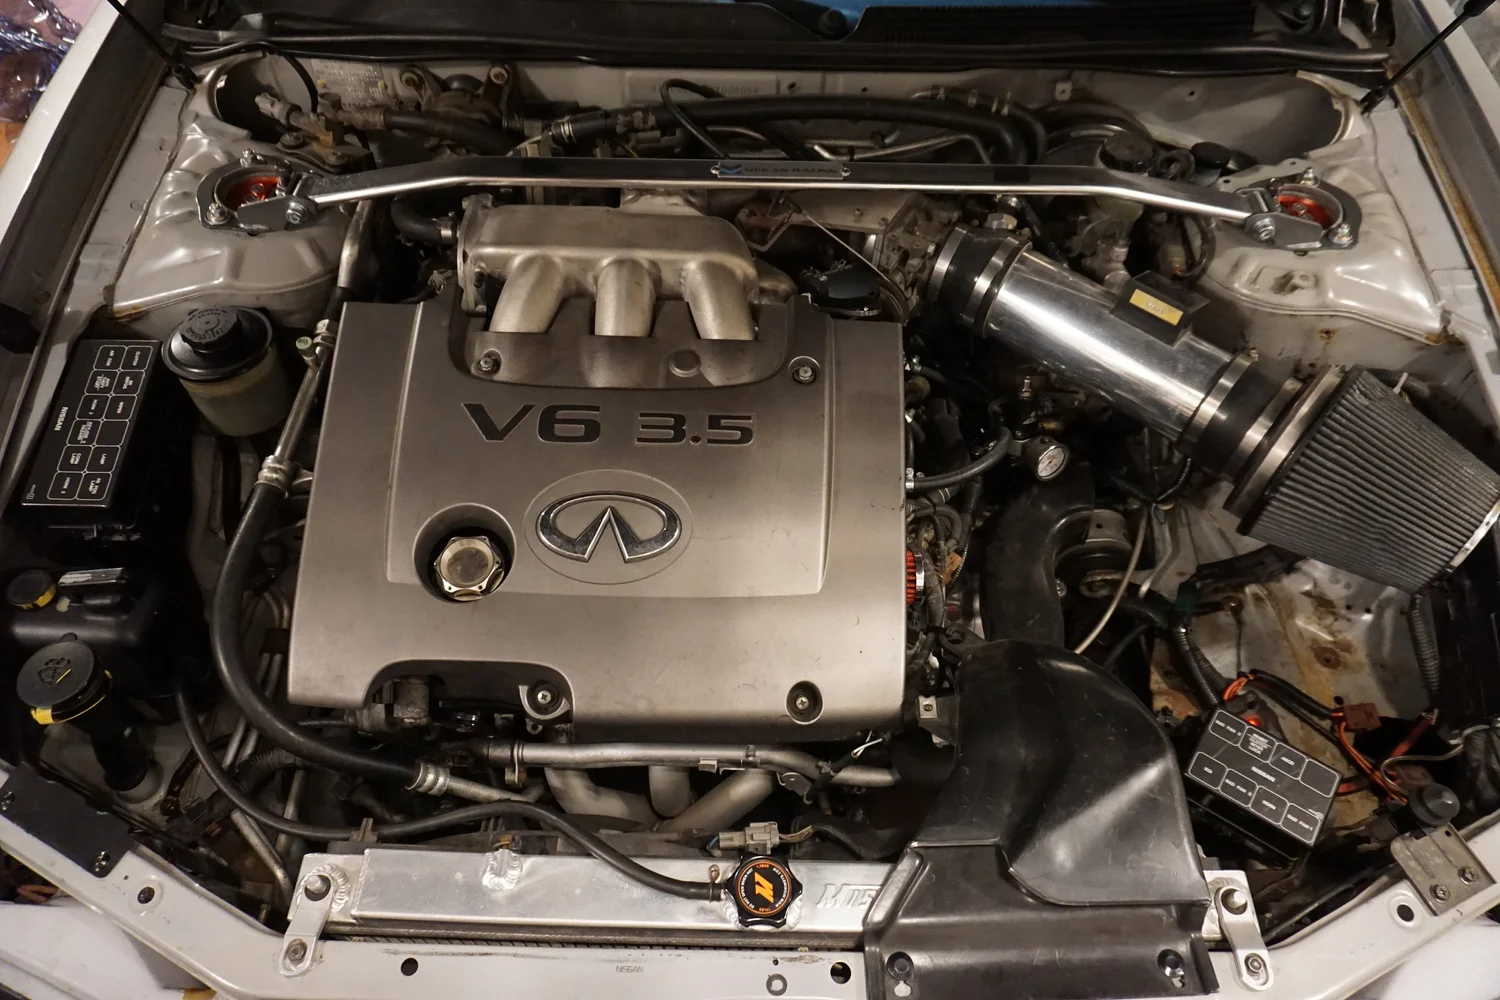
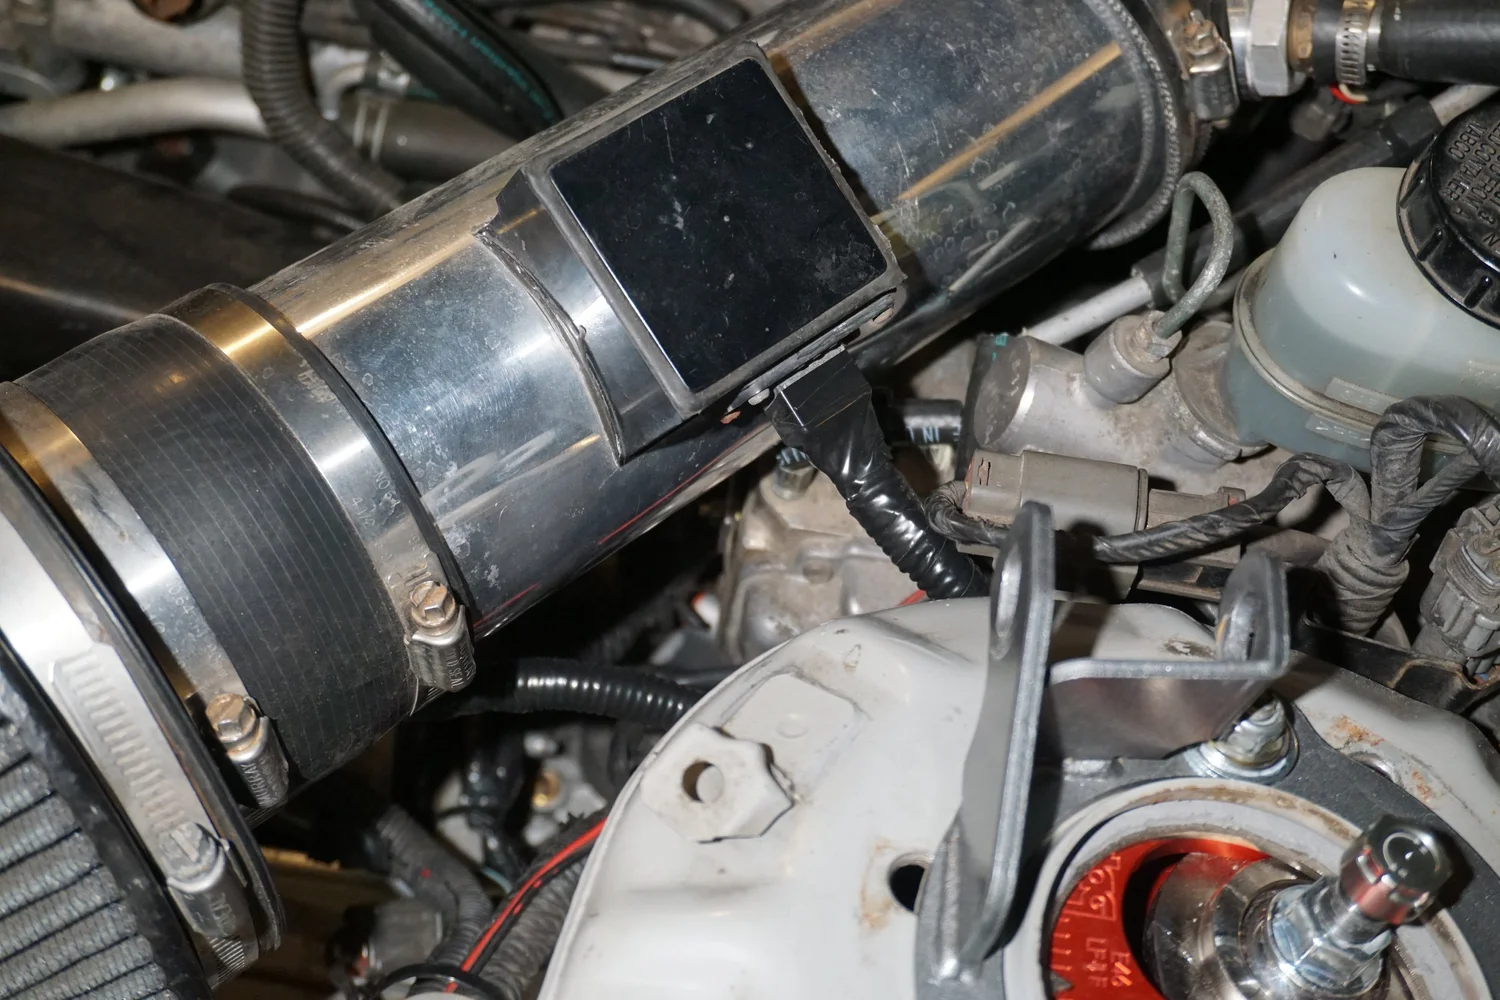
Next up was an intermittent rough running issue, one that I had kind of diagnosed and fixed earlier, where the car would occasionally idle super right with the AFR between 9-10, and sometimes even stall out. I traced it to the wiring for the Q45 MAF, but after I jiggled them the problem went away for a long time. Well, the problem came back so I decided to properly fix it. The problem was that the wires going into the body-side connector for the Q45 MAF had aged out, so the sheathing was cracked and the wires had started to break.
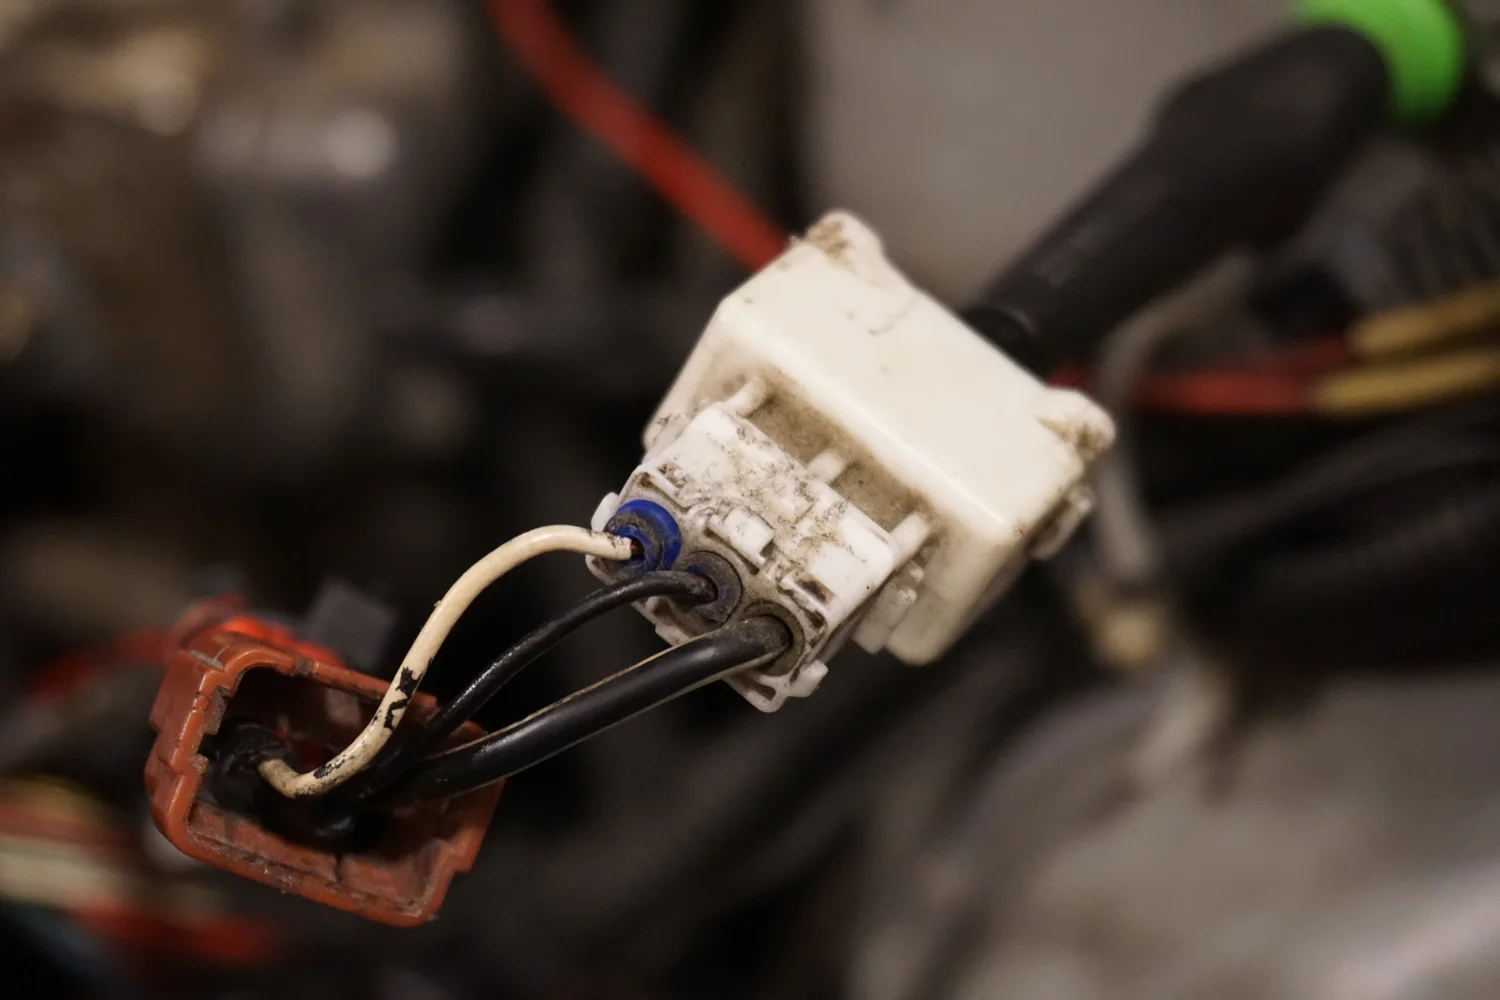
I wanted to reuse the factory connector, but the pins for it are some special type, and I couldn't reuse them since they were so delicate/brittle.
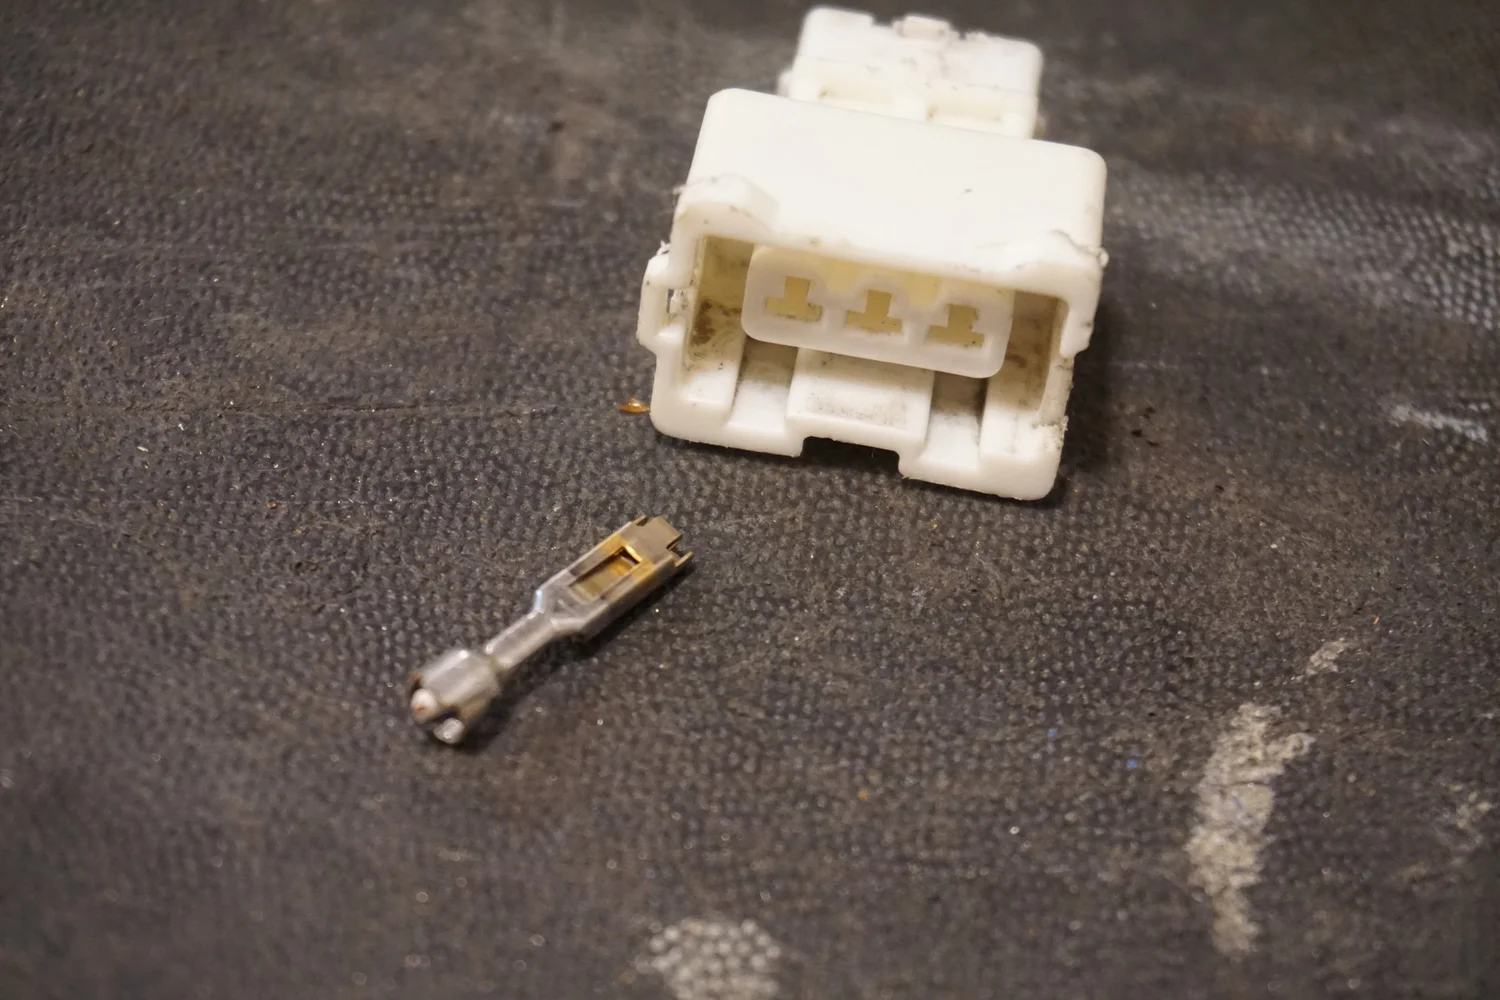
So I did the next best thing and just ran direct female terminals right to the MAF. I don't love it, but I didn't know what else to do.
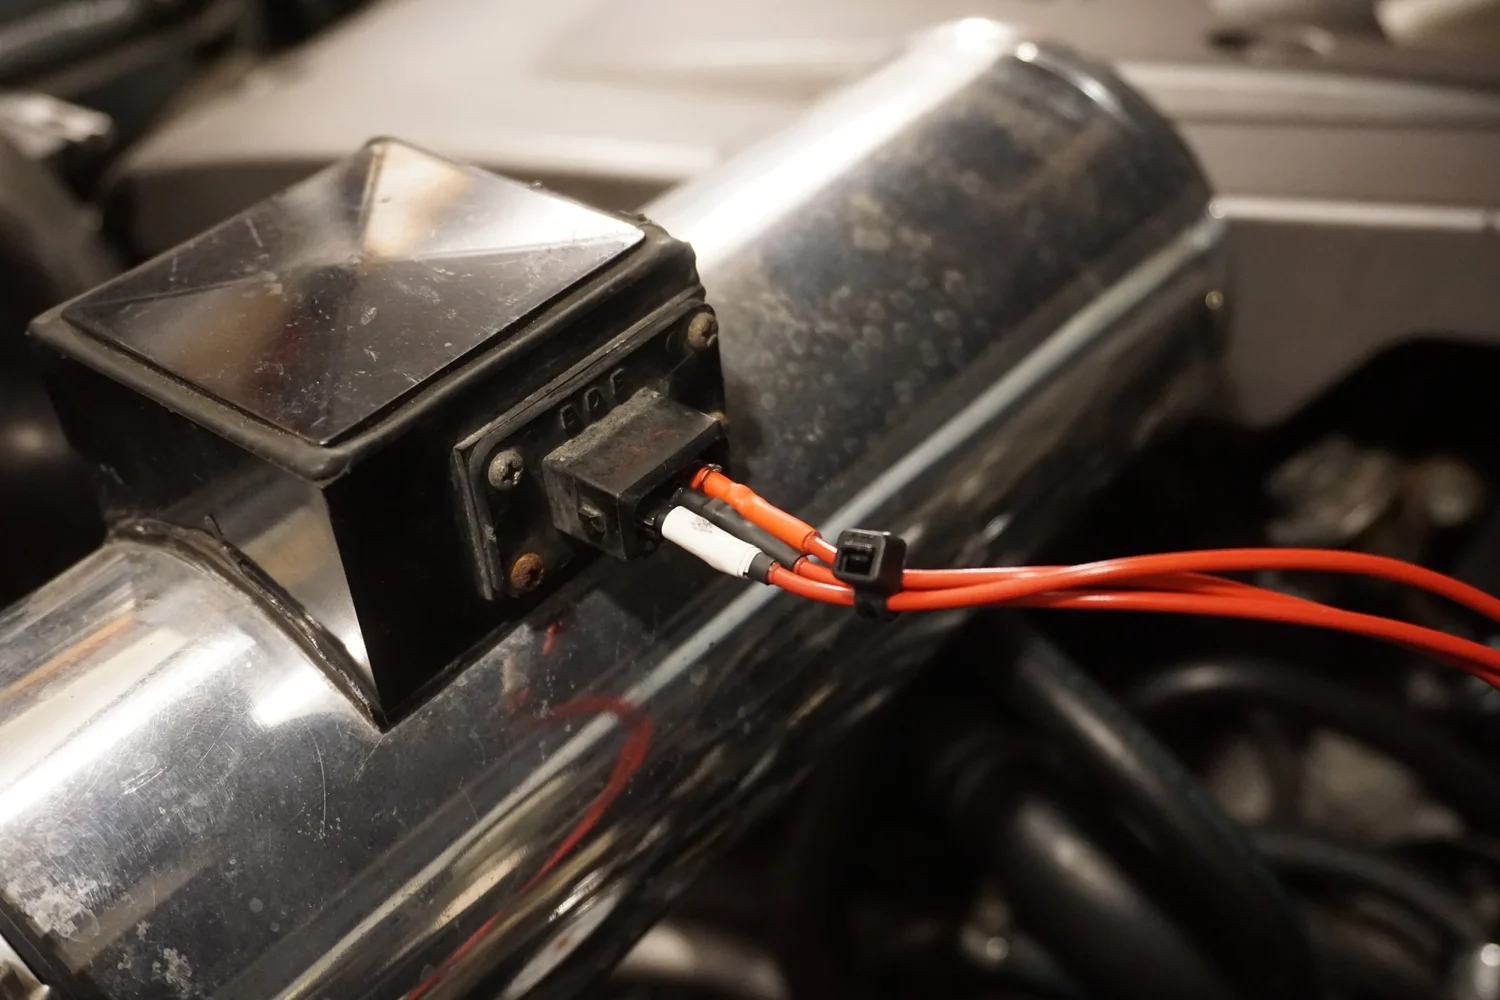
But so far the repair has worked and the car is running great, so I'm quite happy.
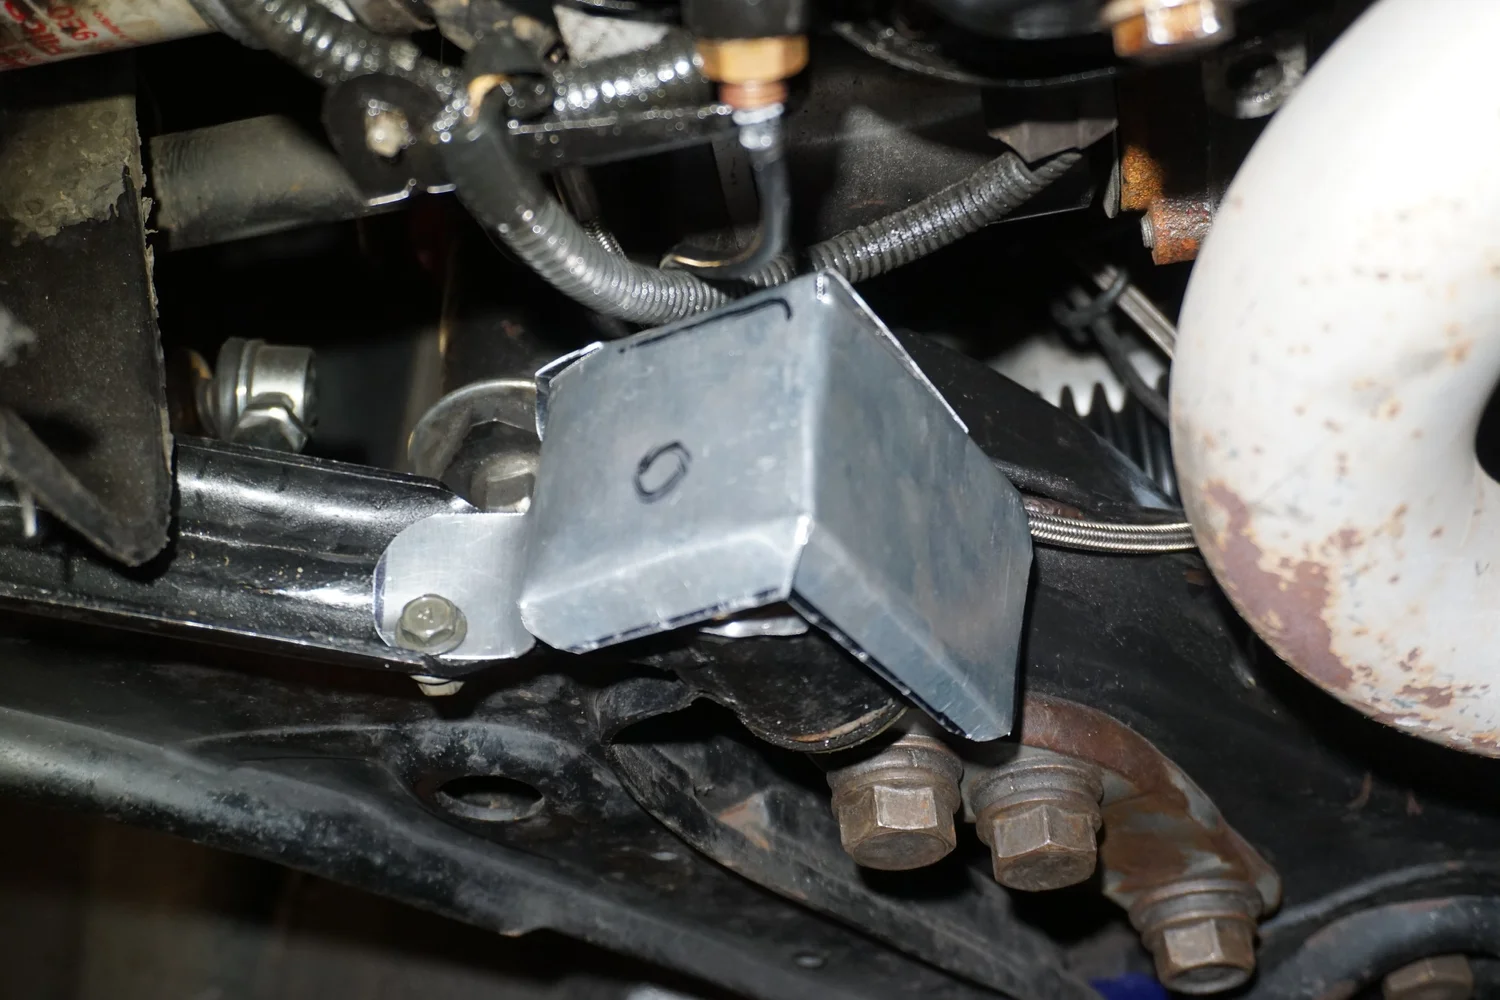
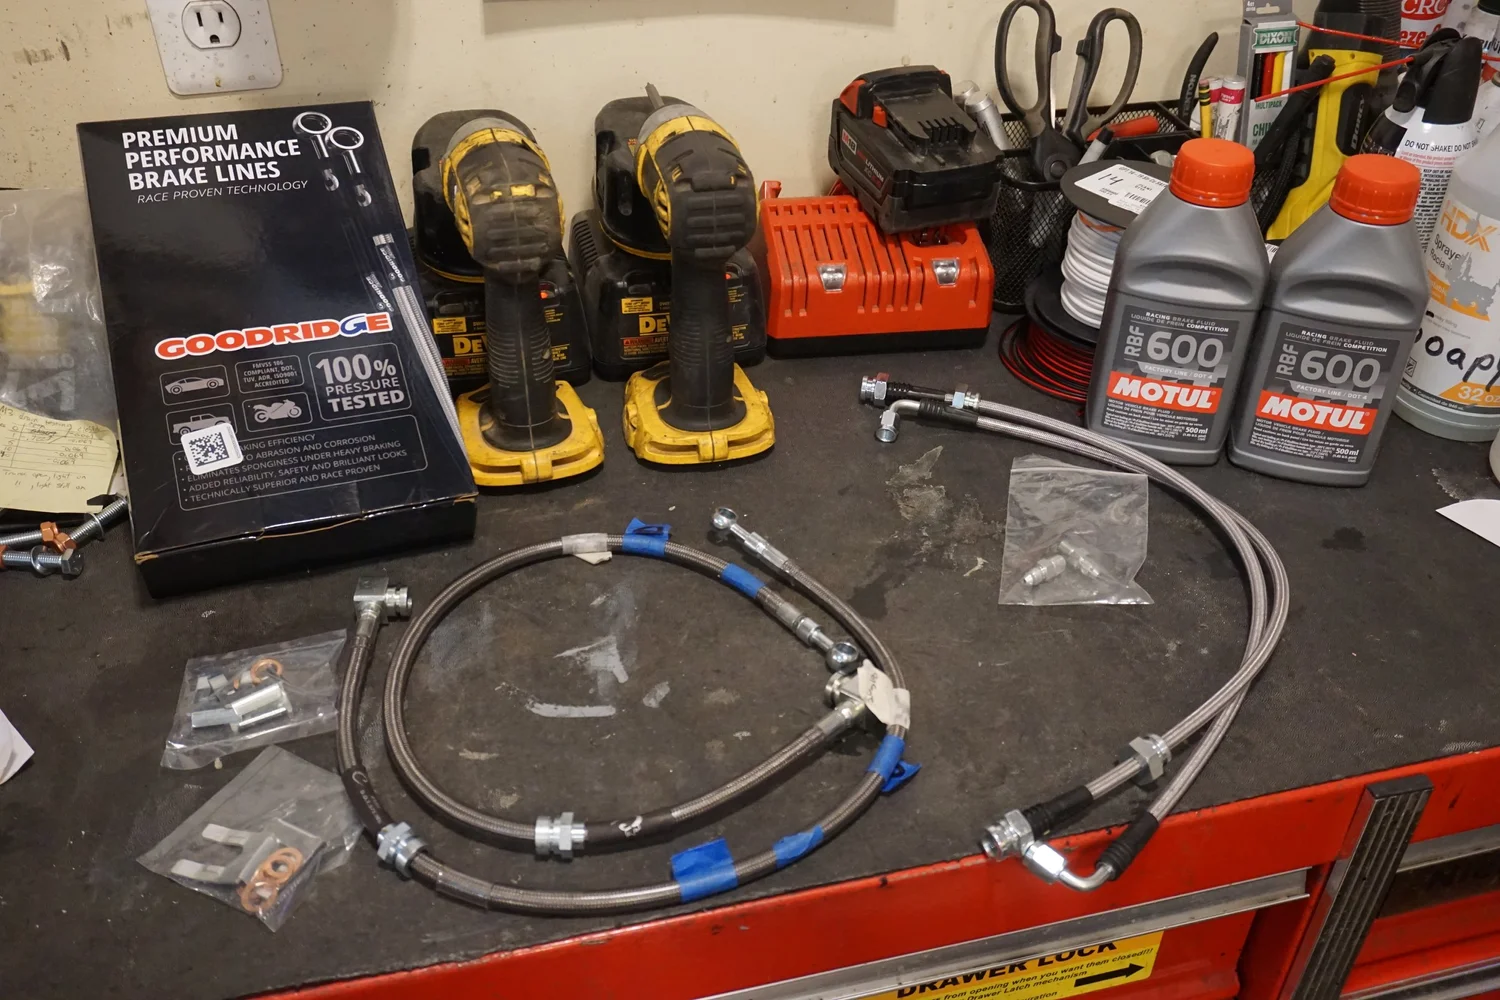
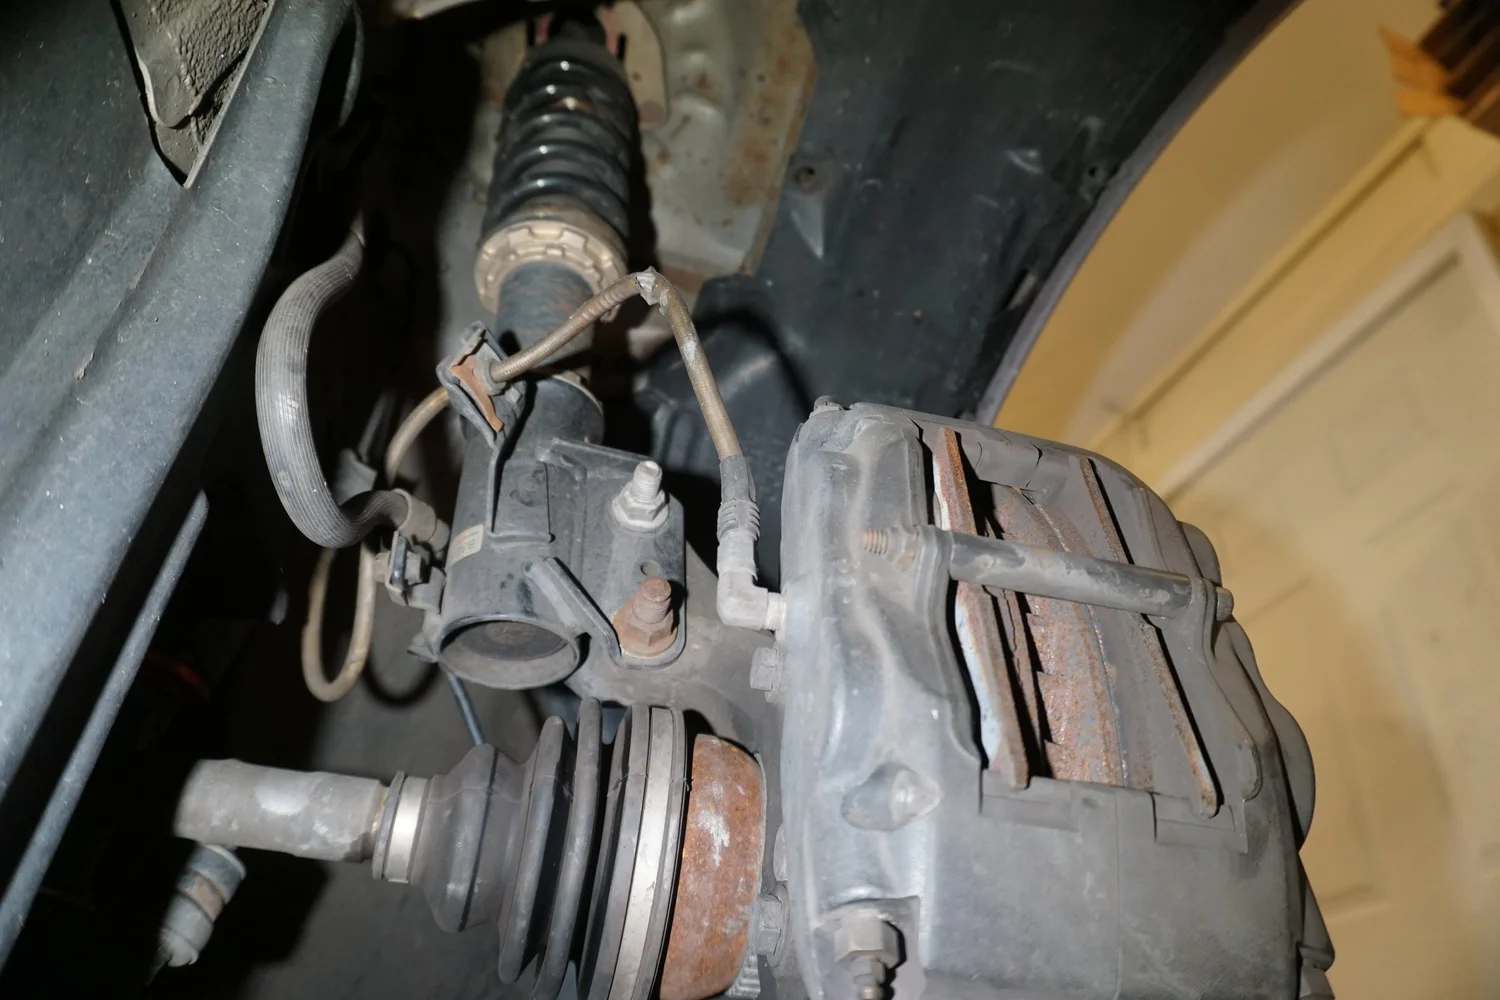
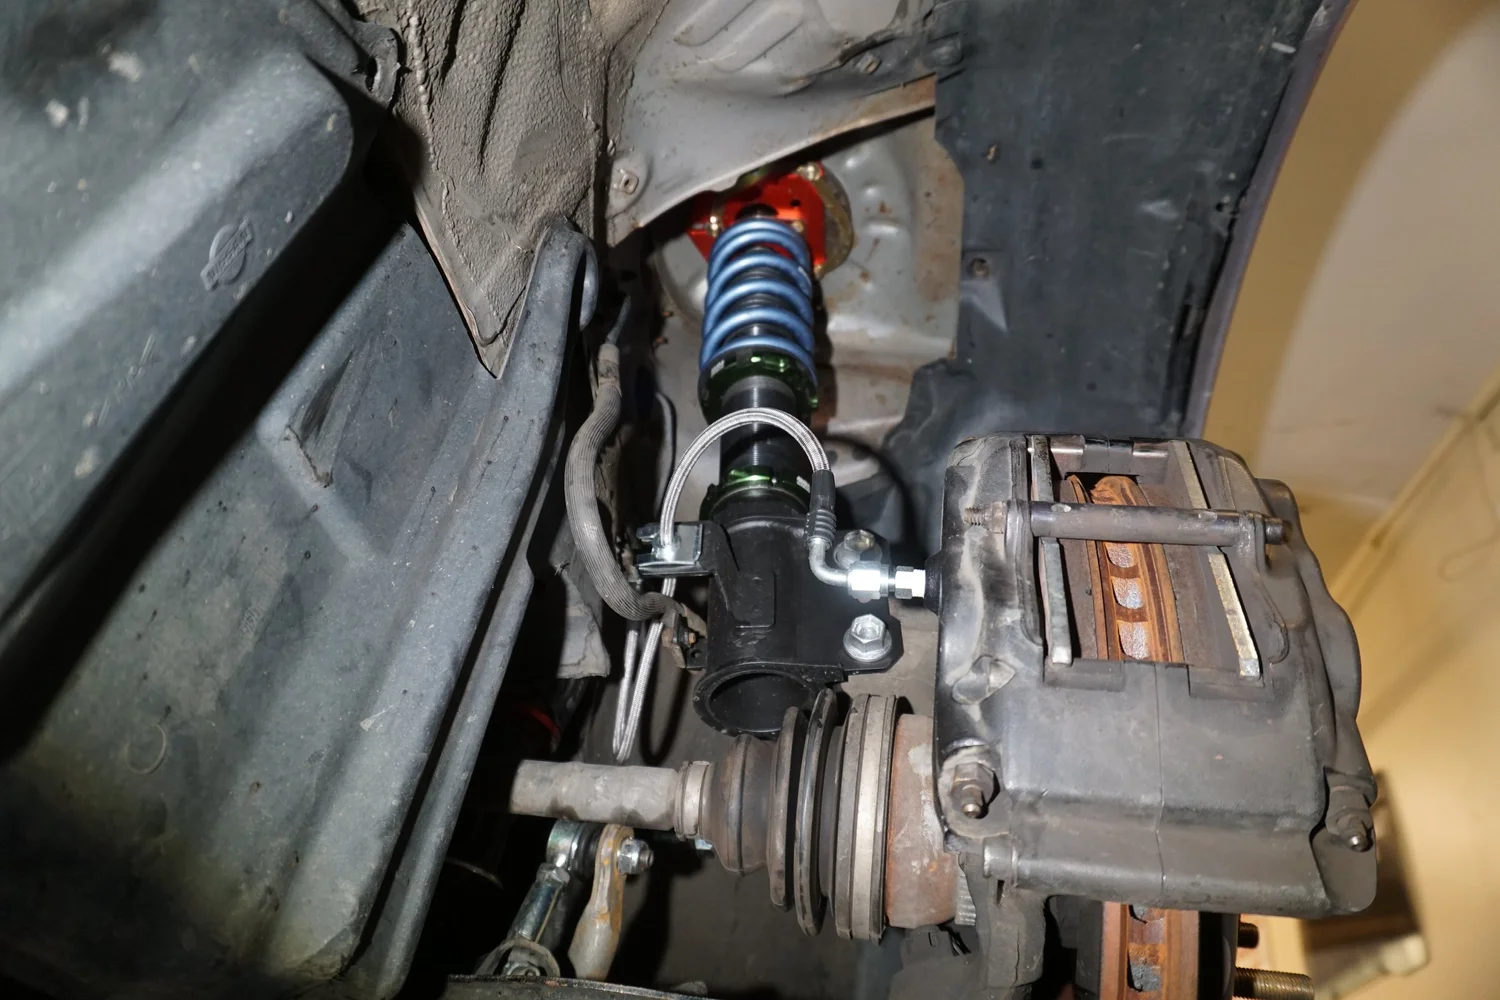
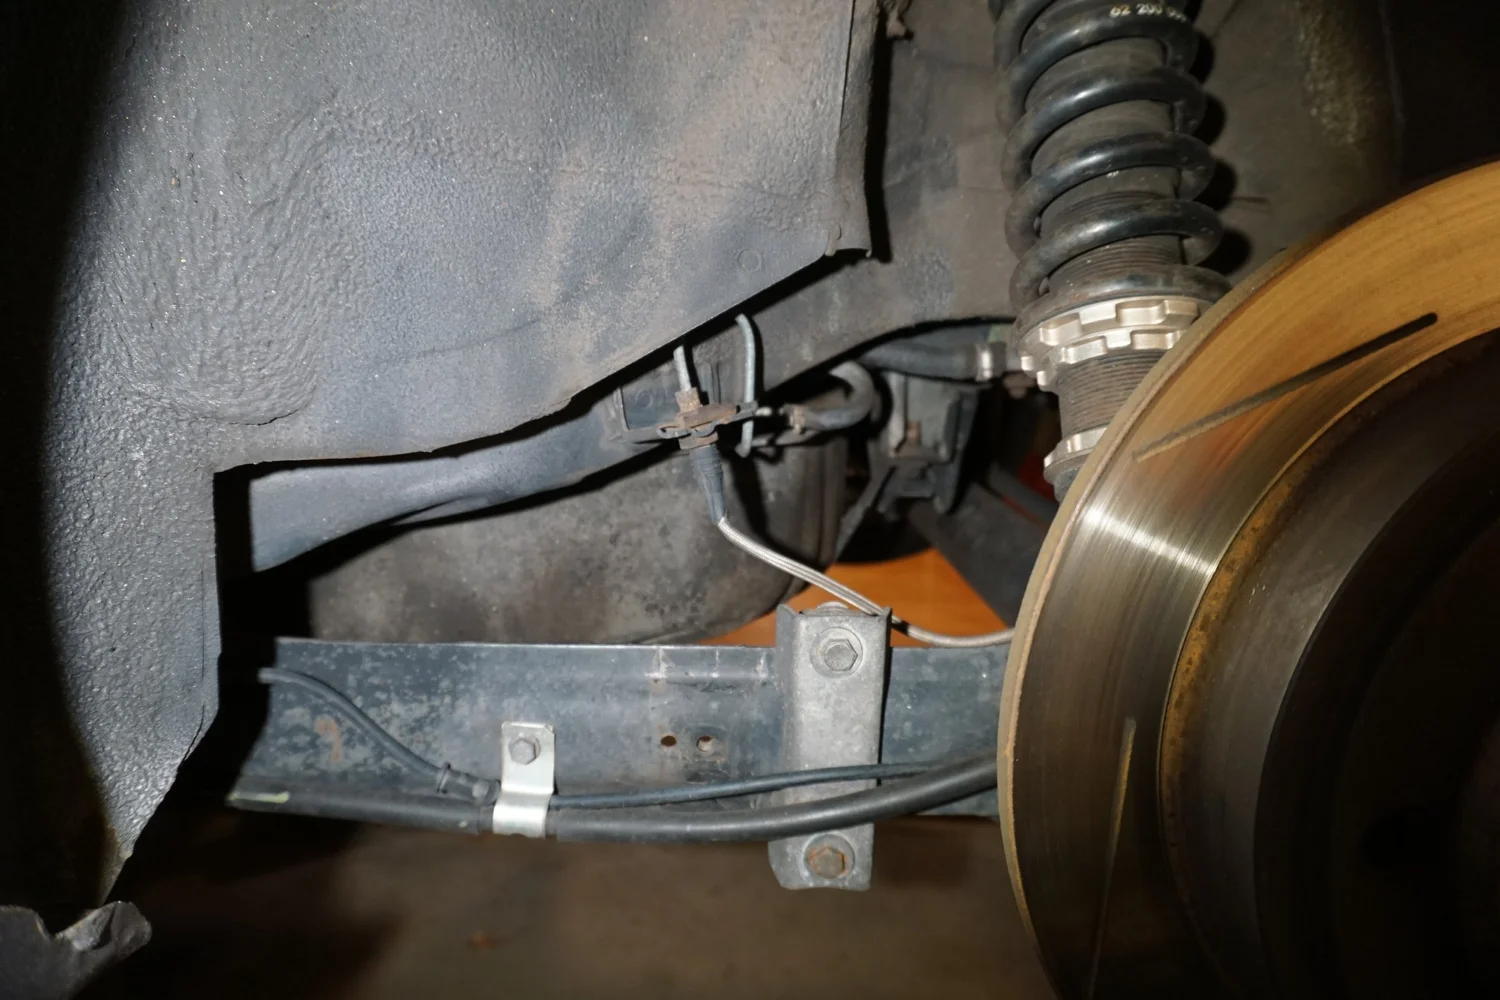
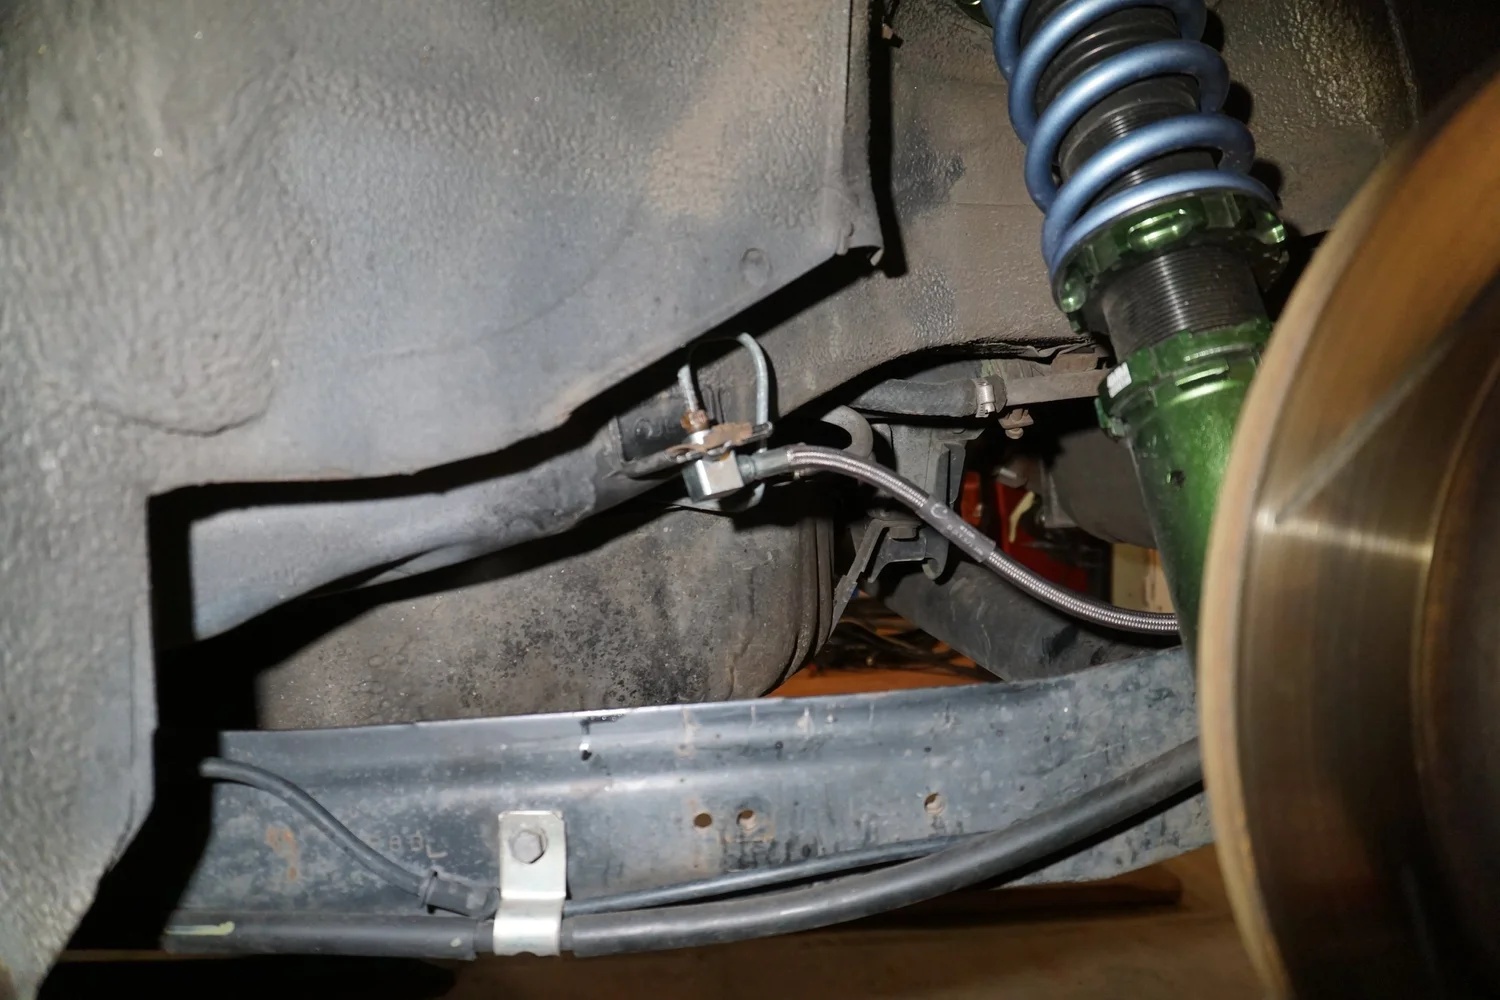
Last up were the new brake lines. I wanted to replace the old SS lines on the car for a couple of reasons, so I initially bought some Goodridge lines before remembering they wouldn't work with the Wilwoods, and I wanted to try something different in the rear. So I ordered new lines for the Wilwoods from Fastbrakes, which thankfully were a new and improved design. Then I worked with Crown Performance to make some custom lines for the rear. I wanted to move the front part of the line up and away from the trailing arm and RSB bracket, as I had smashed mine at one point, and I didn't want to do it again. I'm pretty happy with how it turned out! I also upgraded from my regular ATE DOT 4 fluid to some Motul RBF600.
More big news coming soon
I had to re-do my control arm bushing heat/oil shield, as it rotated all the way around when I torqued down the nut. I decided to drill a little hole in the control arm, hopefully it won't affect the strength of the arm
Excuse the blurry pic. Now I can take it on and off easily and it stays in the correct orientation.Next up was the 5th gen FSTB. Ever since I installed the 3.5 in my car I haven't had a FSTB since my old Stillen bar wouldn't fit. I bought a cheap Megan Racing bar a while back, but didn't want to install it (and re-drill the holes) until the new coilovers/camber plates were installed. With the Fortune Autos installed, I installed the bar, but there was interference with my hood and insulation. Sprinkling some flour on top of the bar confirmed where the problem was:
So I cut out the insulation in that area.
I drove around like that for a while, but when I checked on it later I saw there were marks on the bar from the hood, so I carefully cut out some sections from the hood reinforcements to get some more space.
And then got some black tape around the edges of the insulation since I was tired of it making a mess.
Problem solved!
Next up was an intermittent rough running issue, one that I had kind of diagnosed and fixed earlier, where the car would occasionally idle super right with the AFR between 9-10, and sometimes even stall out. I traced it to the wiring for the Q45 MAF, but after I jiggled them the problem went away for a long time. Well, the problem came back so I decided to properly fix it. The problem was that the wires going into the body-side connector for the Q45 MAF had aged out, so the sheathing was cracked and the wires had started to break.
I wanted to reuse the factory connector, but the pins for it are some special type, and I couldn't reuse them since they were so delicate/brittle.
So I did the next best thing and just ran direct female terminals right to the MAF. I don't love it, but I didn't know what else to do.
But so far the repair has worked and the car is running great, so I'm quite happy.
Last up were the new brake lines. I wanted to replace the old SS lines on the car for a couple of reasons, so I initially bought some Goodridge lines before remembering they wouldn't work with the Wilwoods, and I wanted to try something different in the rear. So I ordered new lines for the Wilwoods from Fastbrakes, which thankfully were a new and improved design. Then I worked with Crown Performance to make some custom lines for the rear. I wanted to move the front part of the line up and away from the trailing arm and RSB bracket, as I had smashed mine at one point, and I didn't want to do it again. I'm pretty happy with how it turned out! I also upgraded from my regular ATE DOT 4 fluid to some Motul RBF600.
More big news coming soon
Last edited by 95maxrider; 09-11-2023 at 08:14 AM.


 09-23-2023, 07:04 AM
#890
Alright, time for the big (to me) news: I successfully (but partially) bent my rear beam (closer) to zero toe!
I've wanted to have this done for close to 15 years now, but I wasn't about to drive out to California to have the original developer of the idea do the project, and the guy from the Sentra forum who used to travel and do it stopped doing that, so I pretty much gave up on the idea. I learned a year or two ago that 2J Racing had started to offer the service, so I thought about driving all the way down there again to have them do it. But that's a long drive, they charge like $500+ for the work, and they don't exactly have a great reputation at this point. I found a local race shop that was down to do the work and they're only an hour from me, but again, it was going to cost $600+ pretty easy. So in the end, I decided I would try to do it myself. What's the worst that could happen?
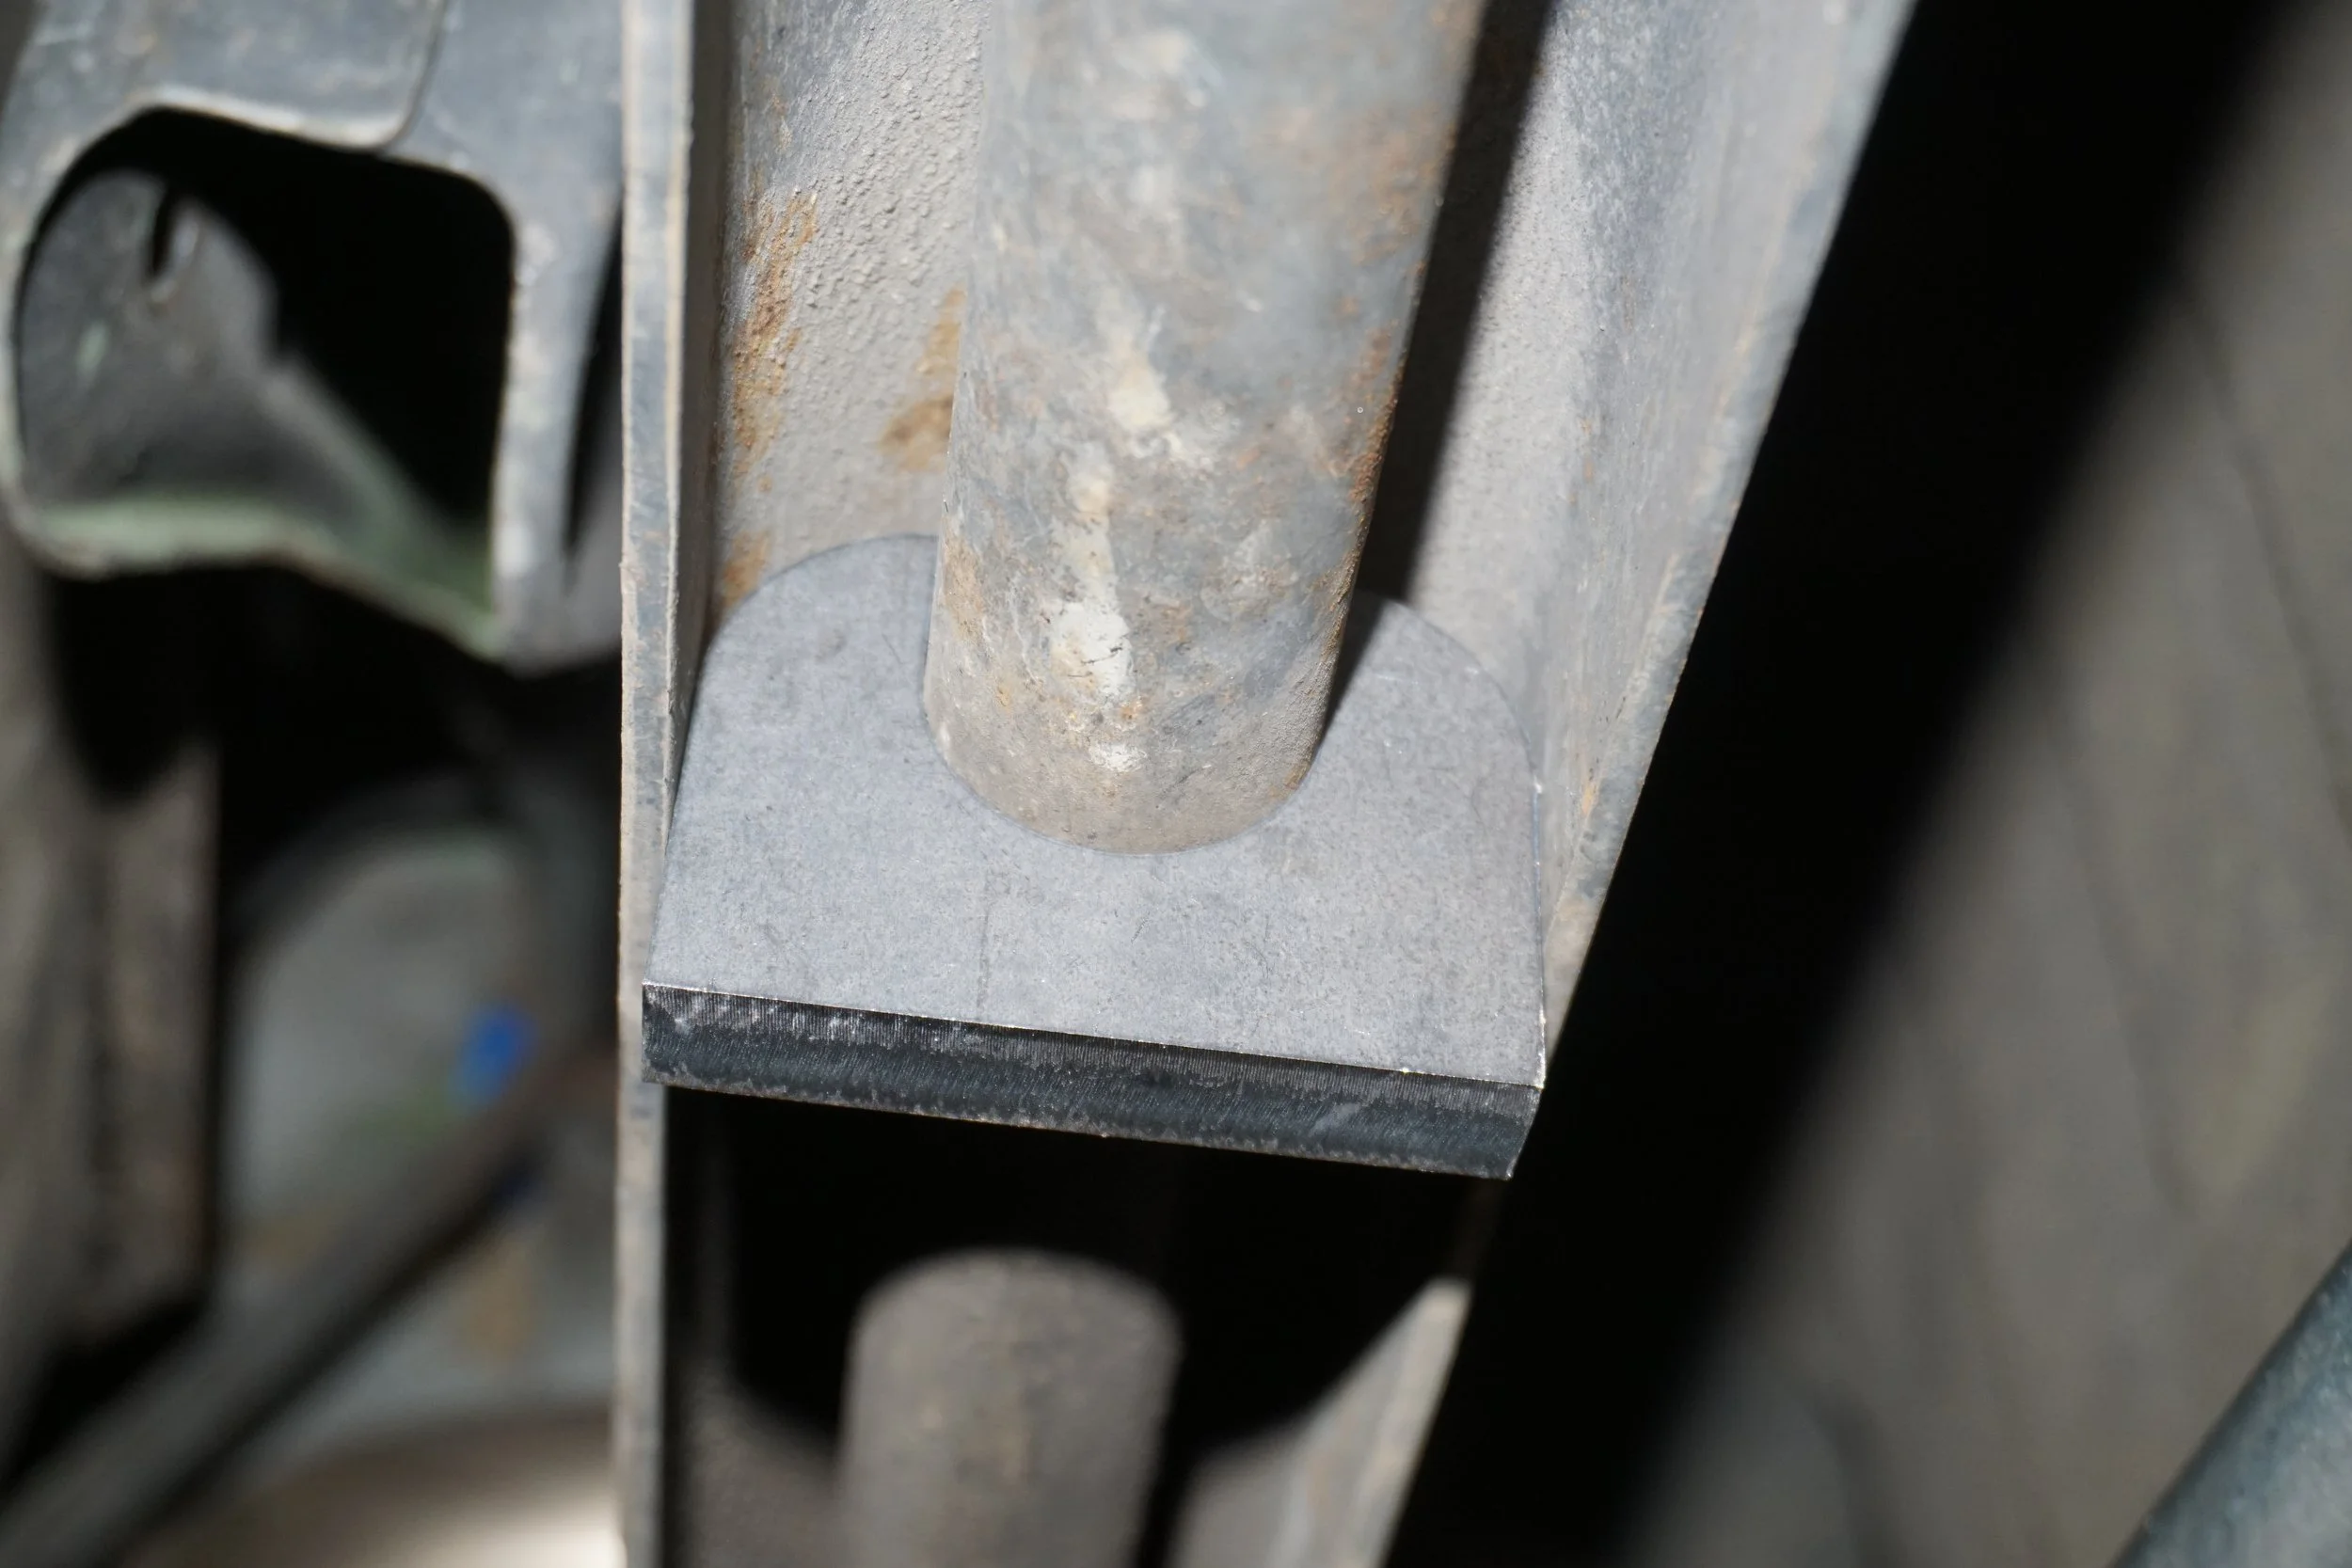
First, I needed the supplies to do the job. I found some super old pictures that showed how the guy in California did it to one of Mike Kojima's Sentras, so I knew I would need some strong chains, a bottle jack, and some sort of I beam. Working with schmellyfart, he developed some steel spacers/supports to fit inside the beam and around the inner torsion (?) bar, so that the outer upside down U structure wouldn't collapse/bend when force was applied with the jack and chains. The goal is to bend the inner torsion bar along with the outer structure. I then had to track down some sort of beam to serve as the strong base for the jack and chains, and it had to be much stronger than the rear beam on the car. Buying something long enough and strong enough new was going to be very expensive, so I looked for something on the used market. I got lucky and found the owner of a construction company an hour away from me who had a number of different beams for sale, and came home with this monstrosity for less than $100.
Here are the parts schmelly came up with, along with my cut up pizza pans to use as turn plates for doing alignment work.

Here's how they fit up in the beam. I placed two at the jack point, and two at each chain point.
And I bought a DIY alignment kit. Measuring toe is quick and easy!
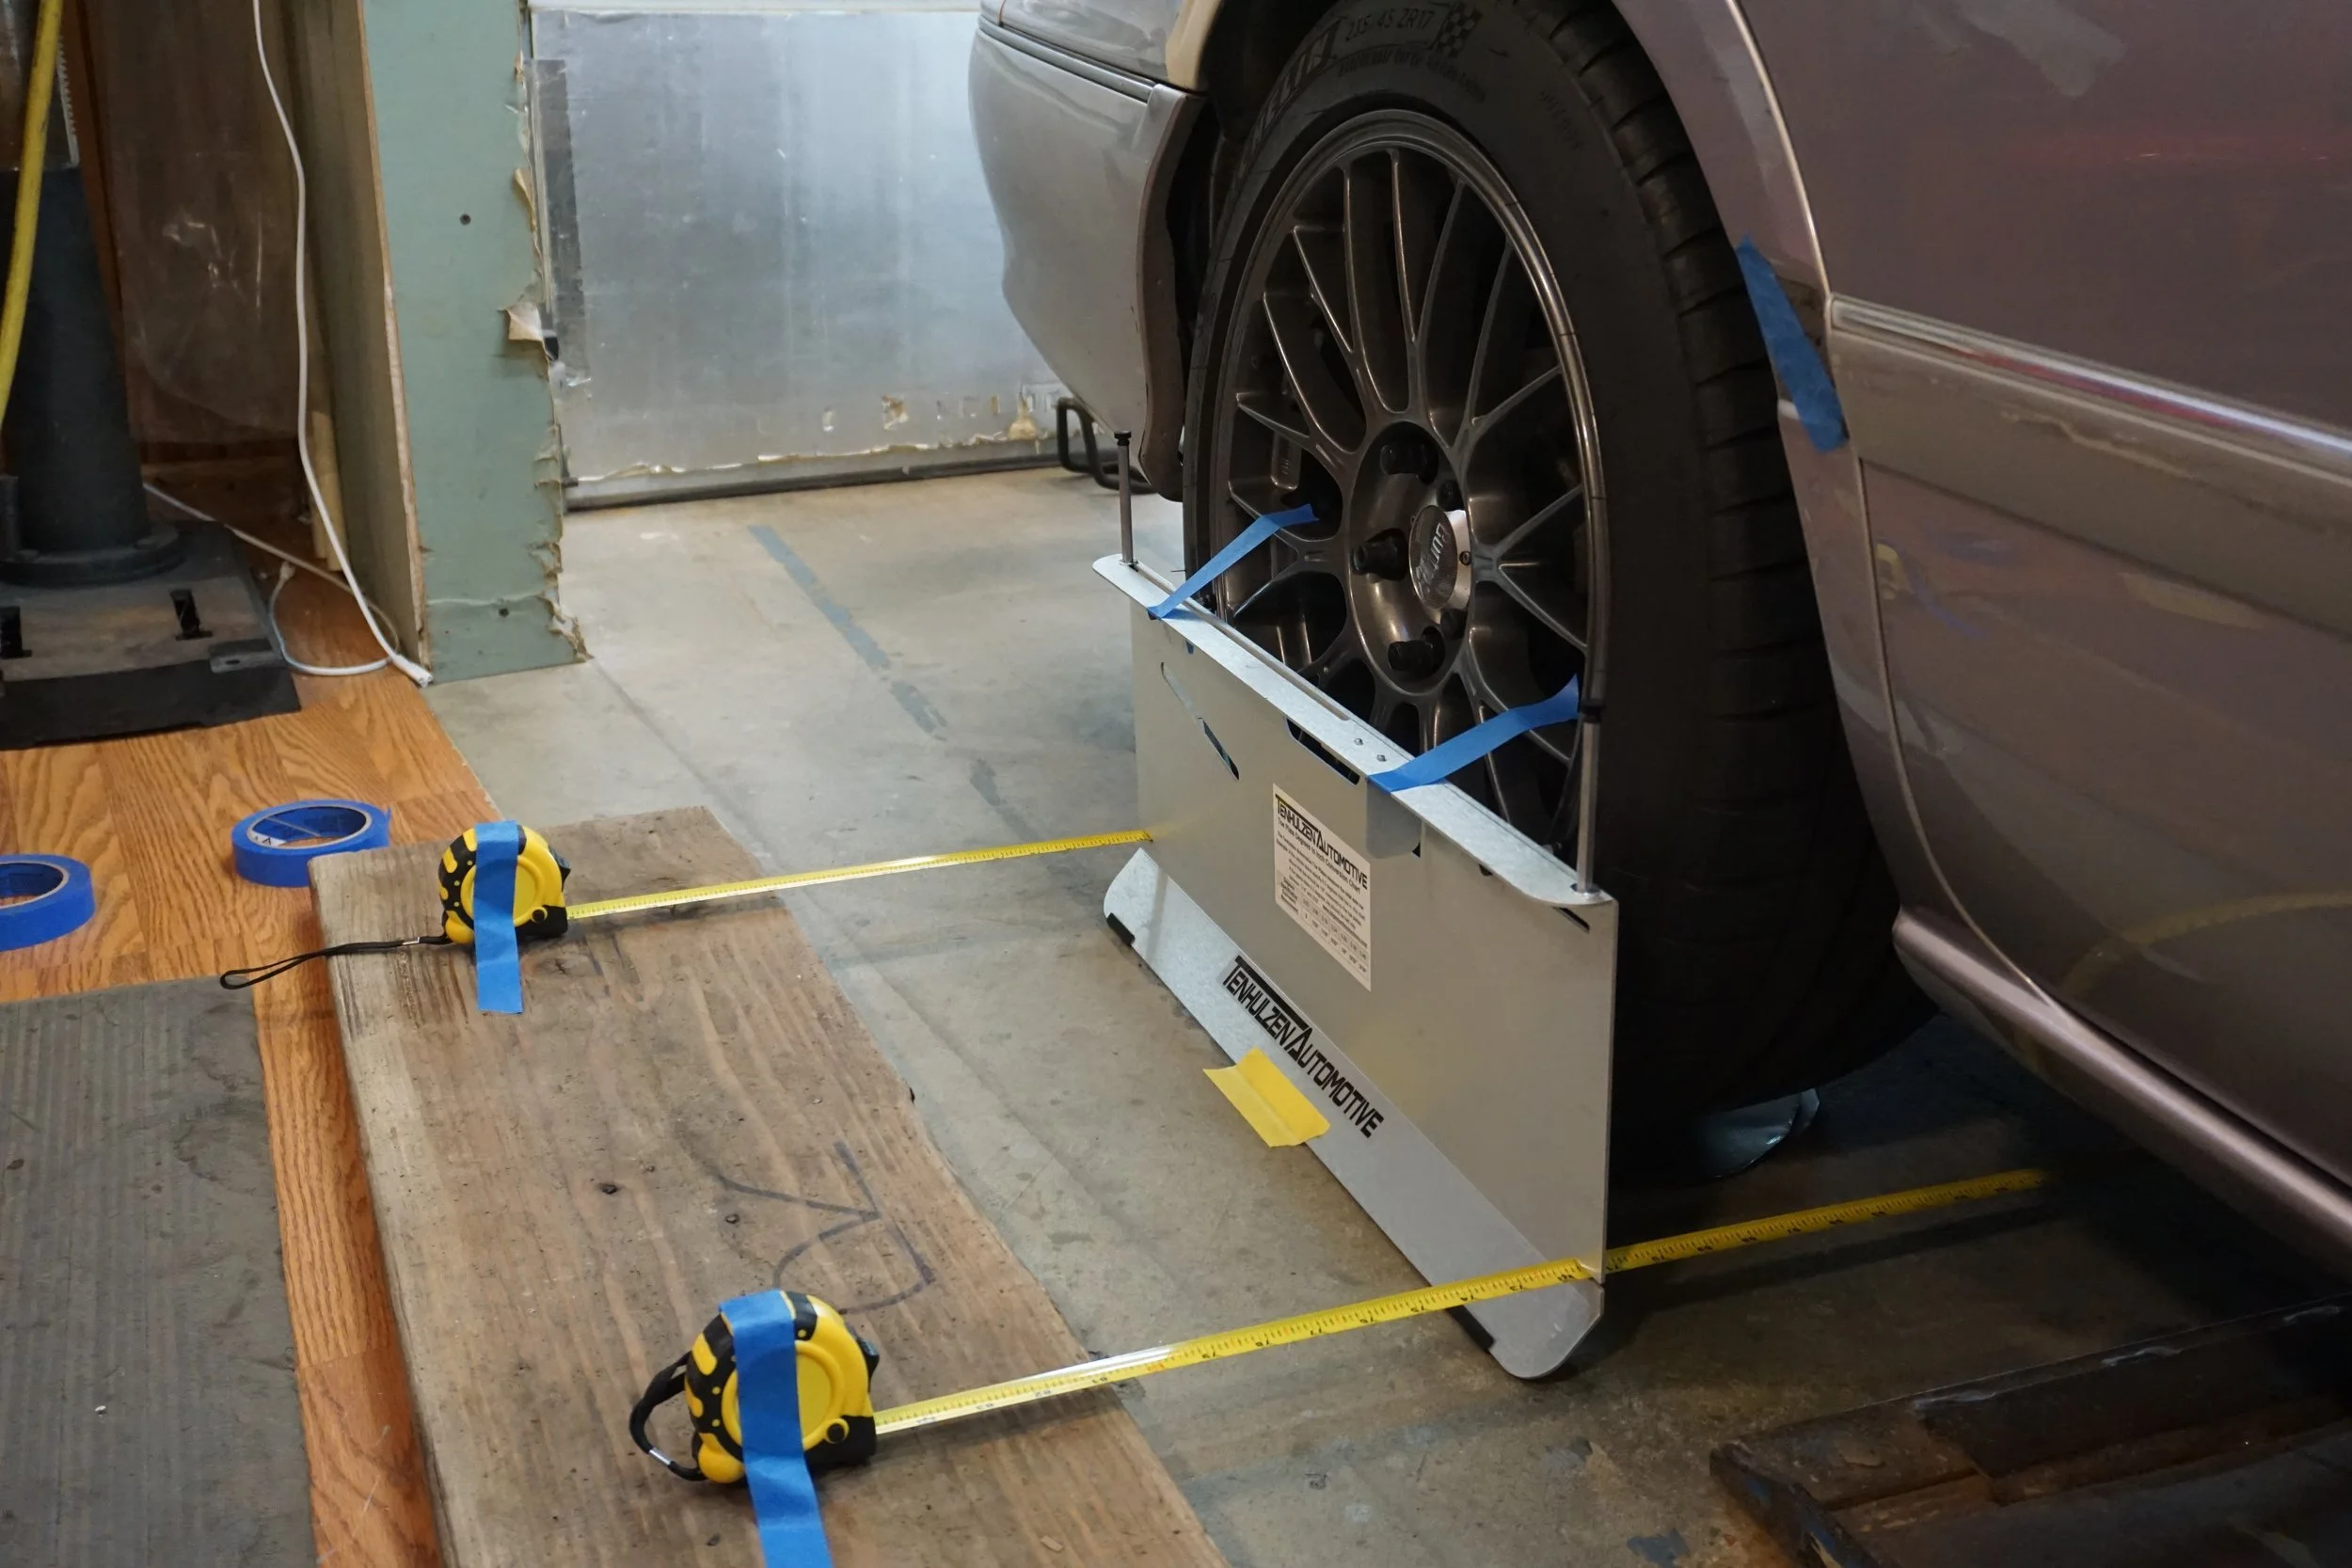
I took my before measurements, and compared them to a recent alignment I got. The alignment printout showed I had 0.42* total toe in, or almost 3/16". My measurement showed 3/16", success!
Before I got started, I cut off the remaining bits of the OEM brackets for the Scott-Russel Linkage. I wanted to make sure those areas weren't any stronger/stiffer than the rest of the beam, so the beam could bend easily and evenly. I also just wanted to get rid of them since they appeared to be great at capturing debris and thus prone to rusting.
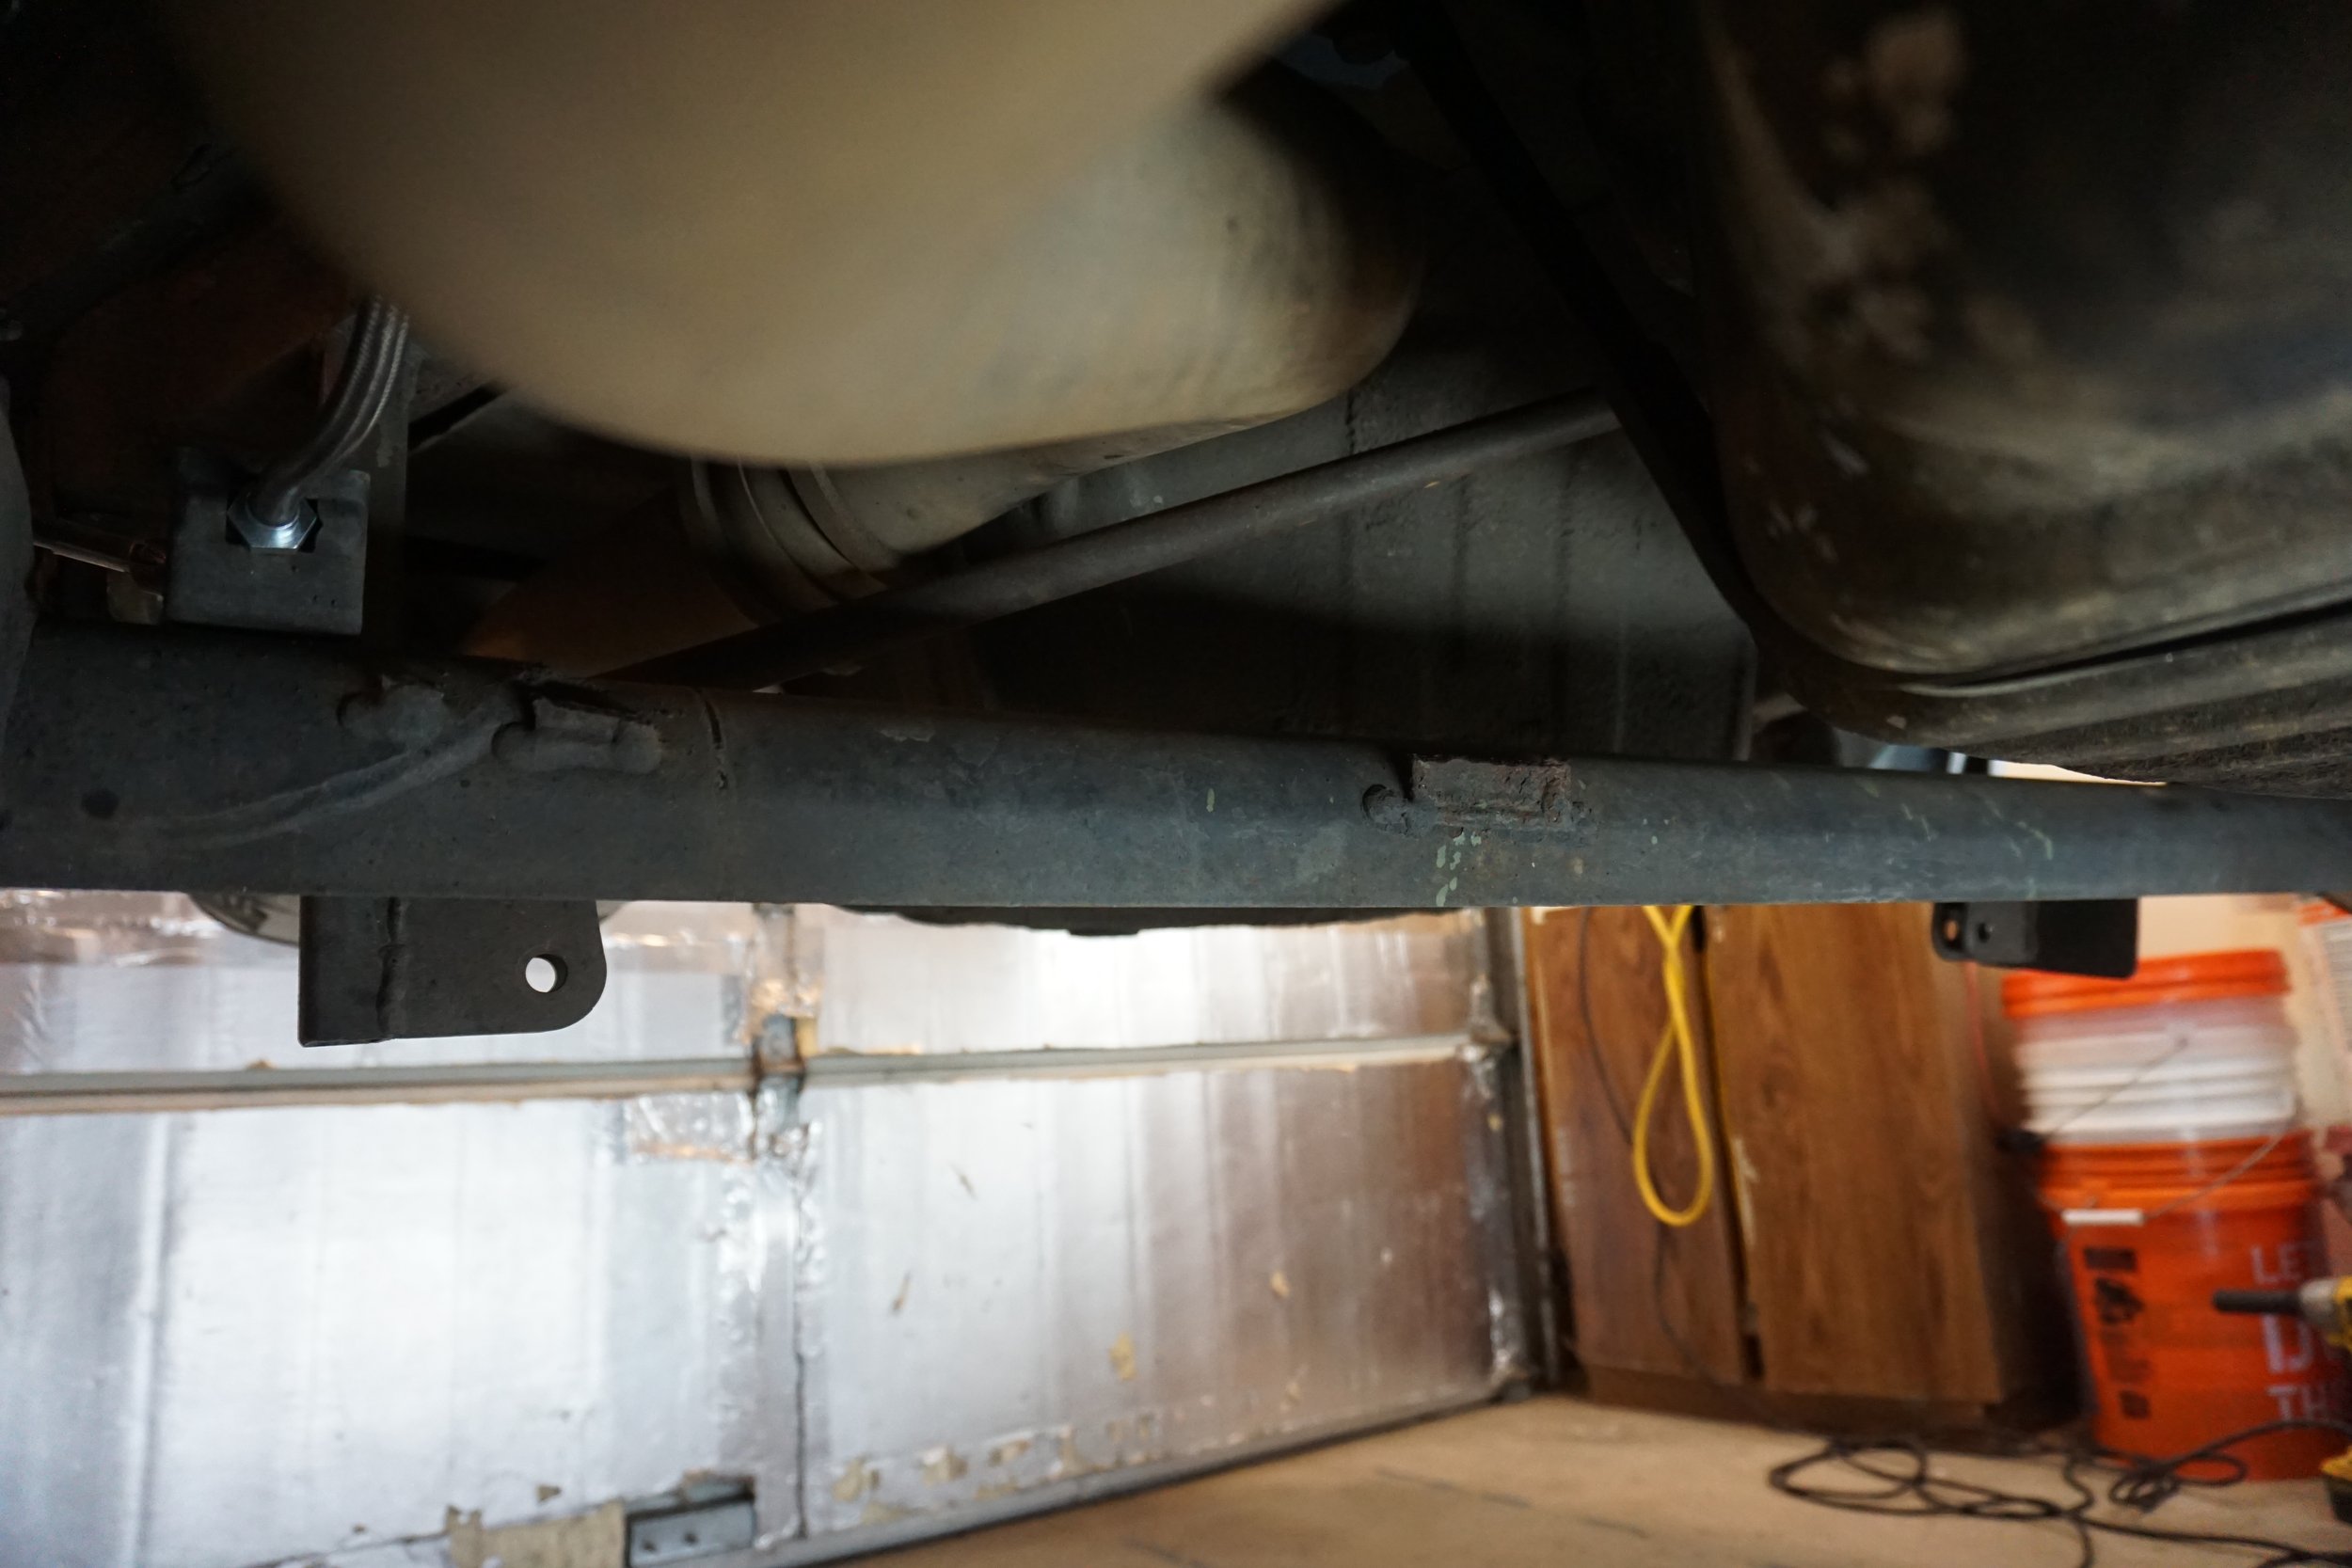
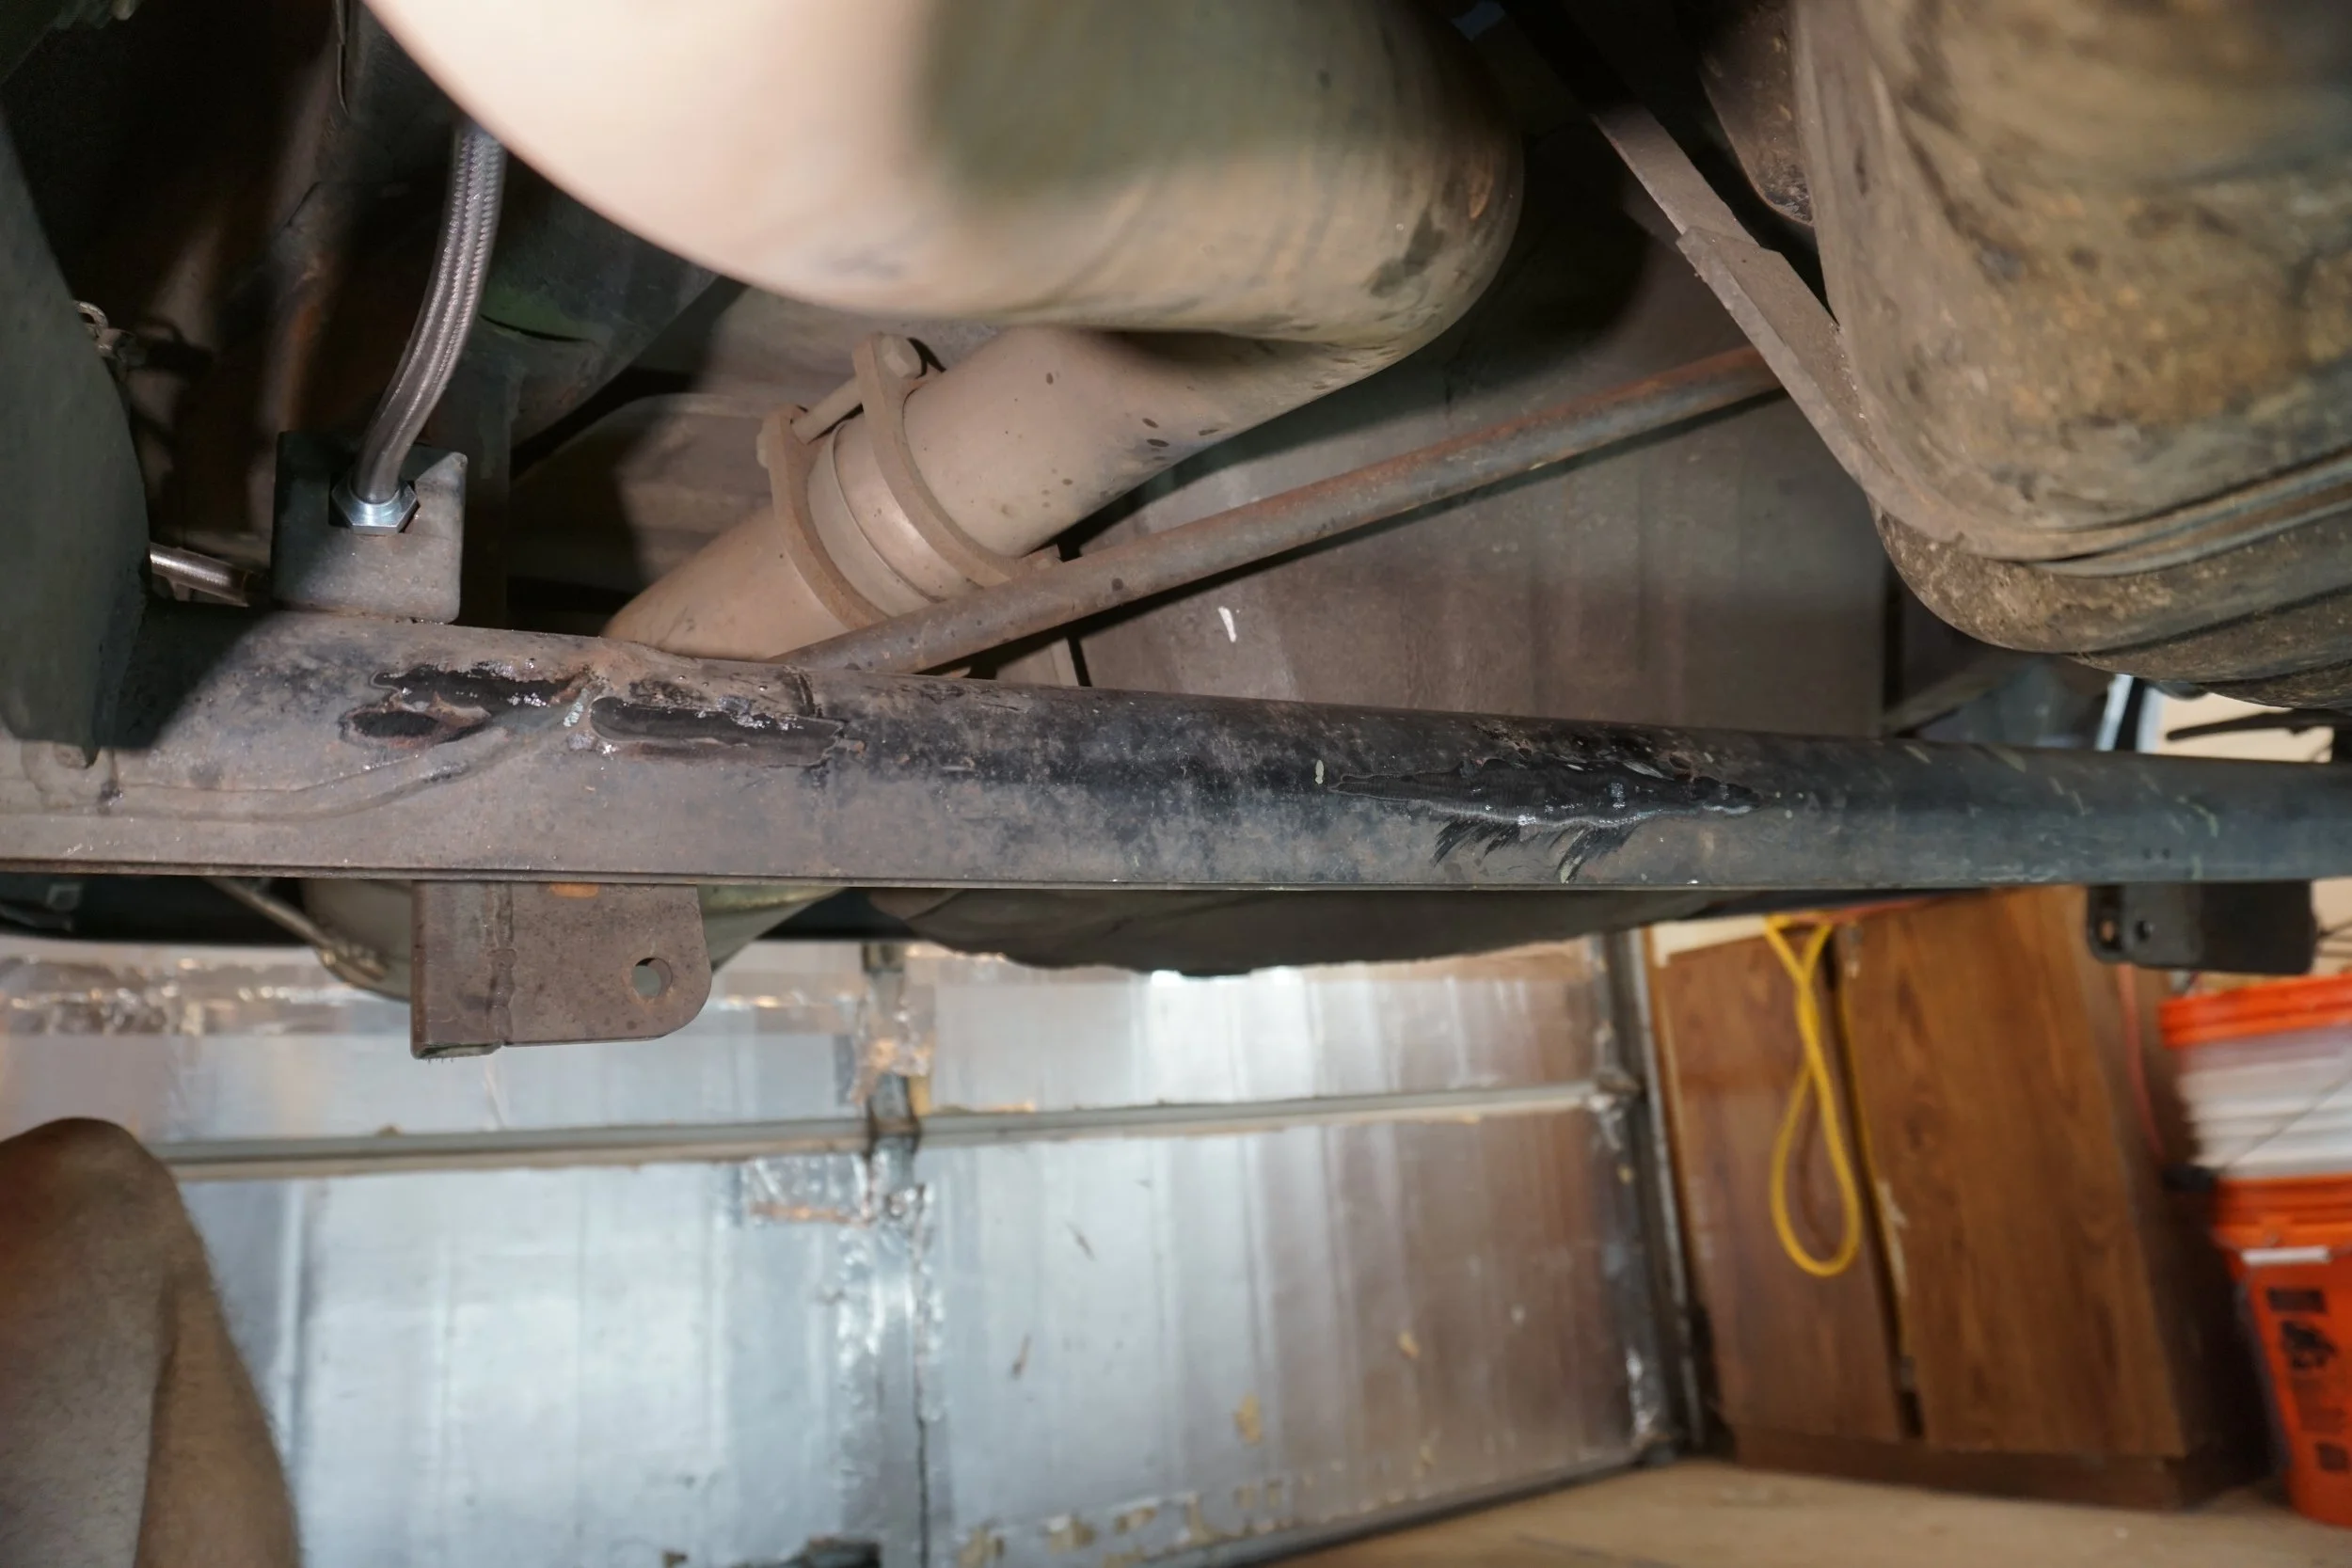
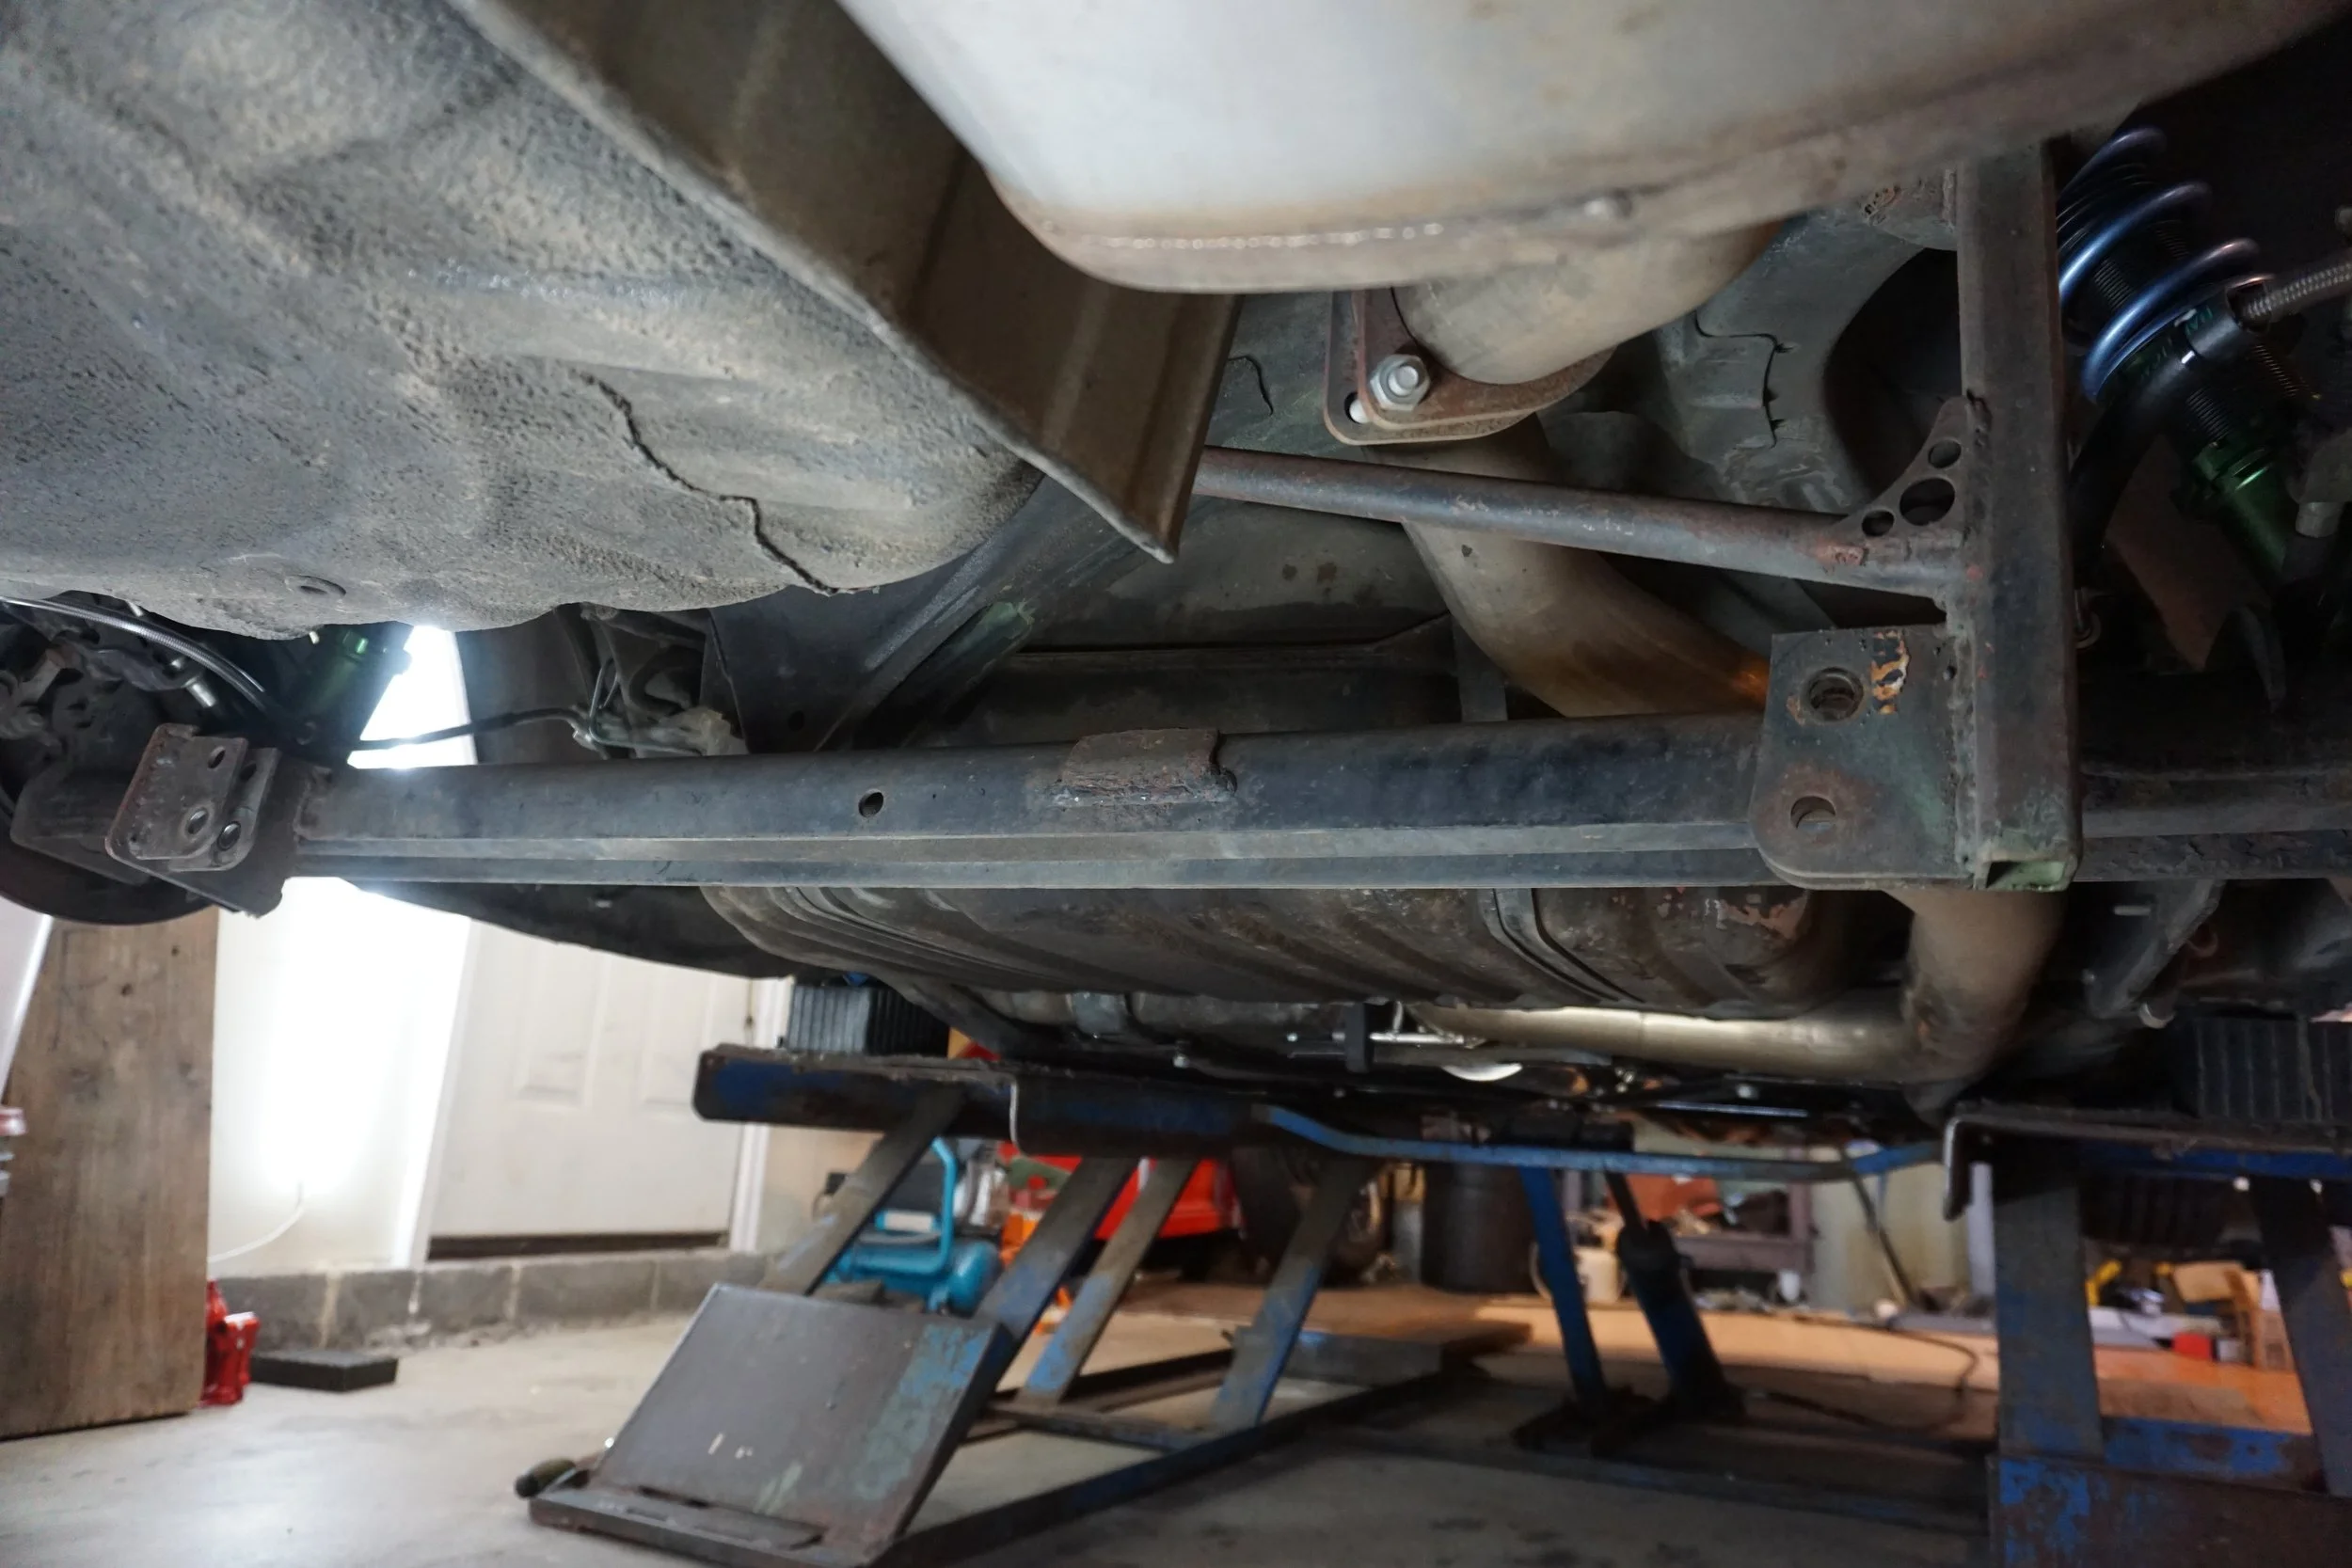
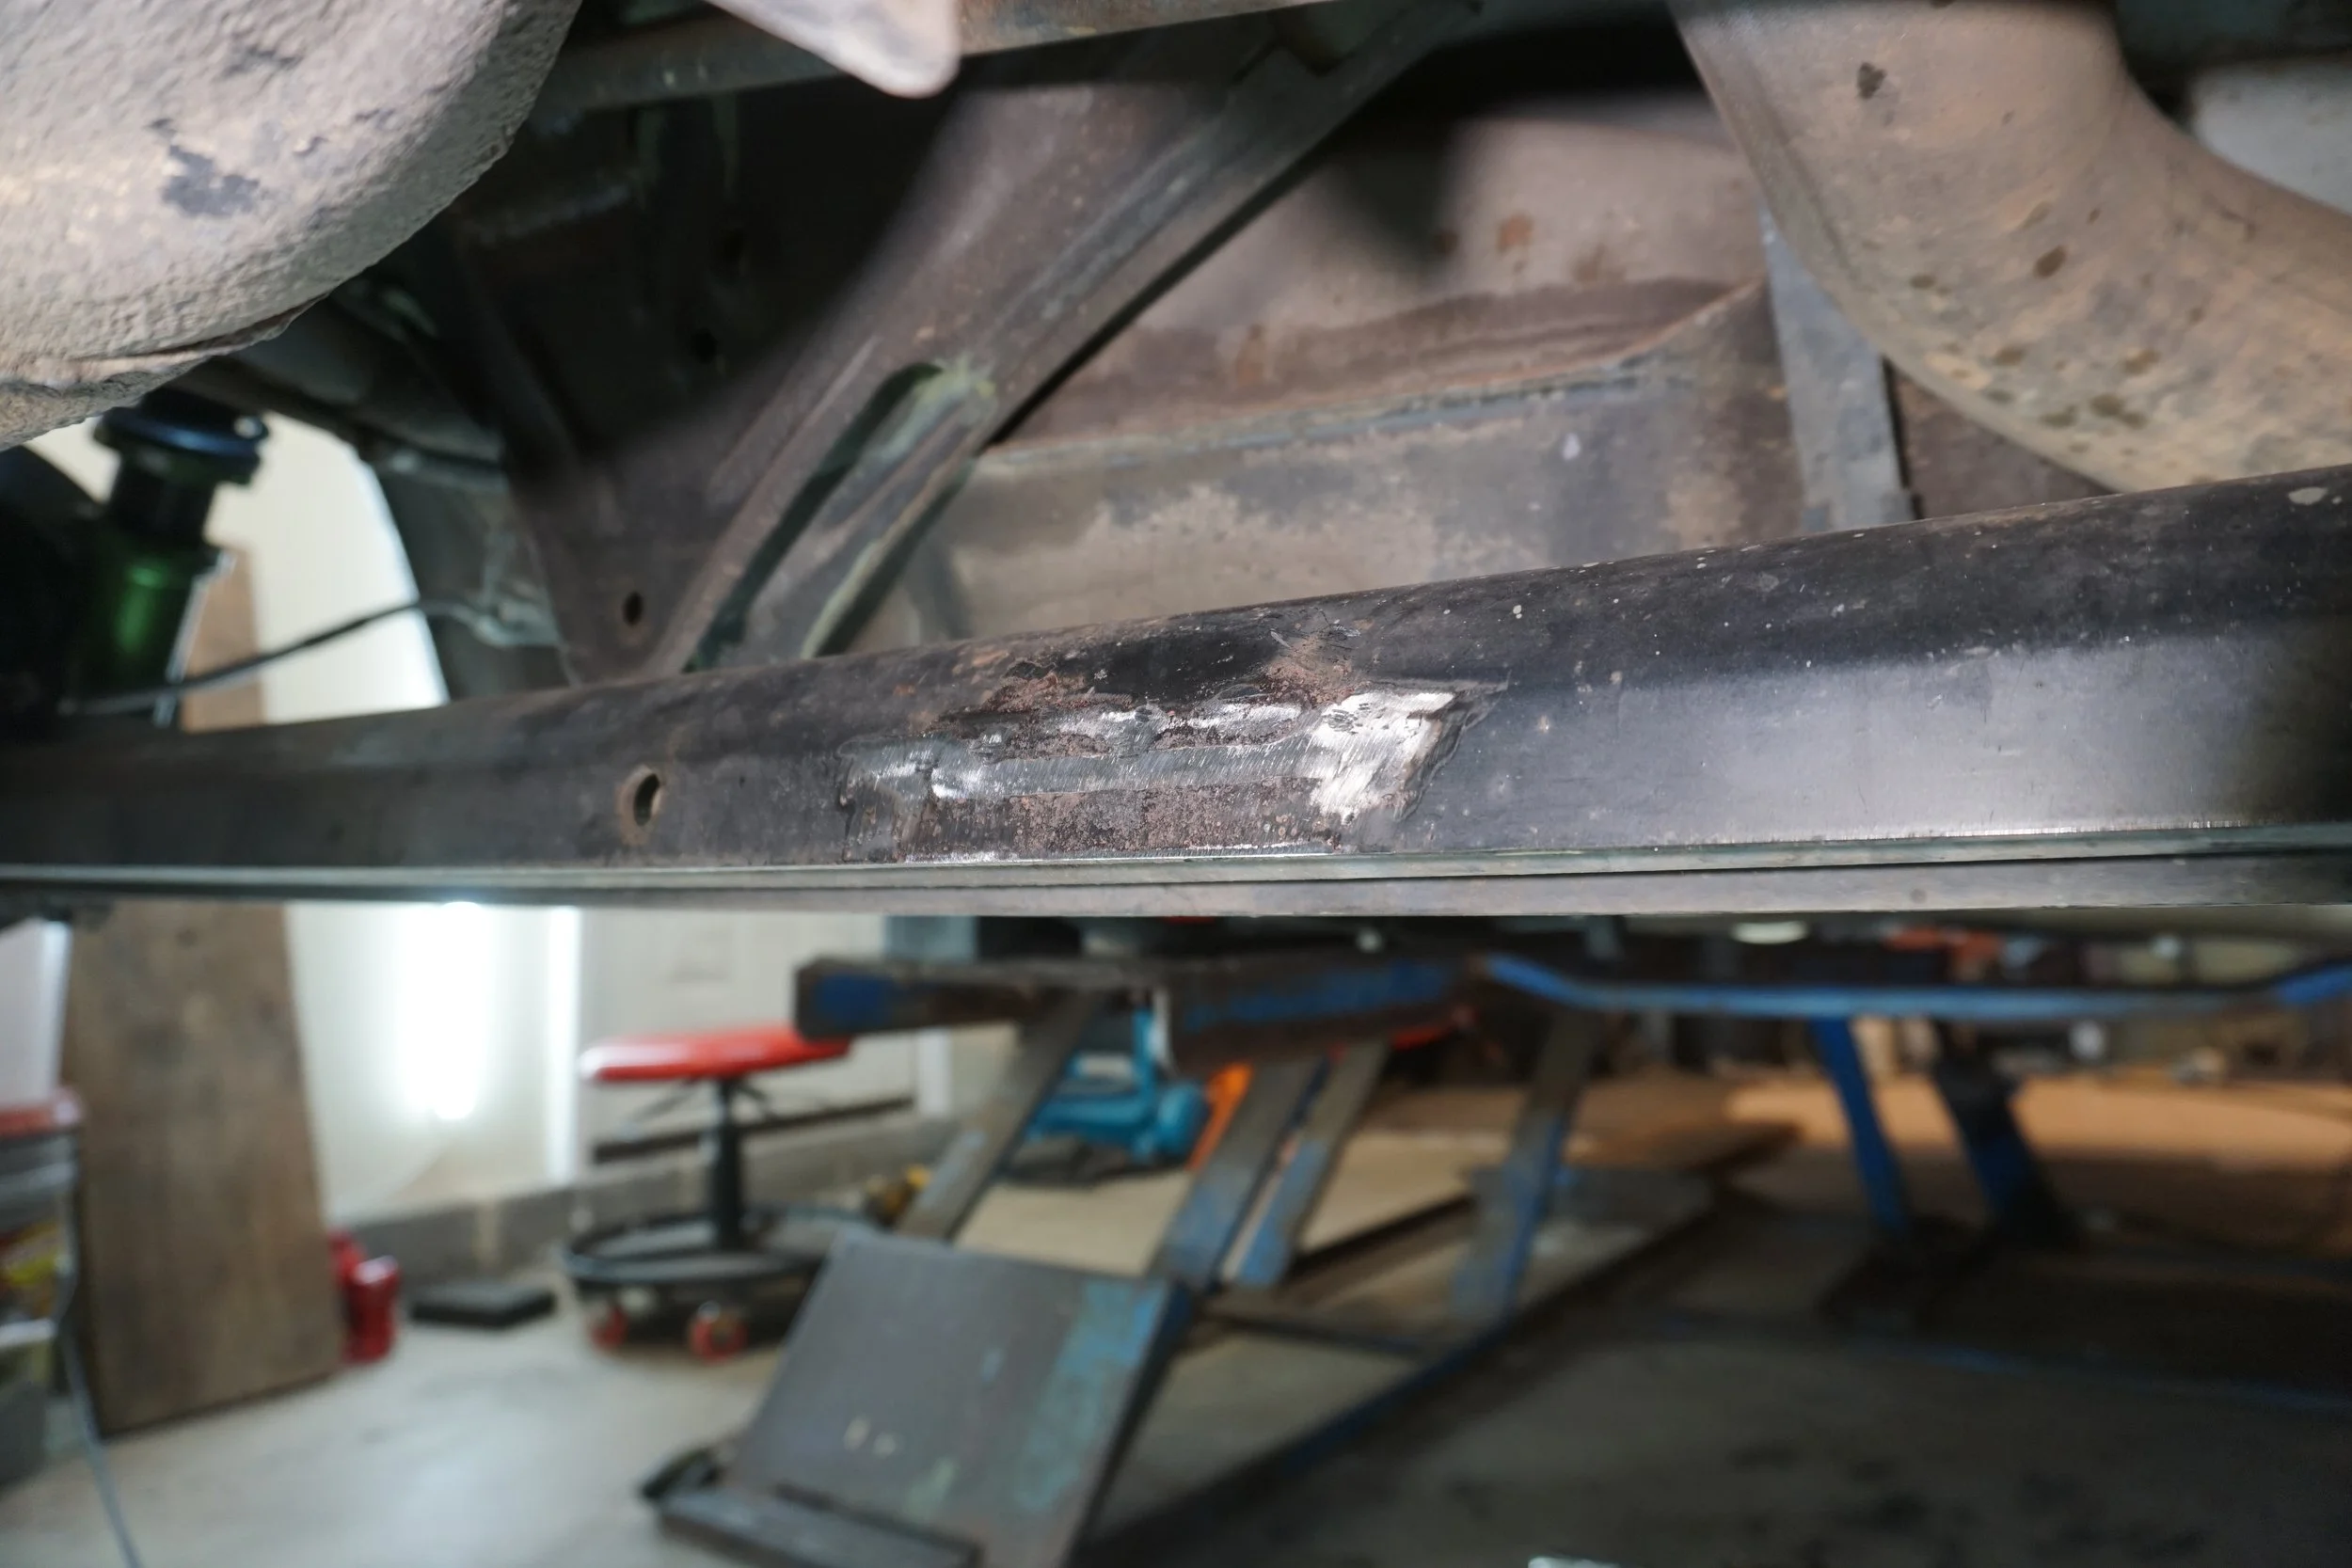
I plan on eventually pulling the whole rear beam from the car and sand blasting it, as there is surface rust and some pitting.
Anyways, back to the job at hand. Let's set this up! I had to disconnect the panhard rod, as it was directly in the way of the bottle jack, and I had to disconnect the rear shocks, as I needed the beam to droop a few inches so it would be lined up with the I beam. This meant the only things attaching the beam to the car were the front trailing arm bushings, so the beam was able to move around quite a bit, which I would later learn was not so great.

I covered up the chains as best I could with a few heavy carpets just in case they snapped.
And then I bent. Over and over again, taking time to measure the changes so I wouldn't bend it too far. But I was running into a problem: the beam was rotating upwards a bit as I pumped up the jack, leading to the jack eventually slipping off. Not only was this somewhat terrifying, as I was lying under the car working the jack, but it meant much of the force of the jack wasn't going into bending the beam. But I kept bending and taking measurements, and it appeared as if I was making progress. I'll skip over some details and just say I eventually stopped, and took the car in for another alignment, as the one I got two months ago (after installing the new coilovers and camber plates) was only a very partial alignment, just enough to even out the toe and make the car drive straight. But before I took the car in, I tested out the alignment plates and tried to get the front of the car close to what I want, to save time and expense when I was on the alignment rack.
Well, it turns out my home alignment was on point in terms of camber, as the shop only had to make a small adjustment on one side, the other was perfect. And in a welcome surprise from two months ago, my caster was perfectly even side to side, even if it wasn't quite as high as I had hoped it would be. They did have to adjust the toe quite a bit, because while my tools can tell me total toe, it can't tell me if the wheels are actually pointed straight. In the end, I walked away with the best alignment my car has ever seen. The most camber ever, the most caster ever (and also perfectly even for the first time), and my normal amount of toe out up front. But I was most interested to see what happened in the rear. Turns out I had gotten rid of 1/3 of my toe in, and I went from 0.42 total toe in to 0.28! The beam bending works!
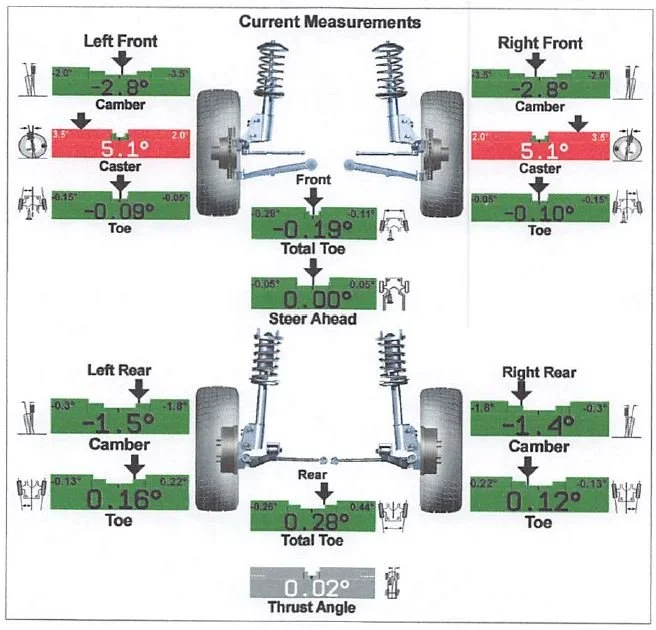
I was hoping to get 6* of caster up front, since I have both the added caster control arm bushings, plus the camber/caster plates, but 5.1* is still about 0.5* better than I had before, so I can't complain. Considering that these cars come with something like 2.8* from the factory, it's a very welcome improvement. So there's still more work to do on the rear beam, and Schmelly has an idea or two on how to keep the beam from rotating so much, so I'll be revisiting this in the future. But for now, the car feels great, and it performed very well at the last race.
Now, time for some other small things.
When I was working on the coilovers and camber plates, I realized that the ground cable I had running from the intake manifold to the shock tower probably wasn't actually doing anything, since I had it on top of my old FSTB bracket, so it wasn't really grounded to the chassis. I decided to make a new cable and give it a proper ground location on the body of the car, so I ground off some paint from lower down on the tower around an existing bolt hole and put it there. It could have been my imagination, but the car seemed to idle smoother after I did this.

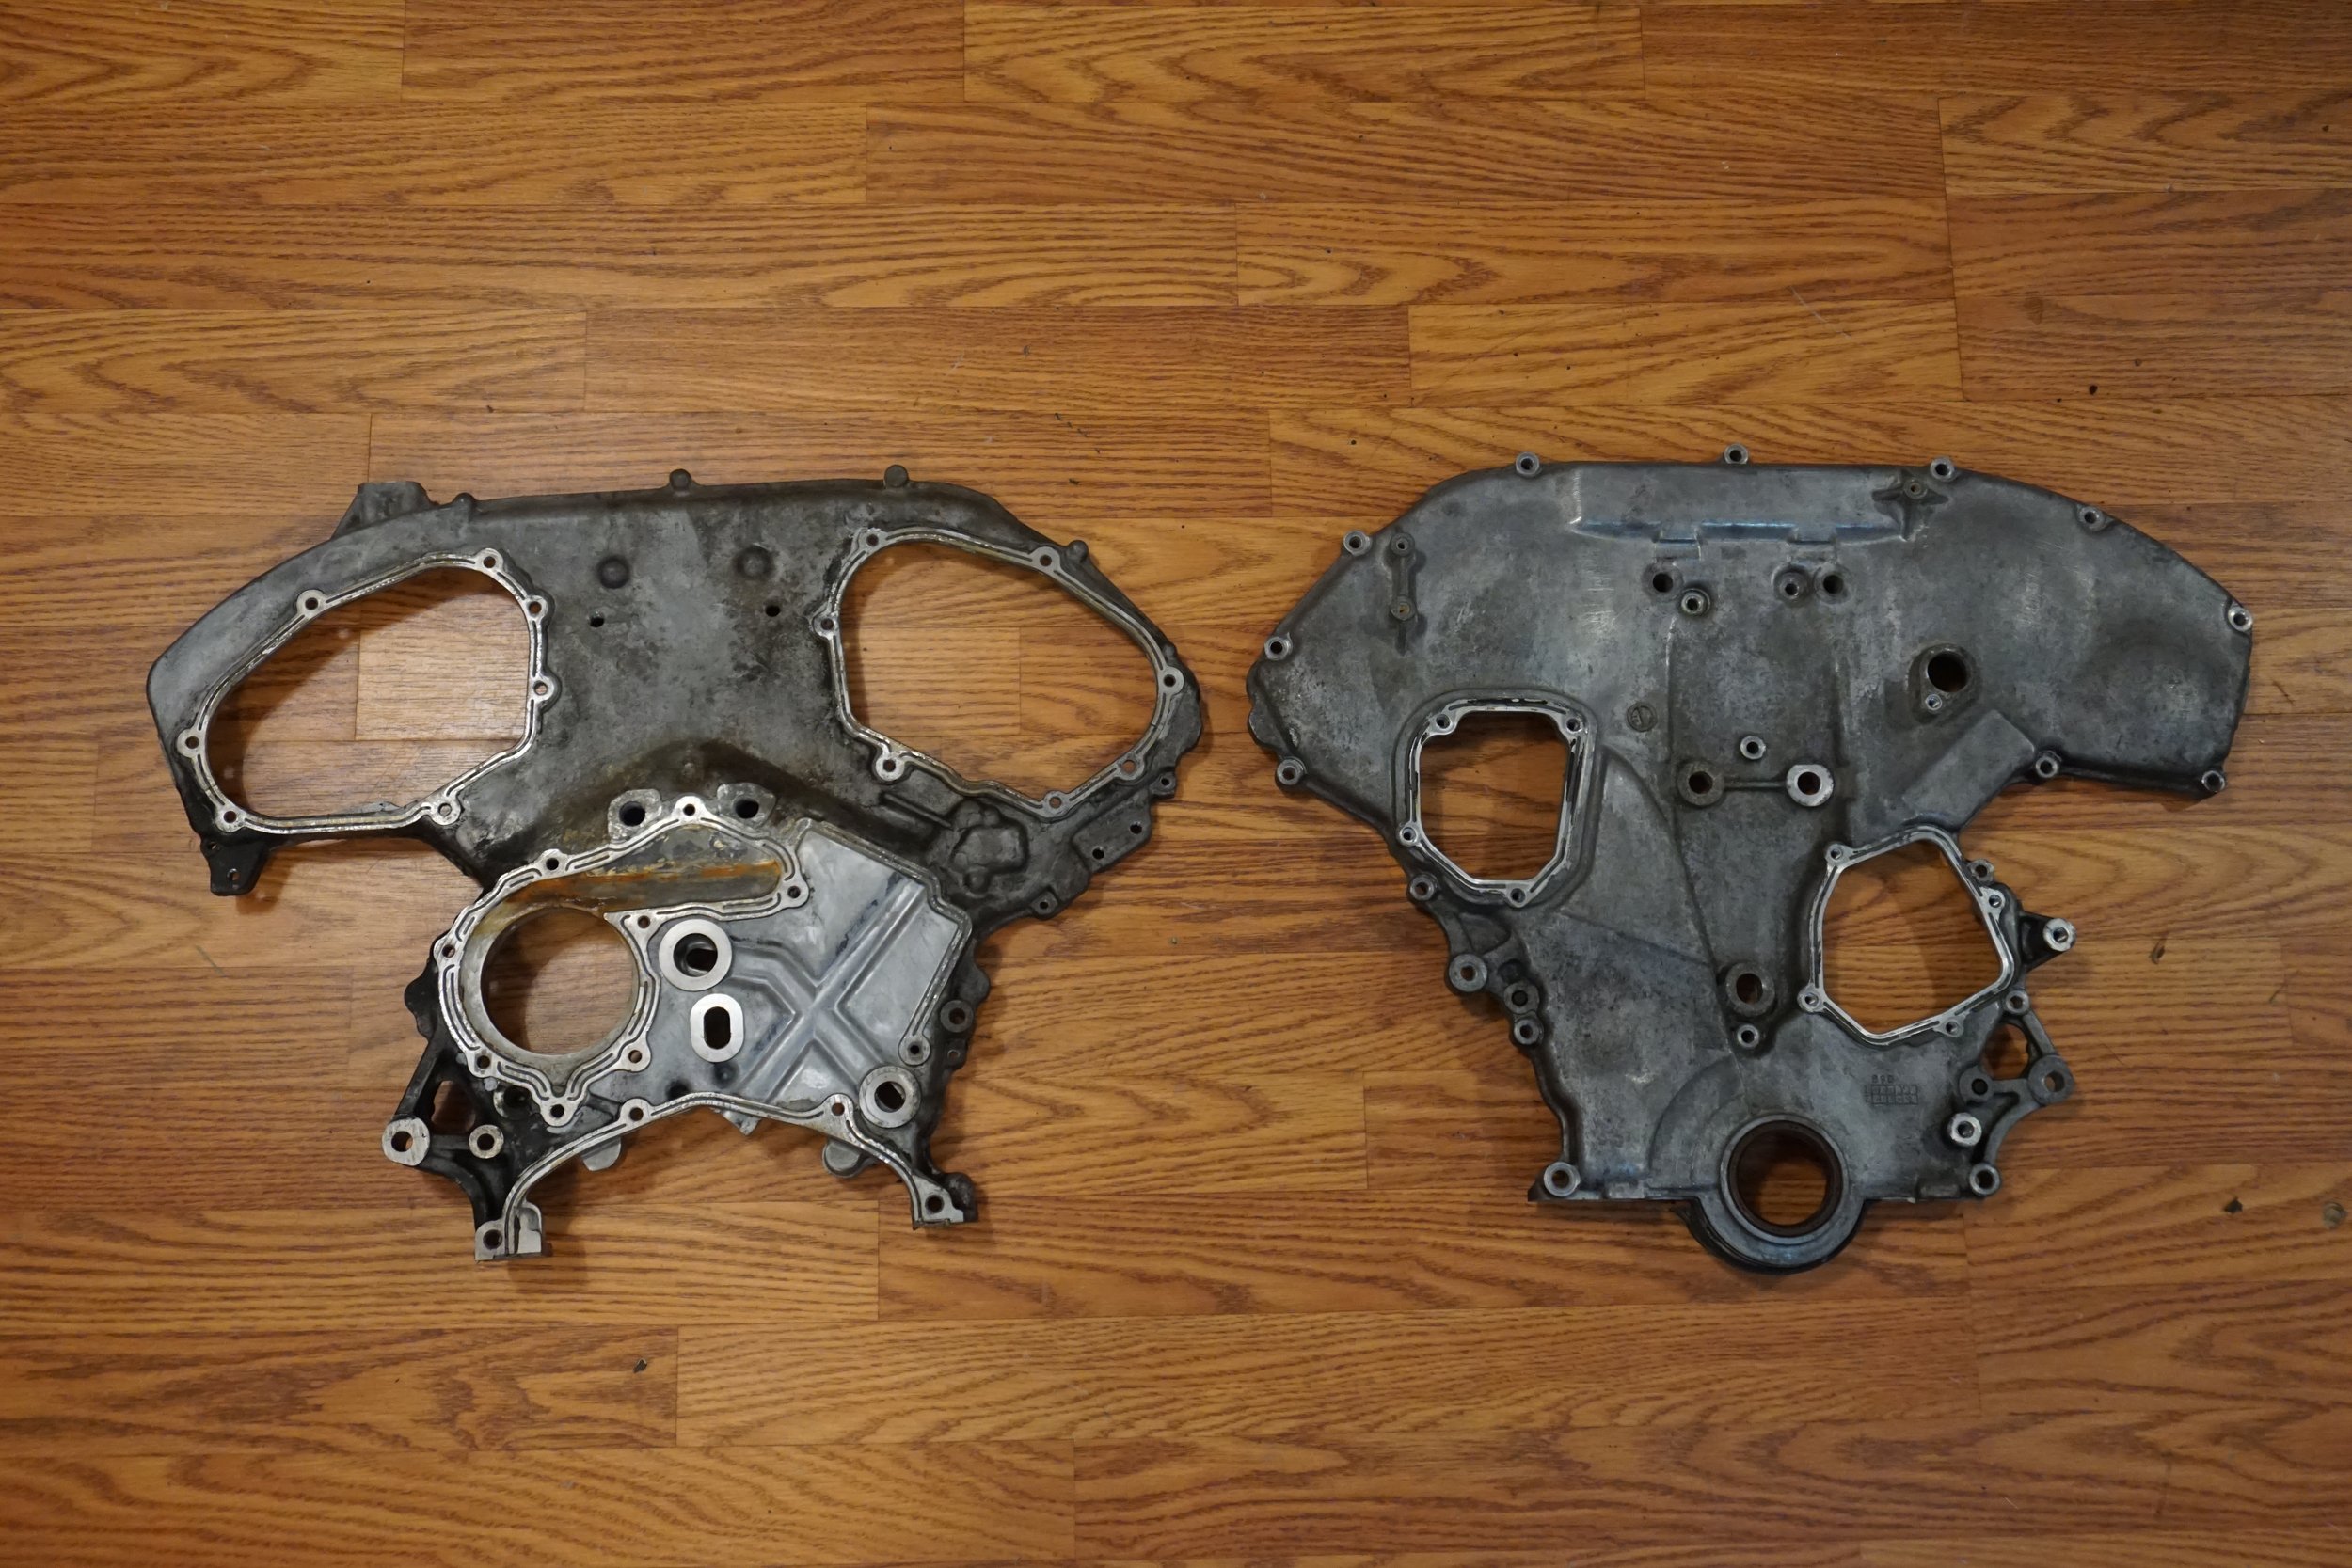
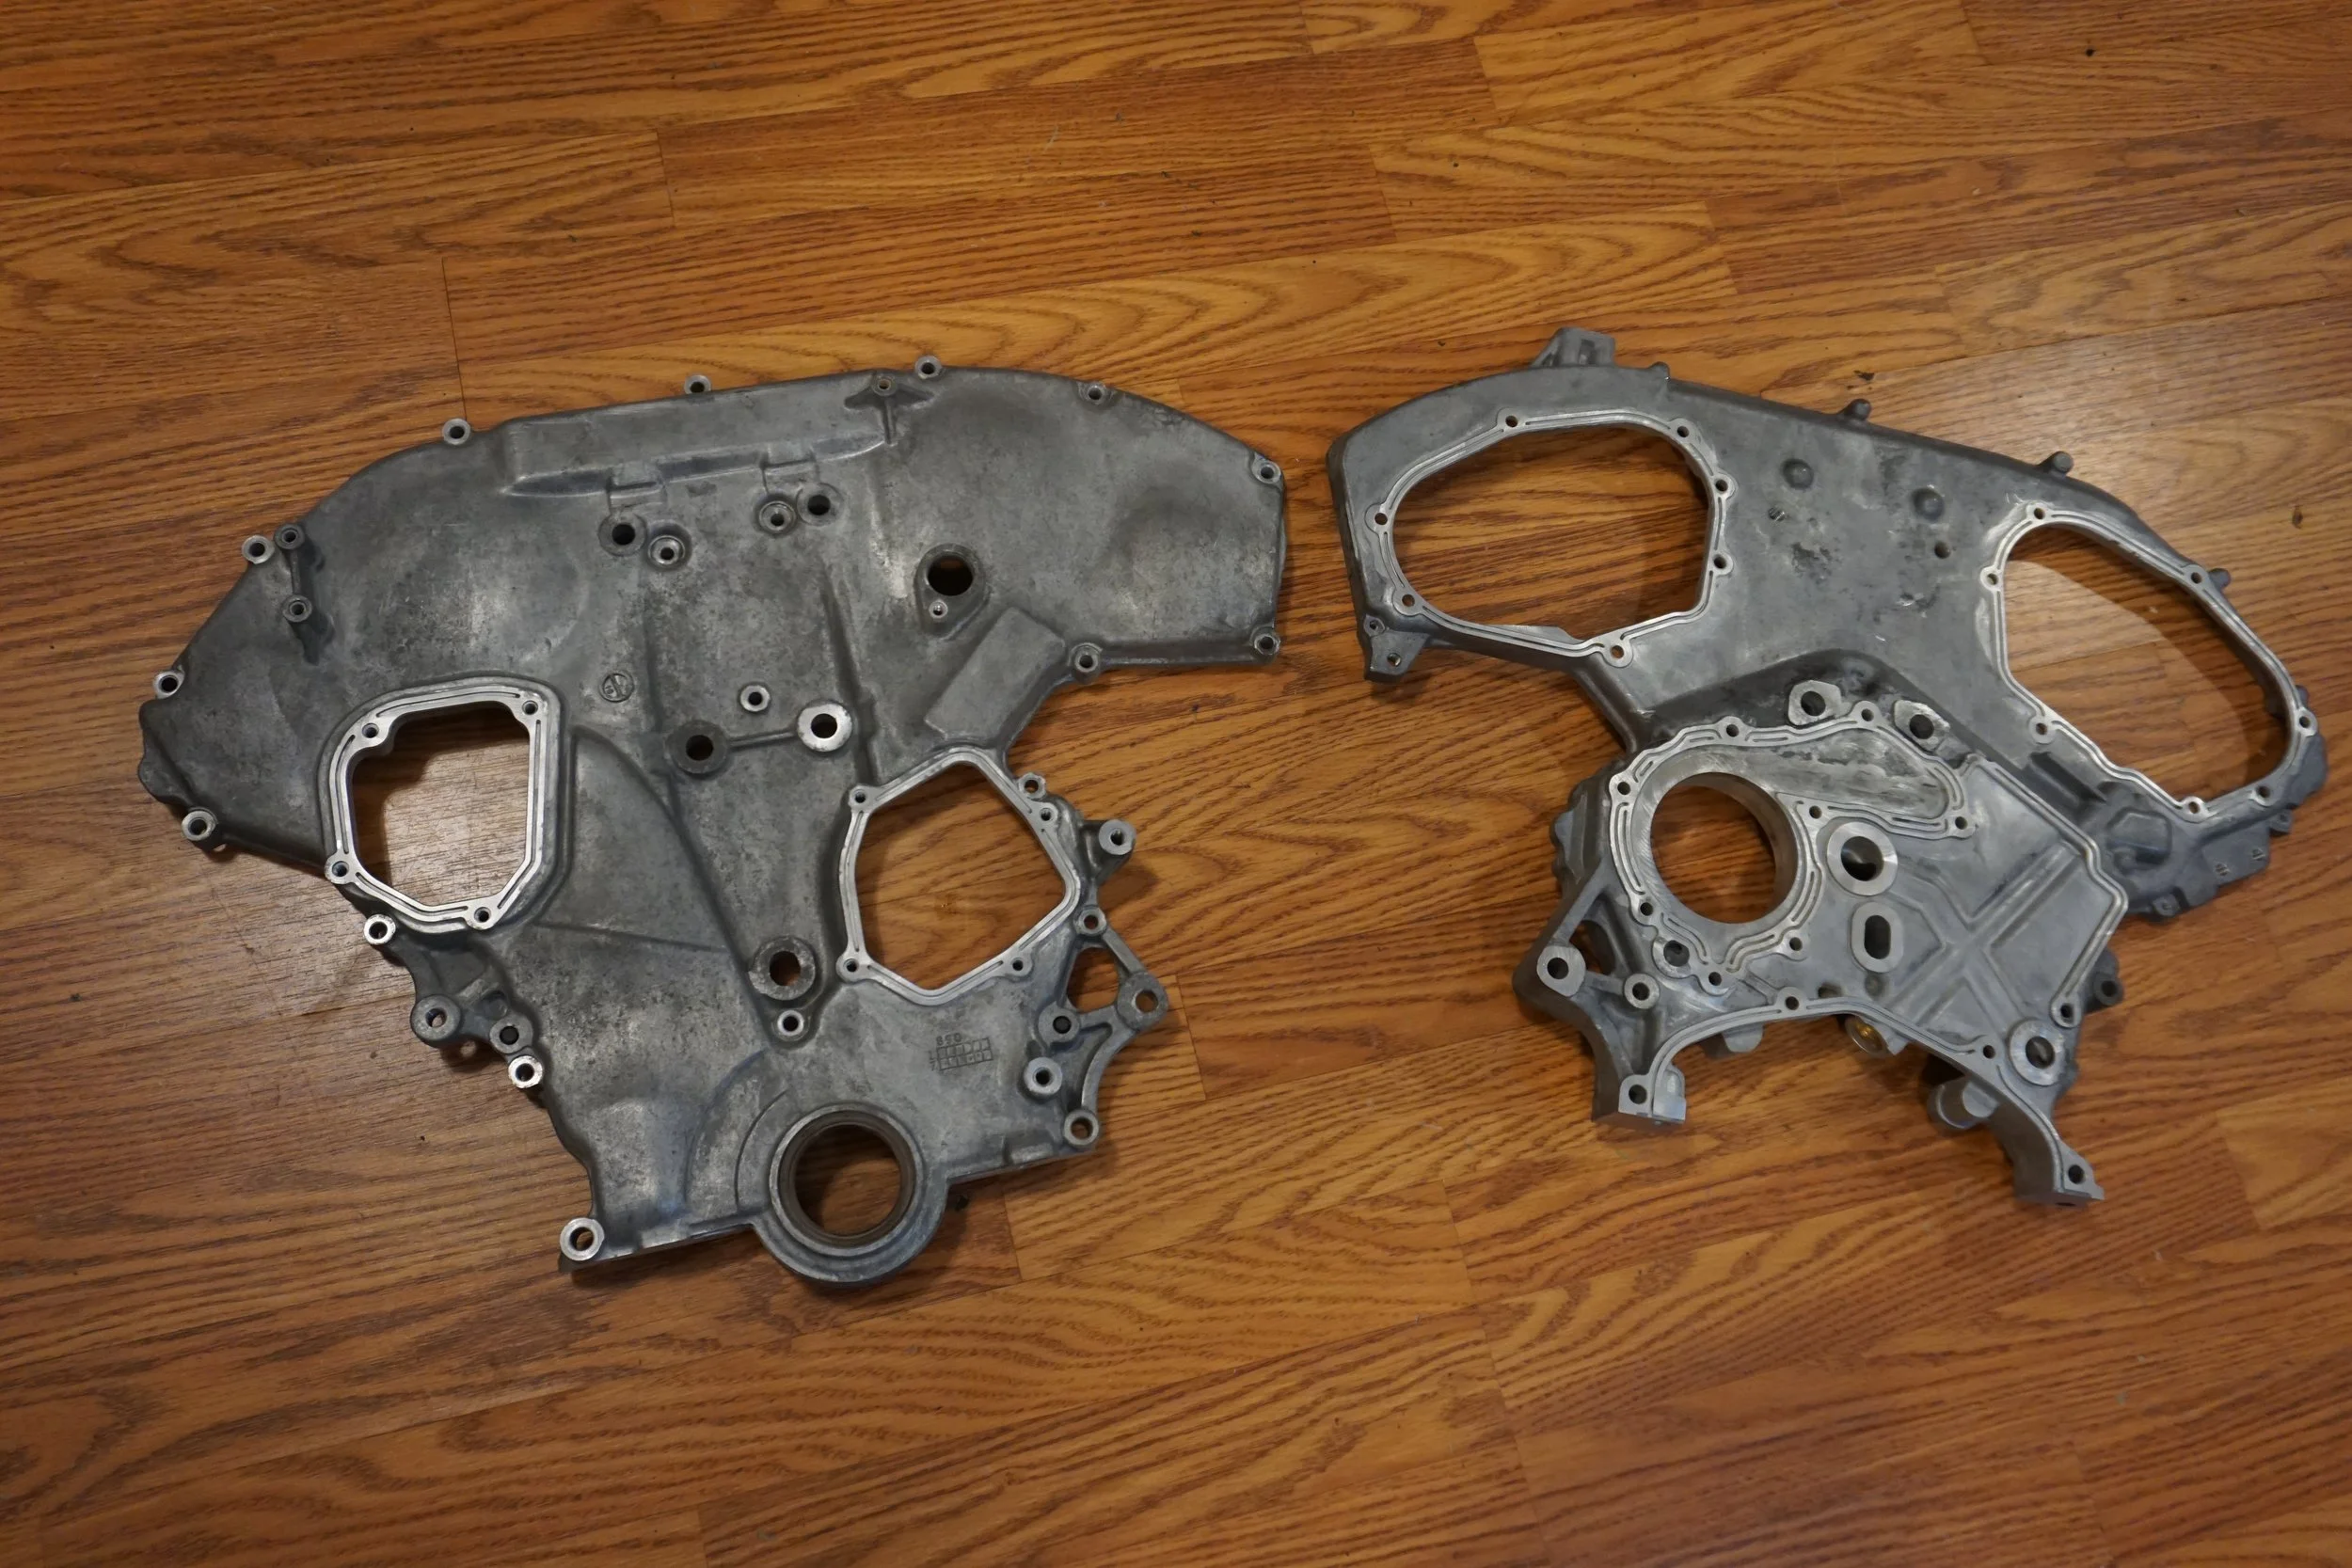
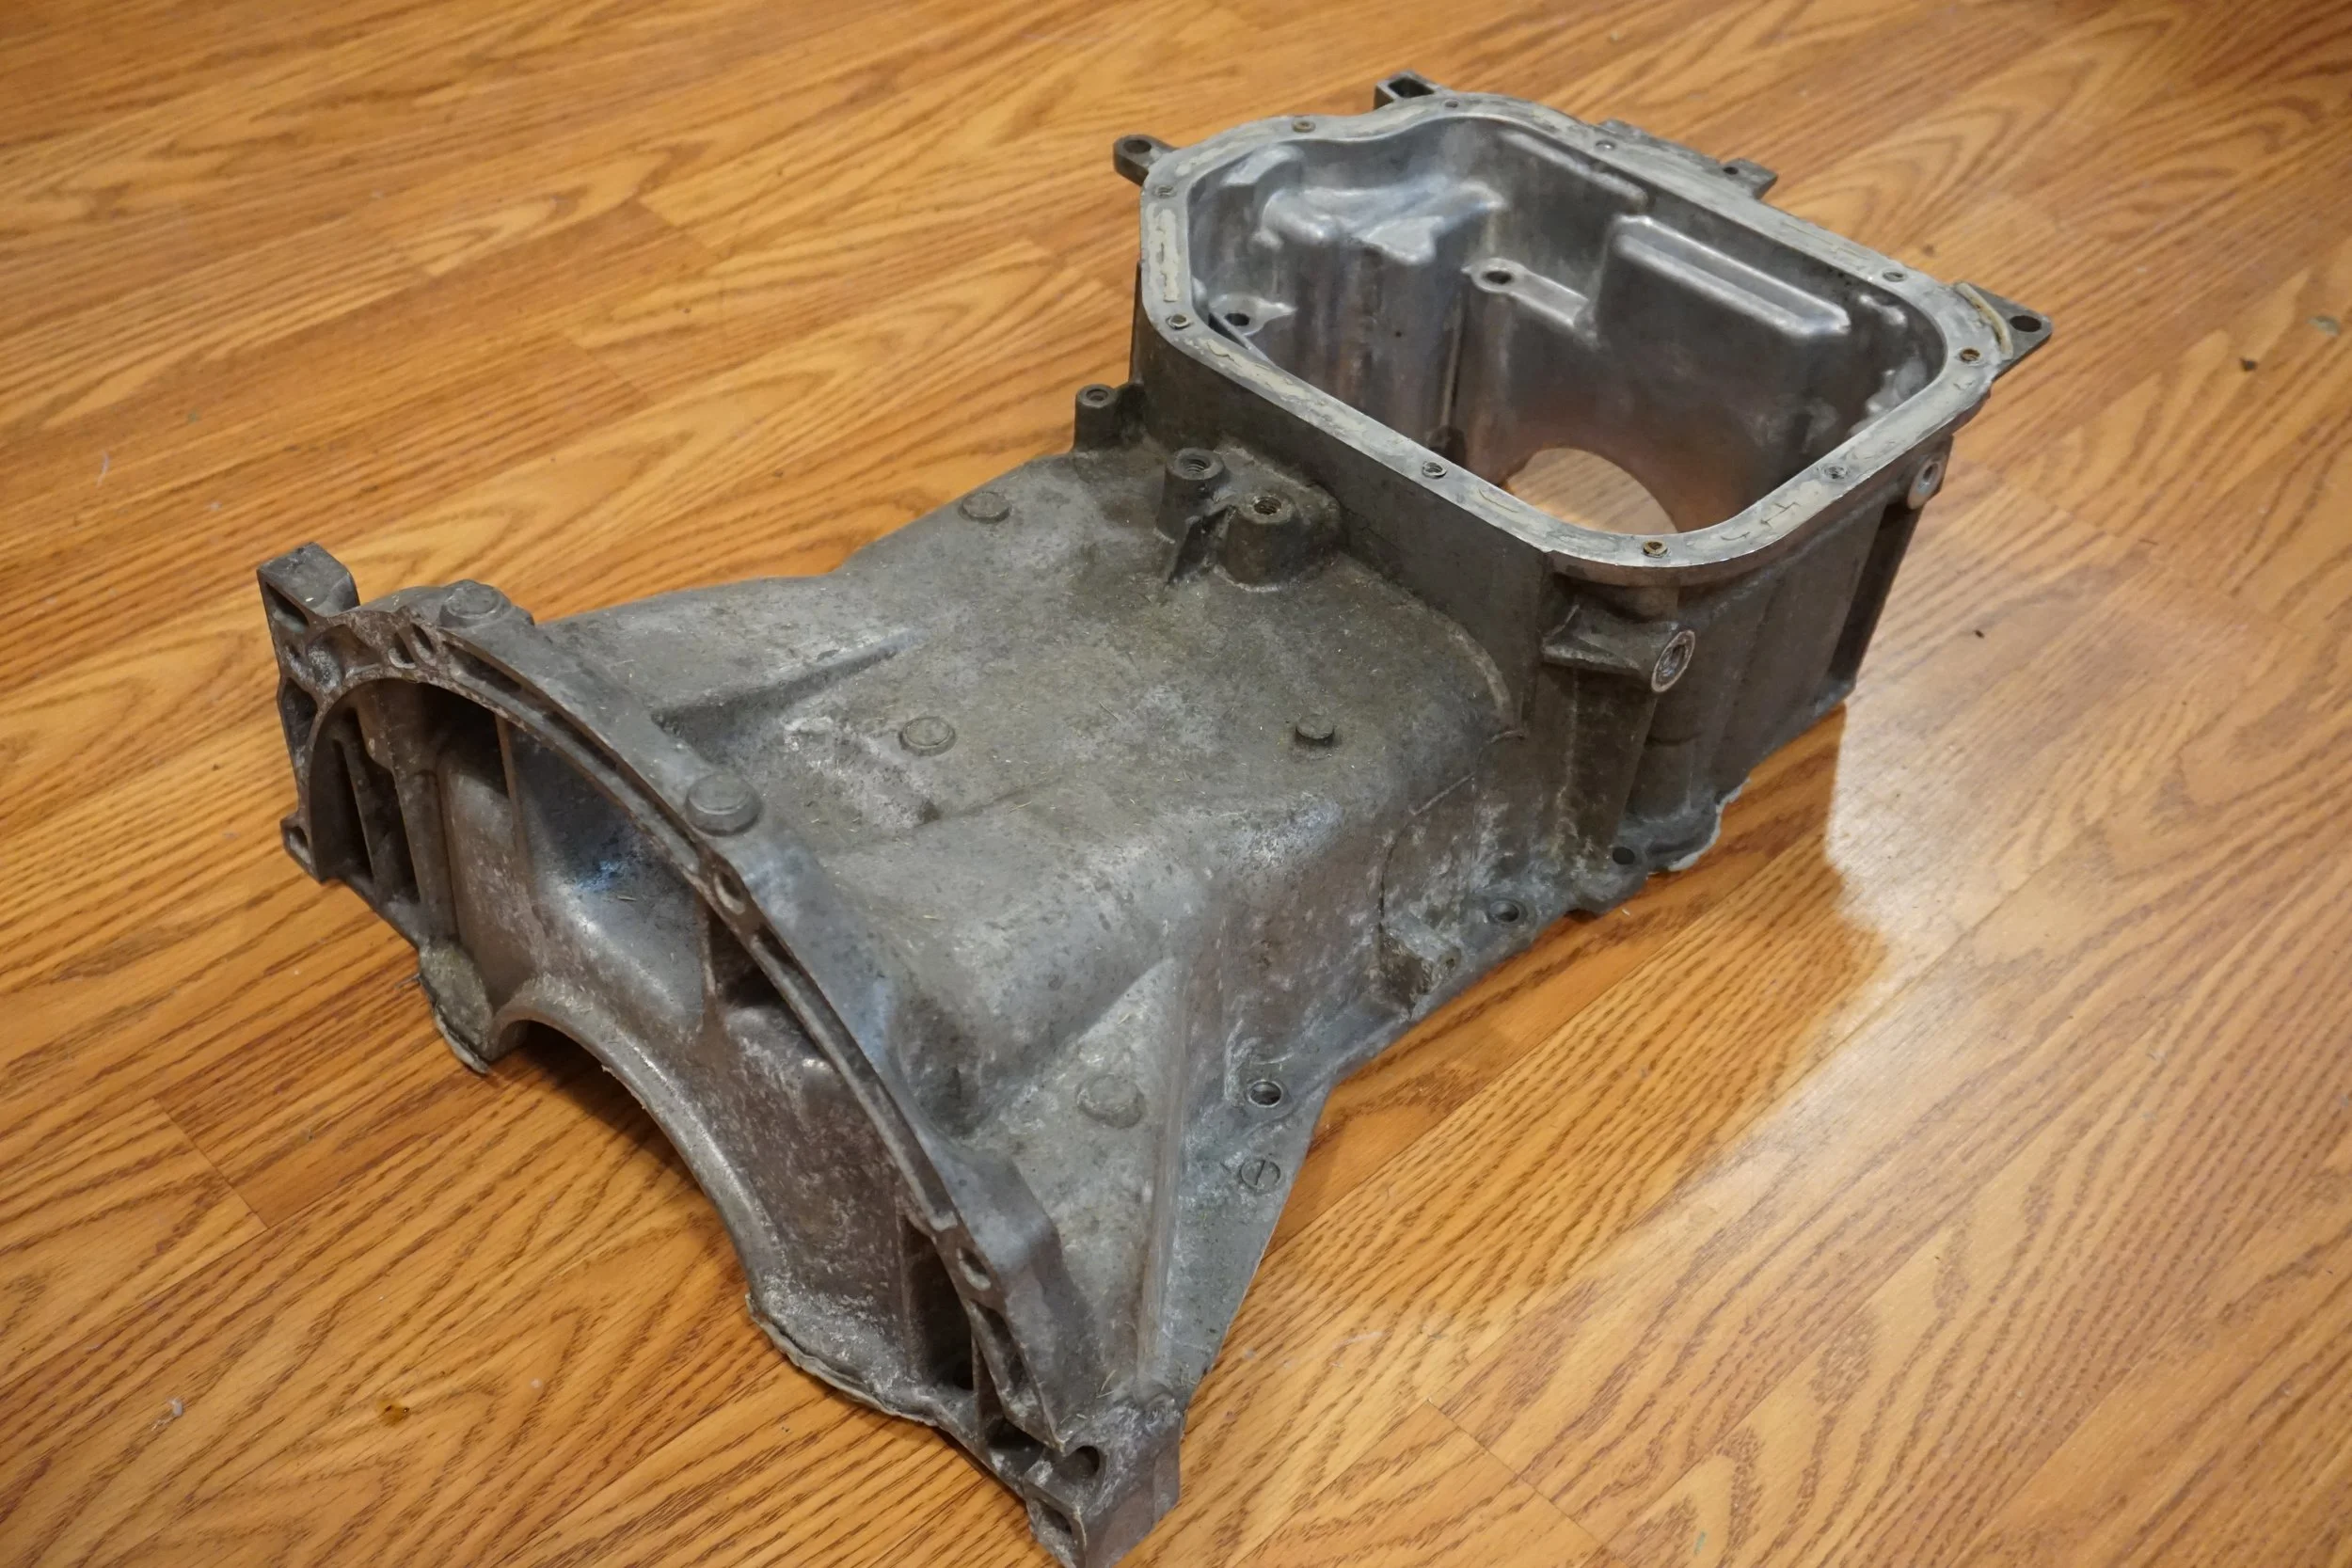
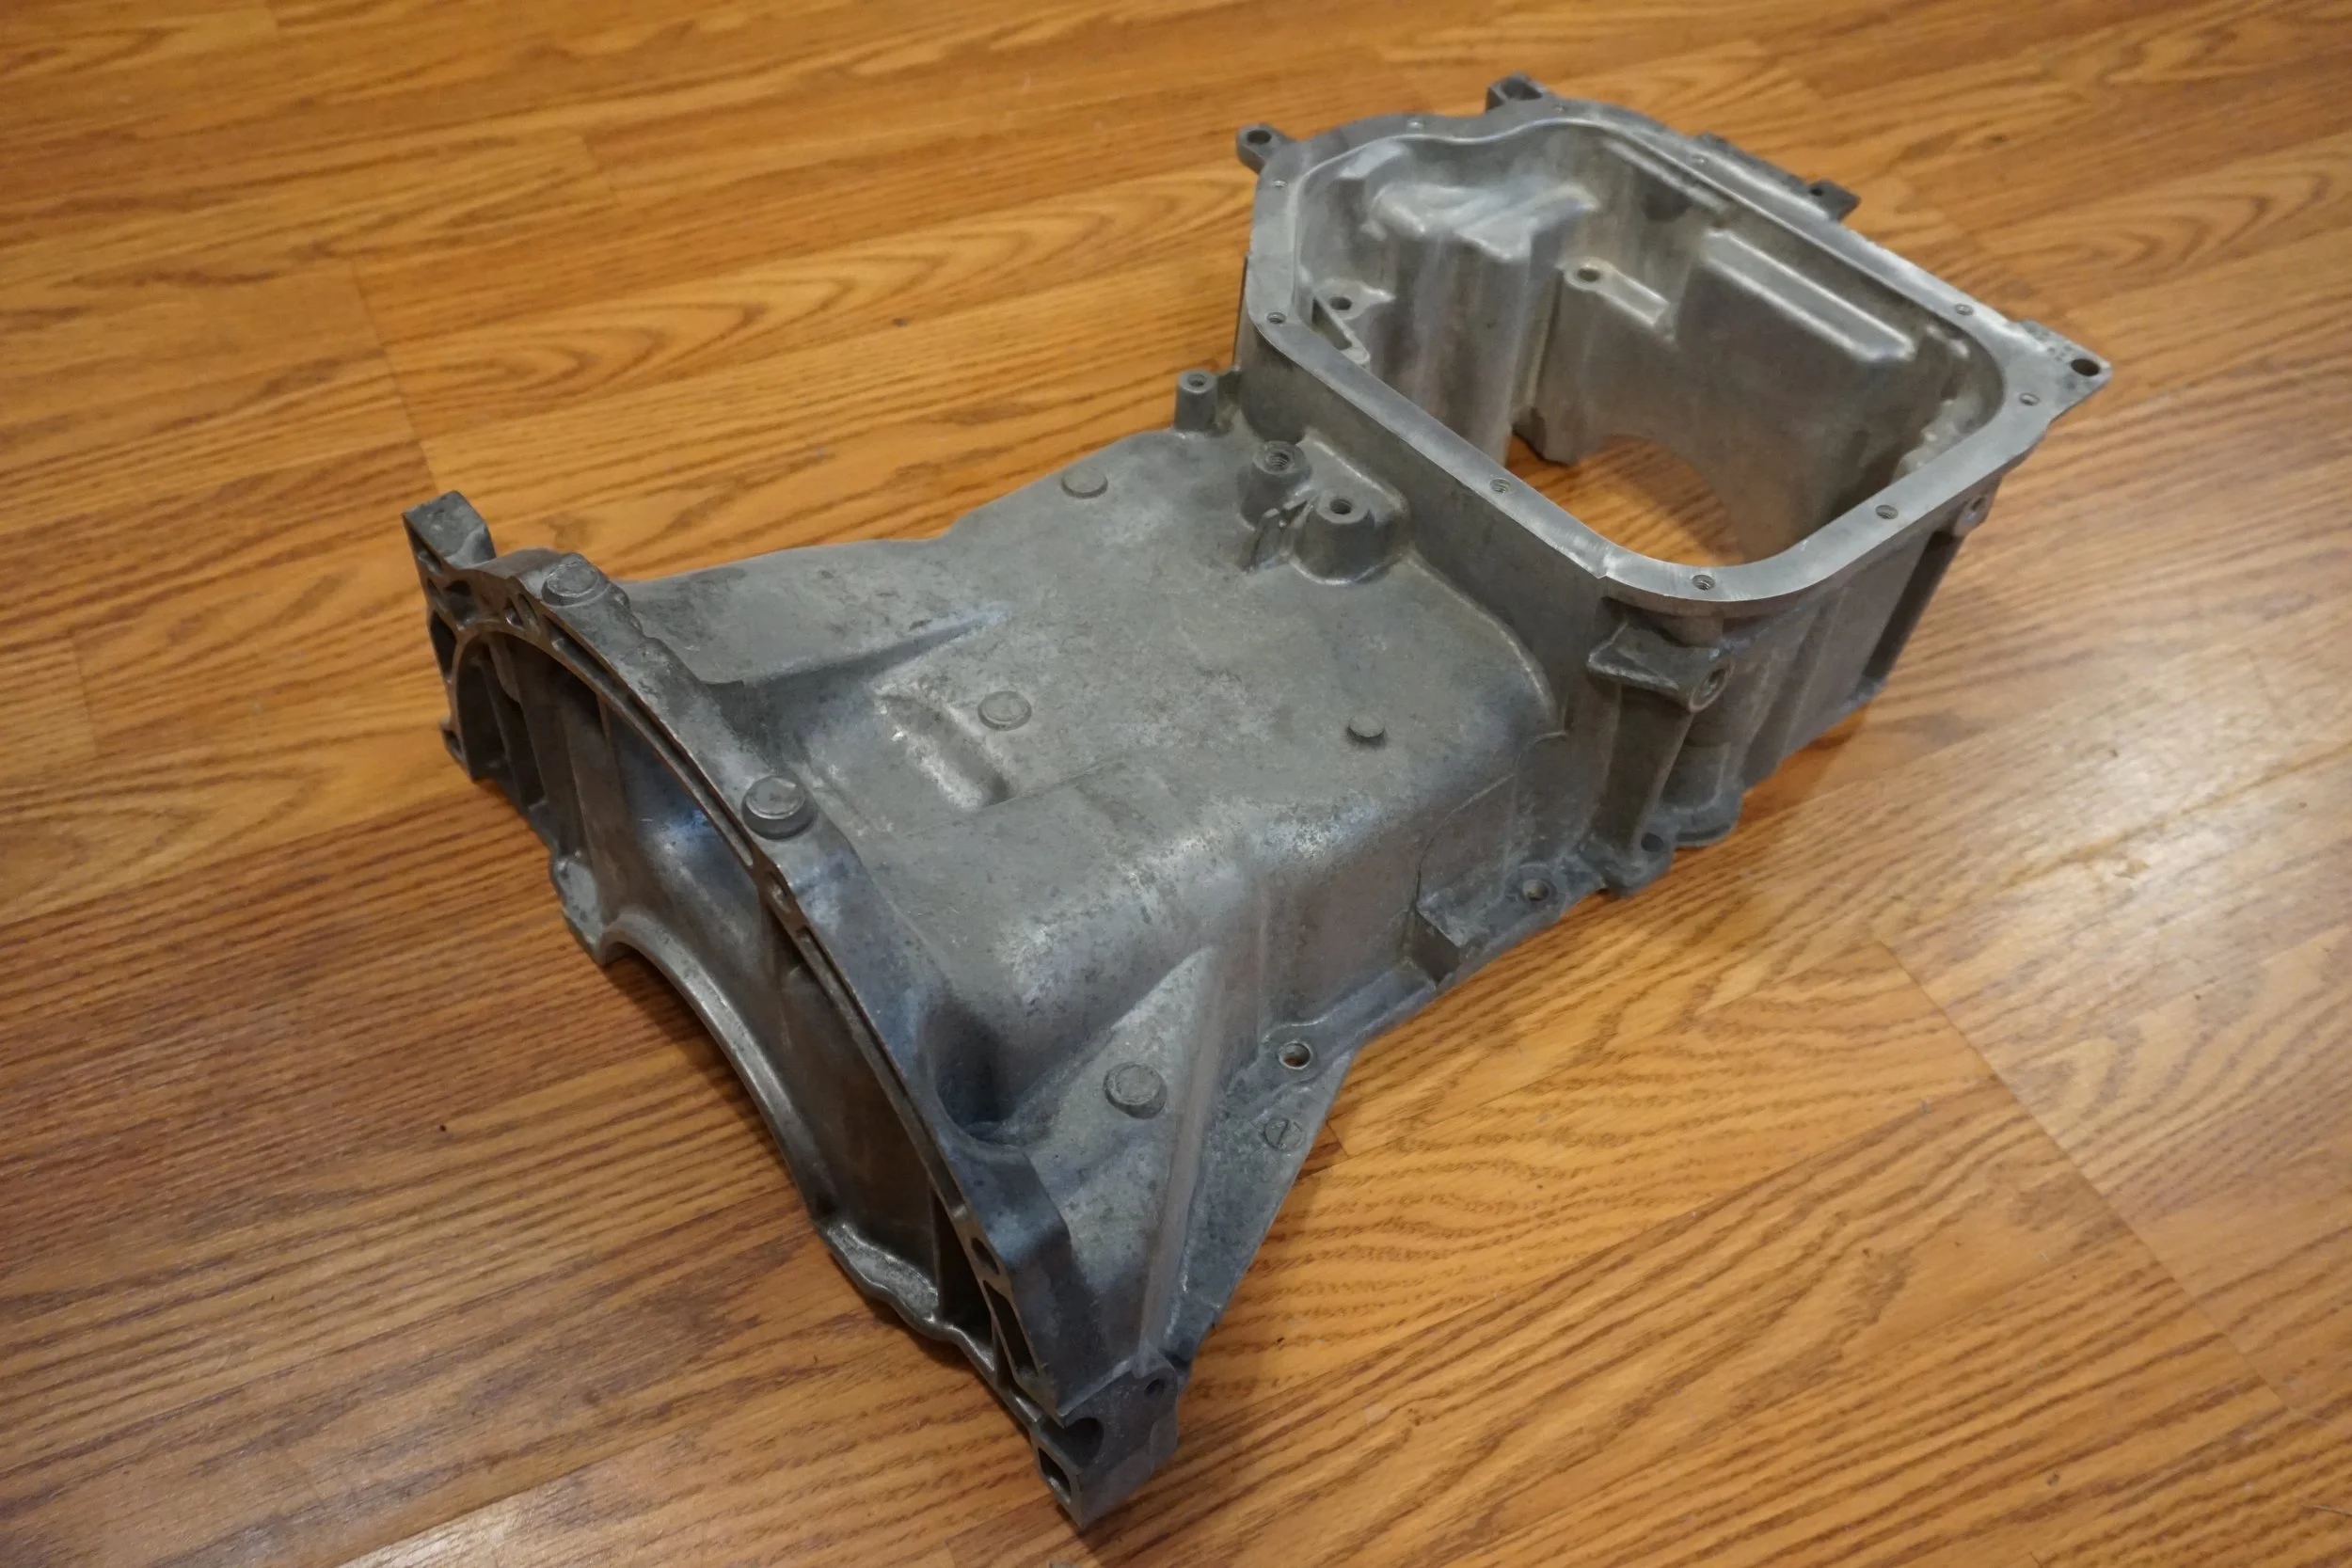
I also played around with my media blasting tank some more, this time using walnut shells as the media. In my extremely slow march to installing a 3rd gen 3.5, I wanted to clean up my old 3.0 timing covers and upper oil pan. Truth be told, I wasn't thrilled with the walnuts shells, and glass beads would have given me the finish I was looking for, but they're much harder to come by at a reasonable price. But still, I was able to clean everything up, which is better than nothing.
Racing results coming soon
I've wanted to have this done for close to 15 years now, but I wasn't about to drive out to California to have the original developer of the idea do the project, and the guy from the Sentra forum who used to travel and do it stopped doing that, so I pretty much gave up on the idea. I learned a year or two ago that 2J Racing had started to offer the service, so I thought about driving all the way down there again to have them do it. But that's a long drive, they charge like $500+ for the work, and they don't exactly have a great reputation at this point. I found a local race shop that was down to do the work and they're only an hour from me, but again, it was going to cost $600+ pretty easy. So in the end, I decided I would try to do it myself. What's the worst that could happen?
First, I needed the supplies to do the job. I found some super old pictures that showed how the guy in California did it to one of Mike Kojima's Sentras, so I knew I would need some strong chains, a bottle jack, and some sort of I beam. Working with schmellyfart, he developed some steel spacers/supports to fit inside the beam and around the inner torsion (?) bar, so that the outer upside down U structure wouldn't collapse/bend when force was applied with the jack and chains. The goal is to bend the inner torsion bar along with the outer structure. I then had to track down some sort of beam to serve as the strong base for the jack and chains, and it had to be much stronger than the rear beam on the car. Buying something long enough and strong enough new was going to be very expensive, so I looked for something on the used market. I got lucky and found the owner of a construction company an hour away from me who had a number of different beams for sale, and came home with this monstrosity for less than $100.
Here are the parts schmelly came up with, along with my cut up pizza pans to use as turn plates for doing alignment work.
Here's how they fit up in the beam. I placed two at the jack point, and two at each chain point.
And I bought a DIY alignment kit. Measuring toe is quick and easy!
I took my before measurements, and compared them to a recent alignment I got. The alignment printout showed I had 0.42* total toe in, or almost 3/16". My measurement showed 3/16", success!
Before I got started, I cut off the remaining bits of the OEM brackets for the Scott-Russel Linkage. I wanted to make sure those areas weren't any stronger/stiffer than the rest of the beam, so the beam could bend easily and evenly. I also just wanted to get rid of them since they appeared to be great at capturing debris and thus prone to rusting.
I plan on eventually pulling the whole rear beam from the car and sand blasting it, as there is surface rust and some pitting.
Anyways, back to the job at hand. Let's set this up! I had to disconnect the panhard rod, as it was directly in the way of the bottle jack, and I had to disconnect the rear shocks, as I needed the beam to droop a few inches so it would be lined up with the I beam. This meant the only things attaching the beam to the car were the front trailing arm bushings, so the beam was able to move around quite a bit, which I would later learn was not so great.
I covered up the chains as best I could with a few heavy carpets just in case they snapped.
And then I bent. Over and over again, taking time to measure the changes so I wouldn't bend it too far. But I was running into a problem: the beam was rotating upwards a bit as I pumped up the jack, leading to the jack eventually slipping off. Not only was this somewhat terrifying, as I was lying under the car working the jack, but it meant much of the force of the jack wasn't going into bending the beam. But I kept bending and taking measurements, and it appeared as if I was making progress. I'll skip over some details and just say I eventually stopped, and took the car in for another alignment, as the one I got two months ago (after installing the new coilovers and camber plates) was only a very partial alignment, just enough to even out the toe and make the car drive straight. But before I took the car in, I tested out the alignment plates and tried to get the front of the car close to what I want, to save time and expense when I was on the alignment rack.
Well, it turns out my home alignment was on point in terms of camber, as the shop only had to make a small adjustment on one side, the other was perfect. And in a welcome surprise from two months ago, my caster was perfectly even side to side, even if it wasn't quite as high as I had hoped it would be. They did have to adjust the toe quite a bit, because while my tools can tell me total toe, it can't tell me if the wheels are actually pointed straight. In the end, I walked away with the best alignment my car has ever seen. The most camber ever, the most caster ever (and also perfectly even for the first time), and my normal amount of toe out up front. But I was most interested to see what happened in the rear. Turns out I had gotten rid of 1/3 of my toe in, and I went from 0.42 total toe in to 0.28! The beam bending works!
I was hoping to get 6* of caster up front, since I have both the added caster control arm bushings, plus the camber/caster plates, but 5.1* is still about 0.5* better than I had before, so I can't complain. Considering that these cars come with something like 2.8* from the factory, it's a very welcome improvement. So there's still more work to do on the rear beam, and Schmelly has an idea or two on how to keep the beam from rotating so much, so I'll be revisiting this in the future. But for now, the car feels great, and it performed very well at the last race.
Now, time for some other small things.
When I was working on the coilovers and camber plates, I realized that the ground cable I had running from the intake manifold to the shock tower probably wasn't actually doing anything, since I had it on top of my old FSTB bracket, so it wasn't really grounded to the chassis. I decided to make a new cable and give it a proper ground location on the body of the car, so I ground off some paint from lower down on the tower around an existing bolt hole and put it there. It could have been my imagination, but the car seemed to idle smoother after I did this.
I also played around with my media blasting tank some more, this time using walnut shells as the media. In my extremely slow march to installing a 3rd gen 3.5, I wanted to clean up my old 3.0 timing covers and upper oil pan. Truth be told, I wasn't thrilled with the walnuts shells, and glass beads would have given me the finish I was looking for, but they're much harder to come by at a reasonable price. But still, I was able to clean everything up, which is better than nothing.
Racing results coming soon
09-24-2023, 07:18 AM
#891
Do you even sleep?! These are some serious projects. +1,000,000 fake internet points for the beam bending. That was something I fantasized about way back when too.
Did the bigger anti-sway bar work?
This looks like the MAFS connector you need. https://www.wiringspecialties.com/vh45-mafs-connector/
What is your media blaster?
Did the bigger anti-sway bar work?
This looks like the MAFS connector you need. https://www.wiringspecialties.com/vh45-mafs-connector/
What is your media blaster?
09-24-2023, 07:34 AM
#892
Do you even sleep?! These are some serious projects. +1,000,000 fake internet points for the beam bending. That was something I fantasized about way back when too.
Did the bigger anti-sway bar work?
This looks like the MAFS connector you need. https://www.wiringspecialties.com/vh45-mafs-connector/
What is your media blaster?
Did the bigger anti-sway bar work?
This looks like the MAFS connector you need. https://www.wiringspecialties.com/vh45-mafs-connector/
What is your media blaster?
 Once I get the process dialed in on my car, I could bend your beam if you'd like.
To be honest, I've been disappointed in the seeming lack of results from the bigger FSB. The car does feel great when I'm on the track, but with so many recent changes, it's hard to pin it down to one thing. I was expecting it to be much more noticeable. I may drill another hole further in on the bar for the end links, which in theory should make it stiffer. We shall see.
This is the media blaster I got: But you will need a pretty hefty air compressor to use it efficiently. I've got an 80 gallon tank and it's rated for something like 19 SCFM. My go-to media for metal/rust is fine coal slag.
Yes, that's the connector I need! That's freaking awesome, thanks!
09-30-2023, 04:22 PM
#893
Wow, quite the accomplishment! I never got that far either, had purchased a spare beam but never got in on an Illinois Sentra bending party as that was right when the traveling option went bust. I mean I did the lightweight GXE bumper, chiseled out the sound deadening, lowered and lightend my battery up front, but what you've accomplished is on a whole other level. CONGRATS you fanatic.
10-10-2023, 06:17 AM
#894
Senior Member
iTrader: (9)

Join Date: Dec 2000
Location: Vernon Hills, IL/ Alexandria, VA
Posts: 893
I had the beam bending done on my first Maxima. I liked it as it made the car behave more like a rear wheel driver car. The rear would start sliding out when making turns.
Ferhan
Ferhan
11-03-2023, 09:52 AM
#895
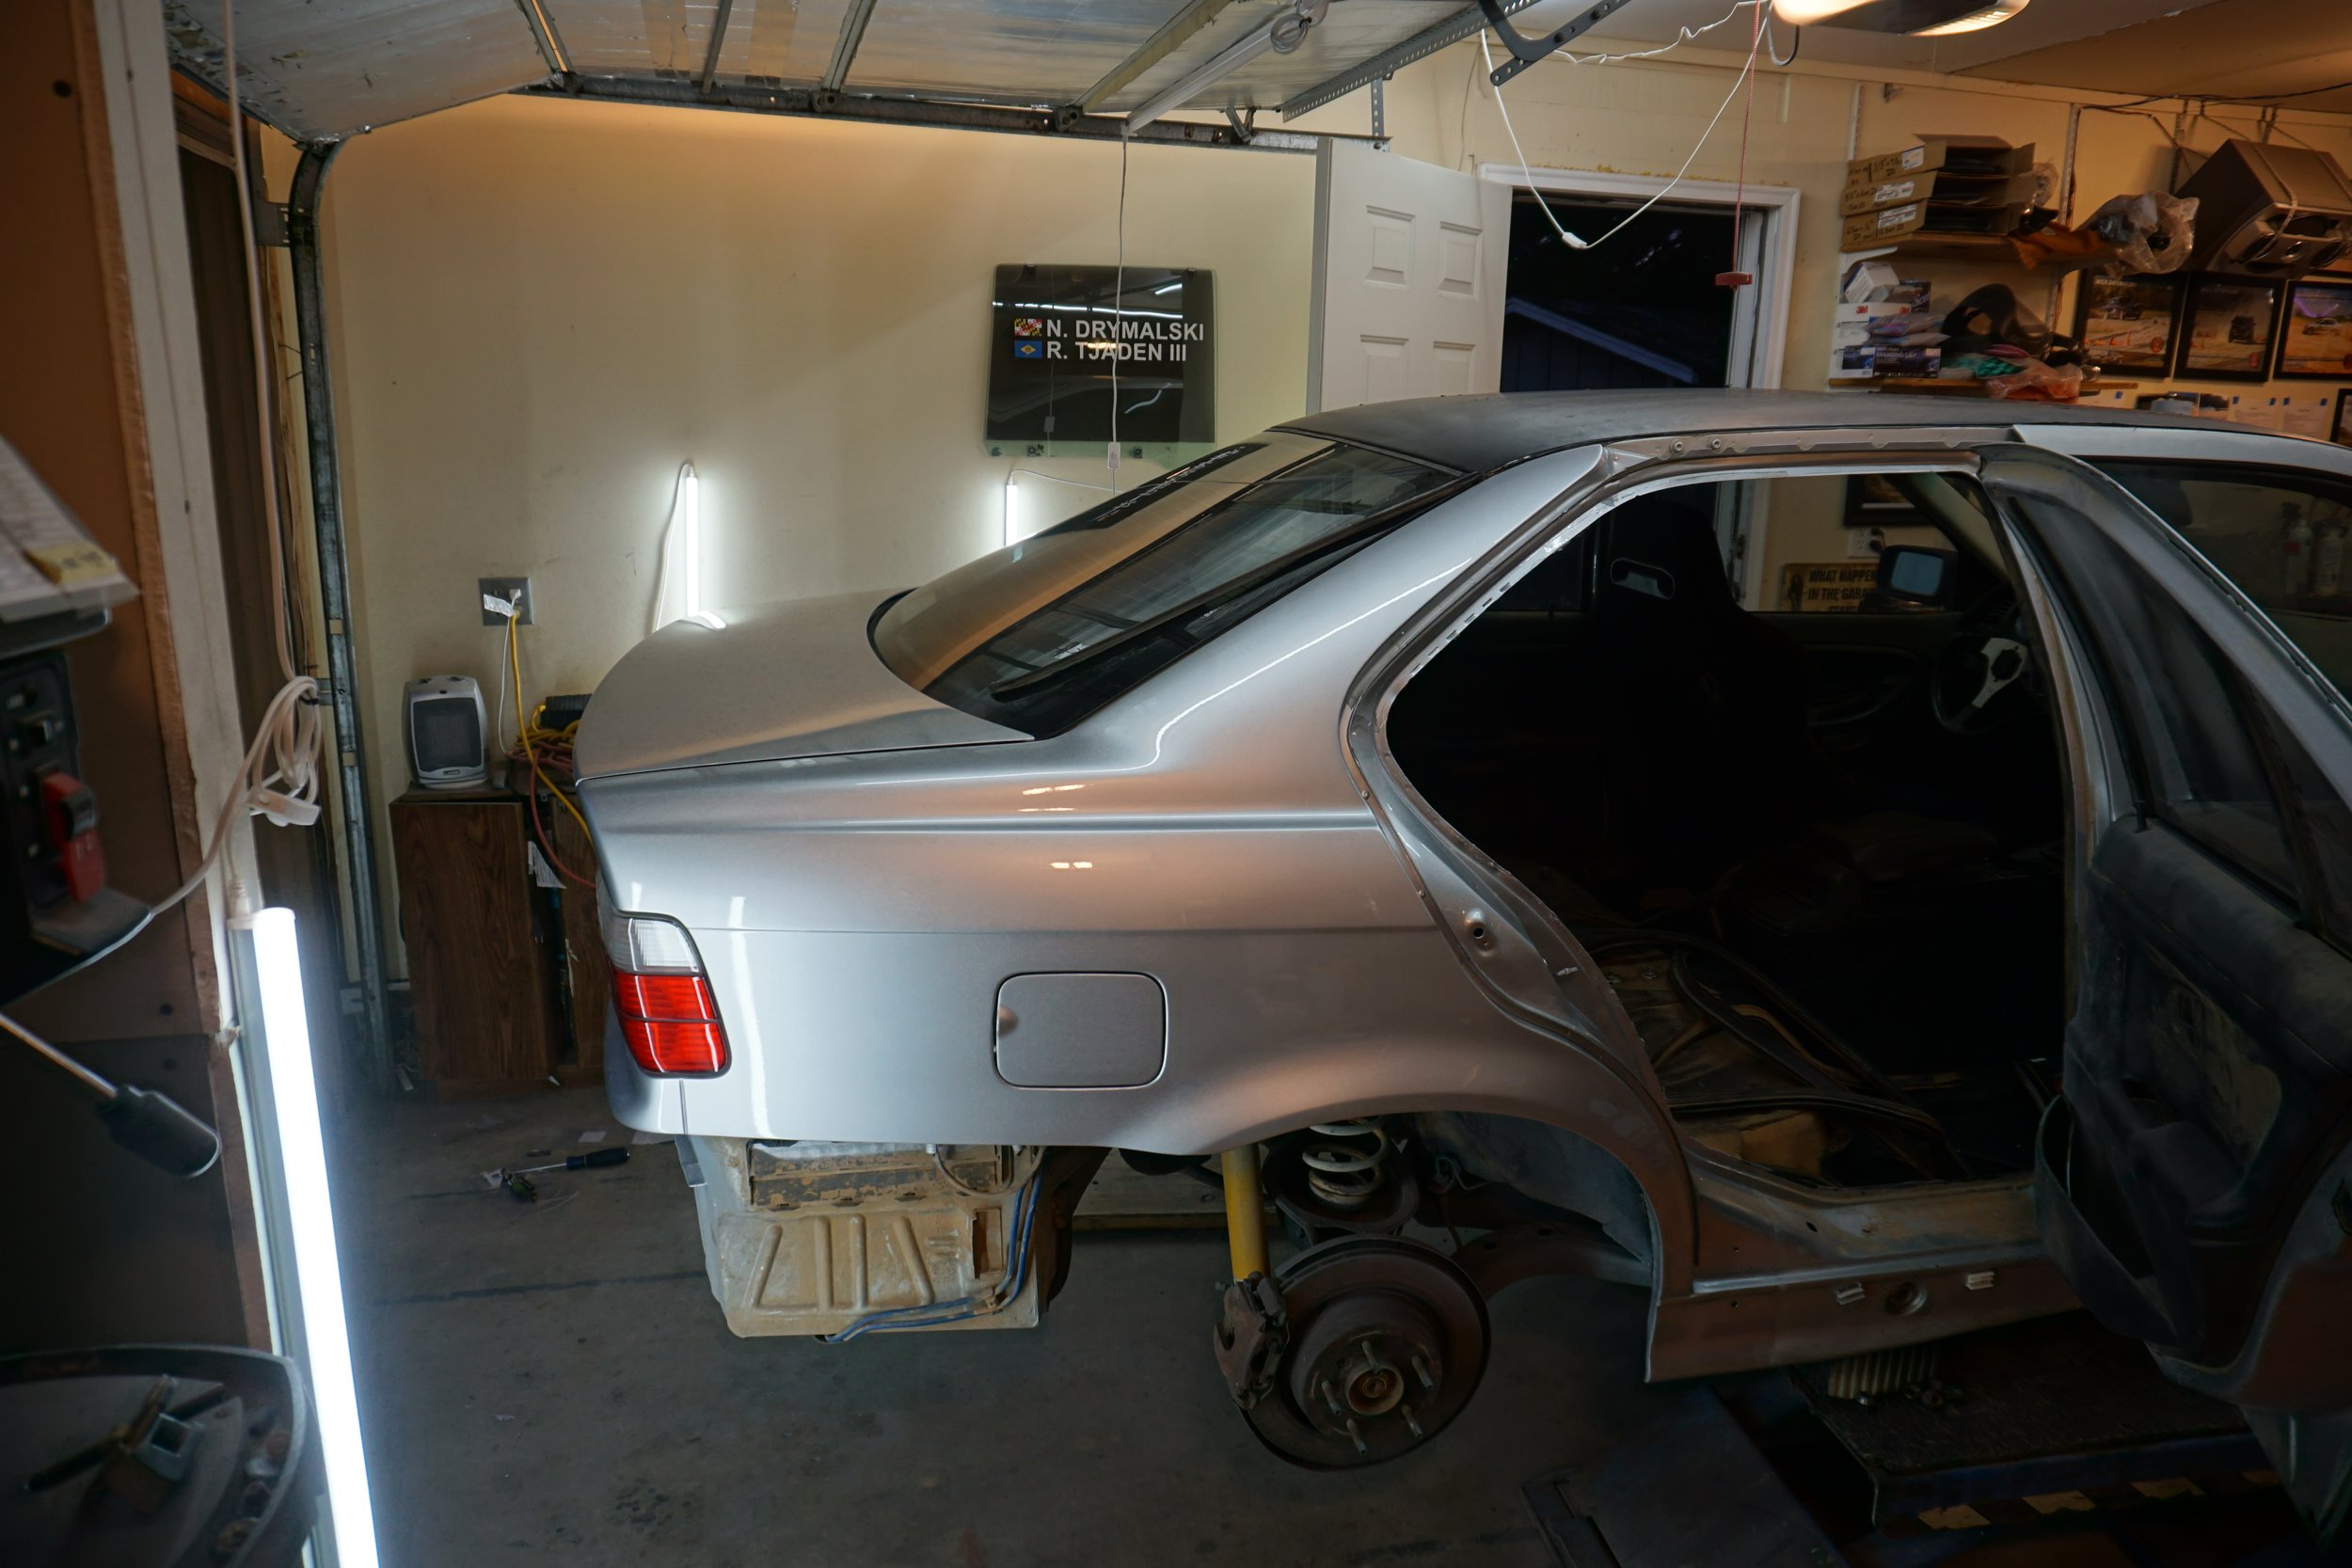
Okay, I'm still behind on posting up racing results, but I just got done with a project on the M3 that I'm pretty proud of, so I'll do a (very) quick recap.
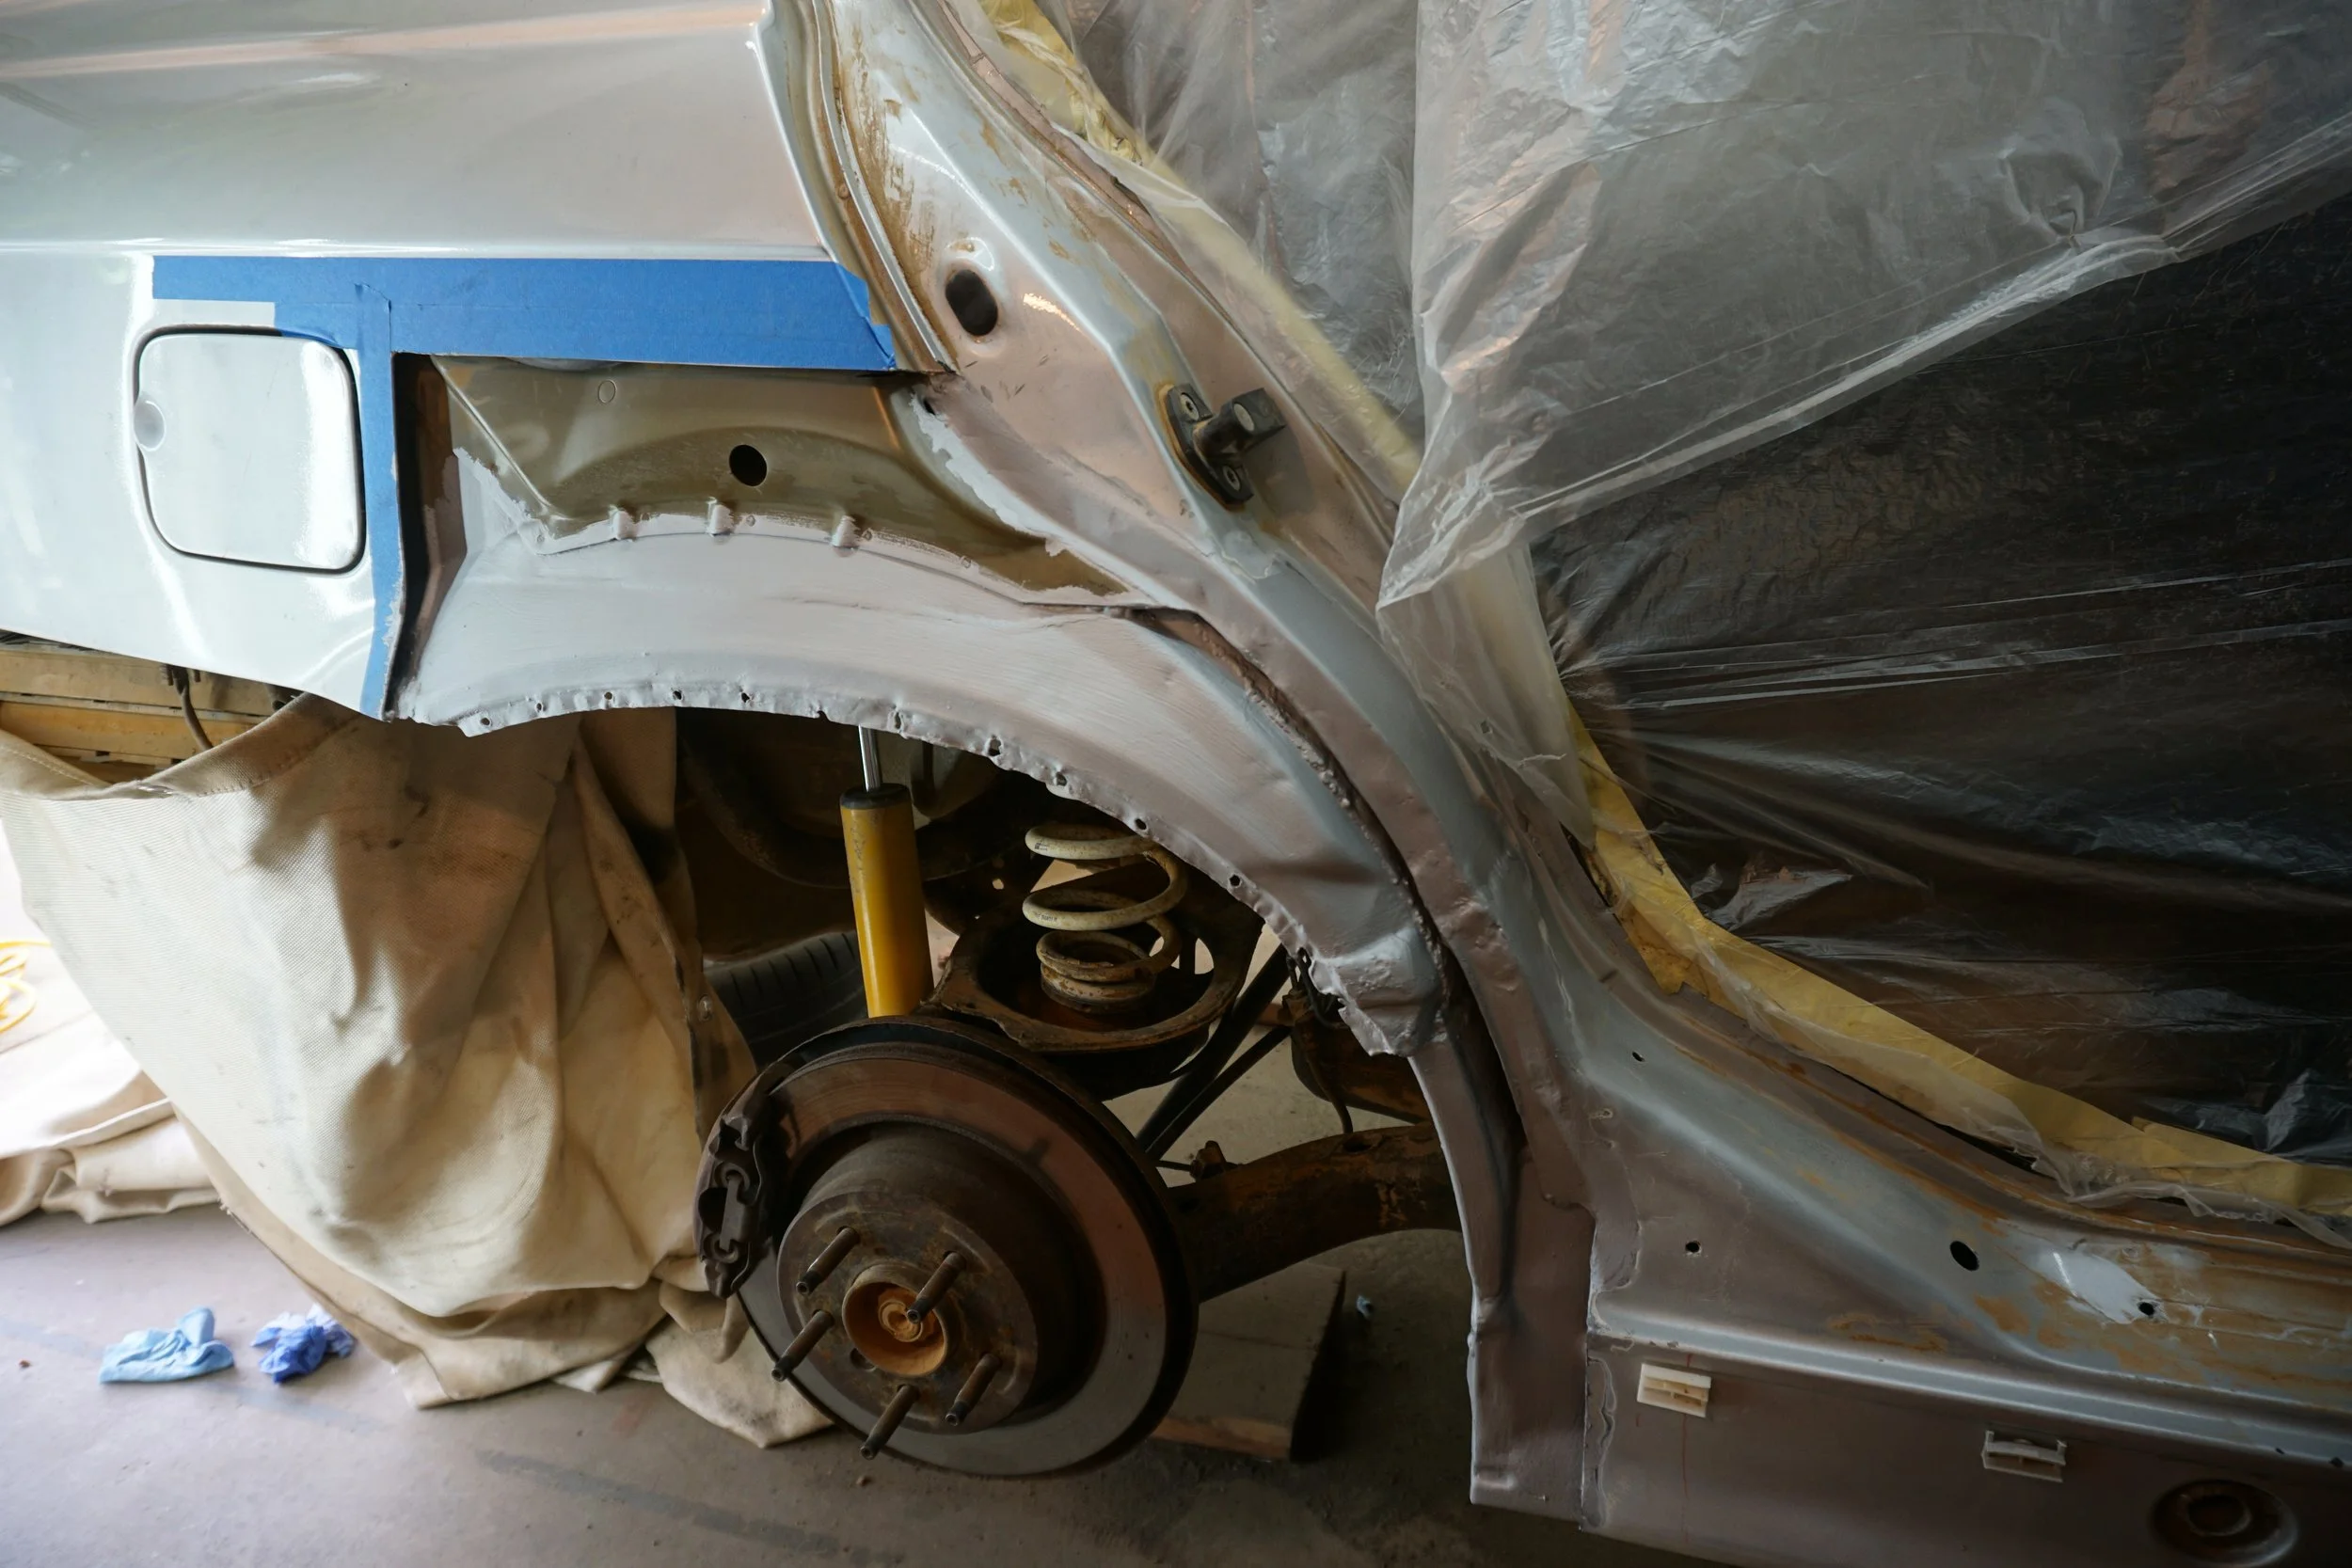
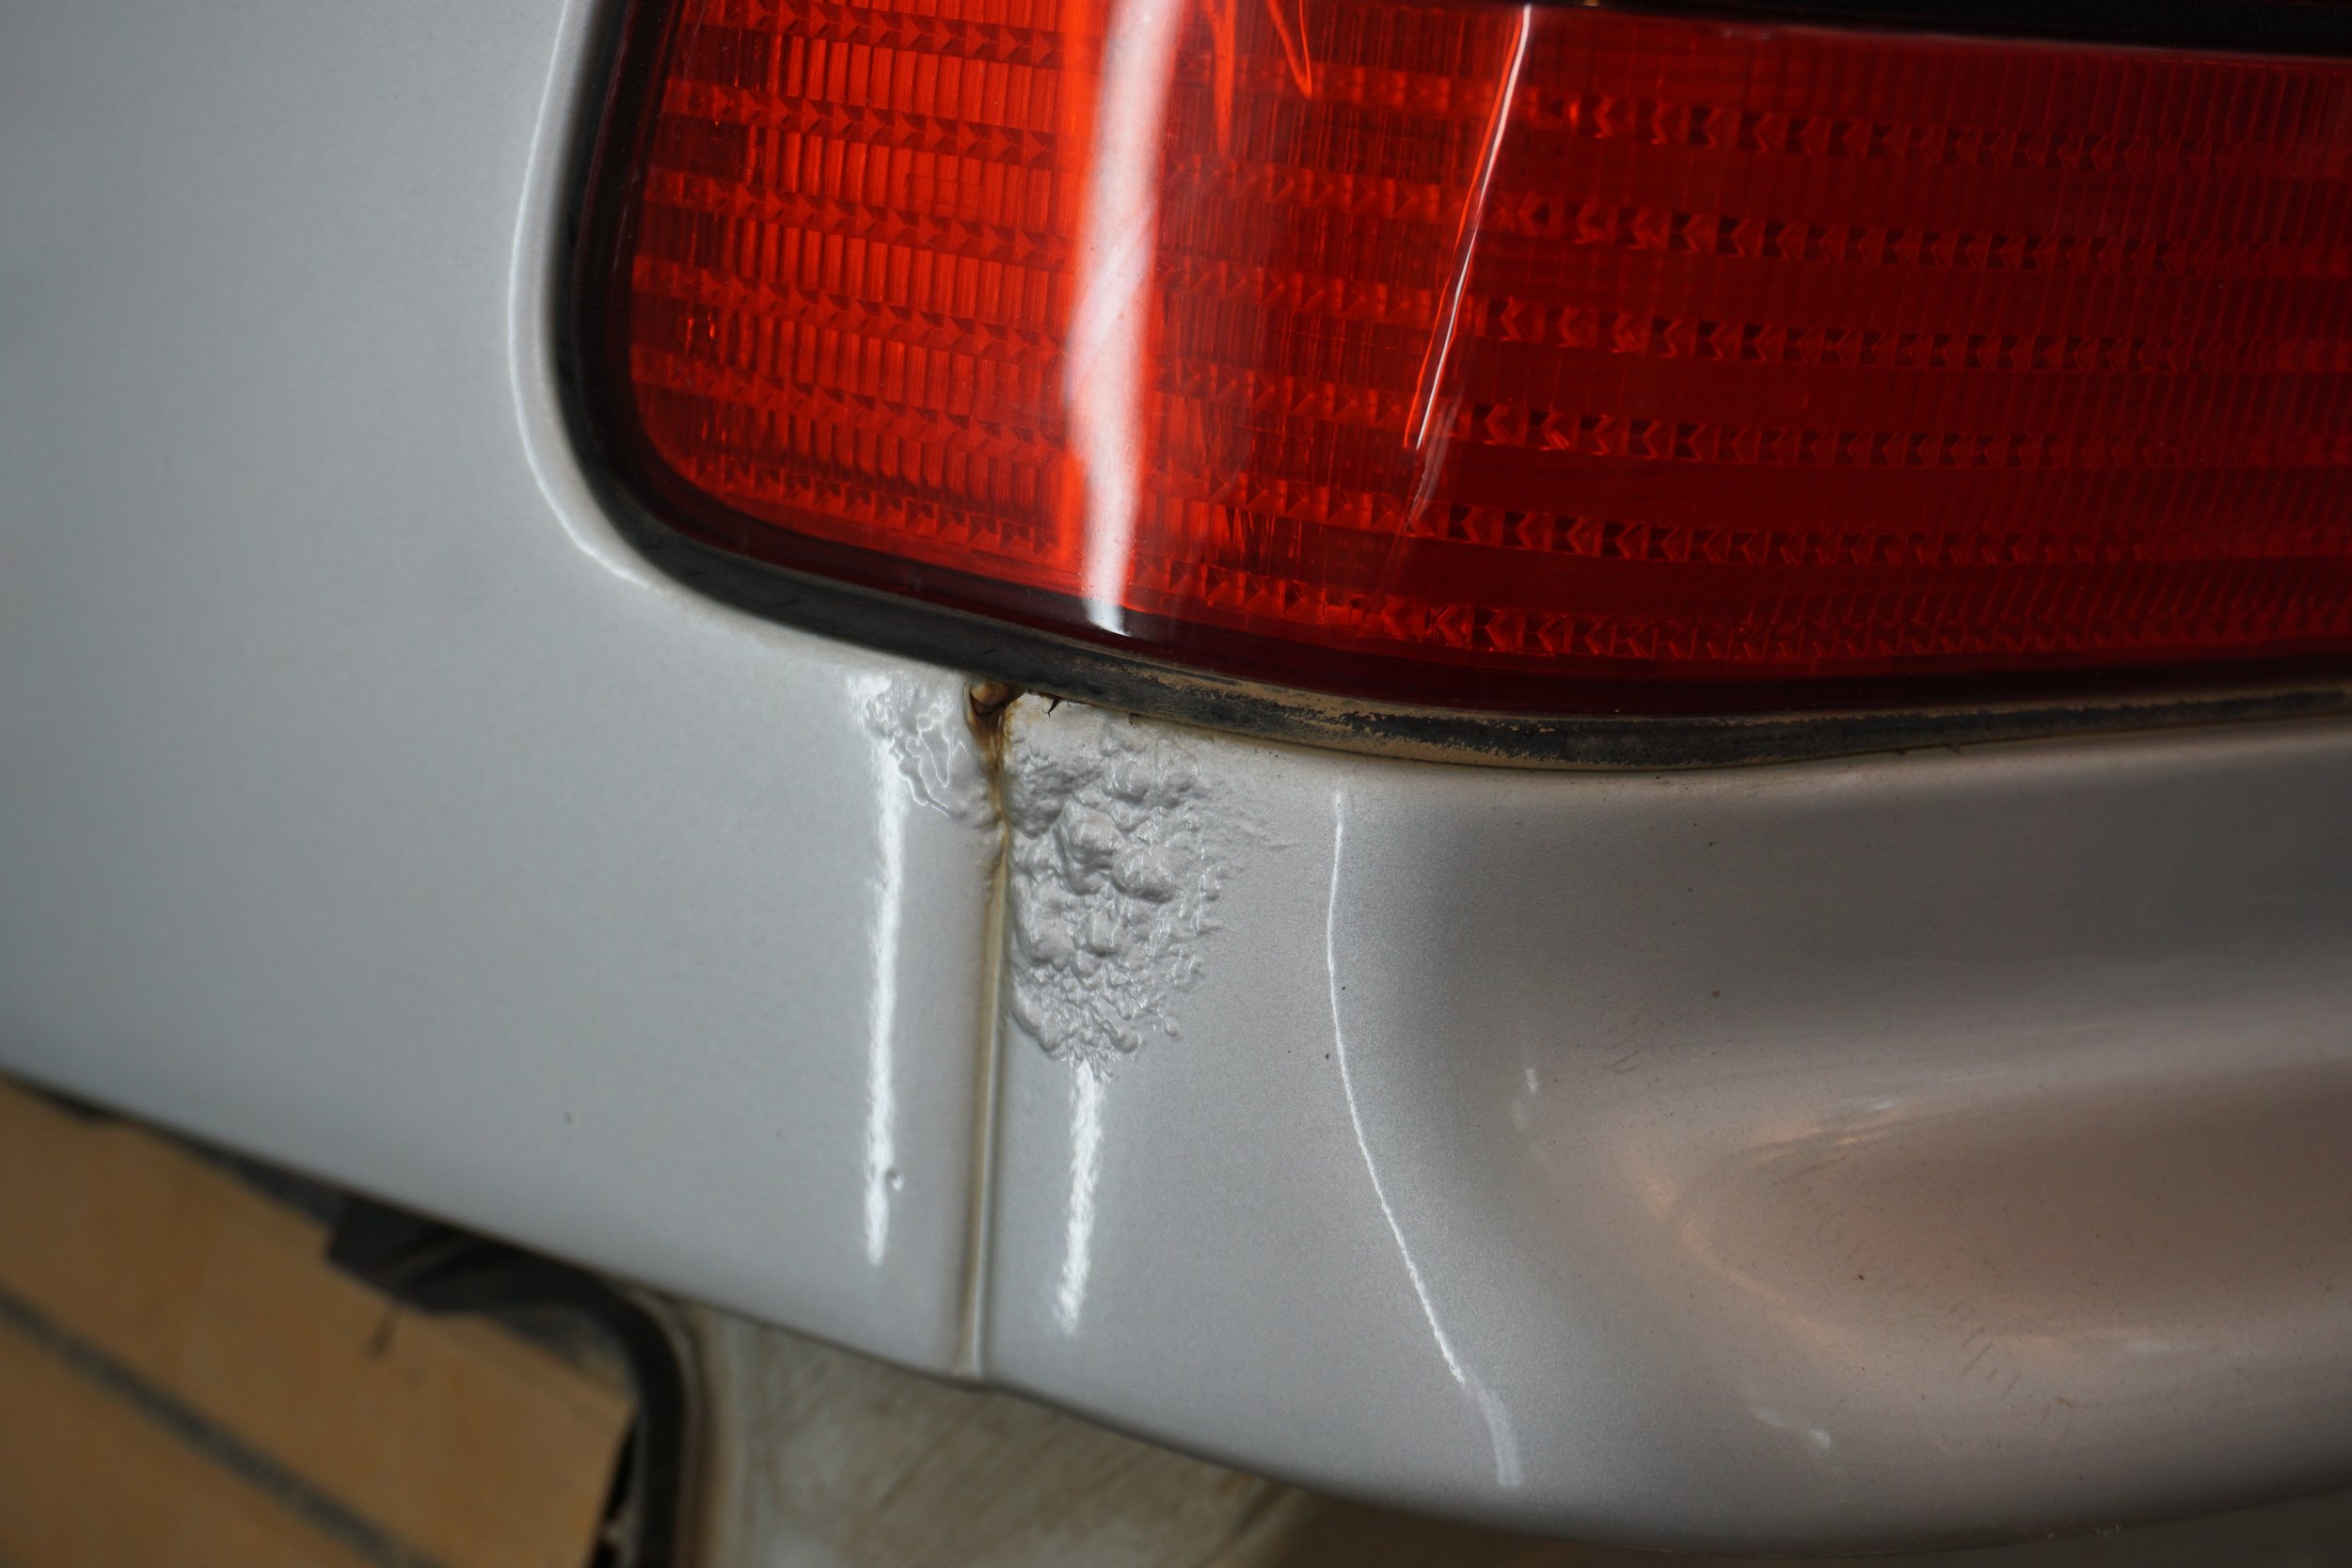
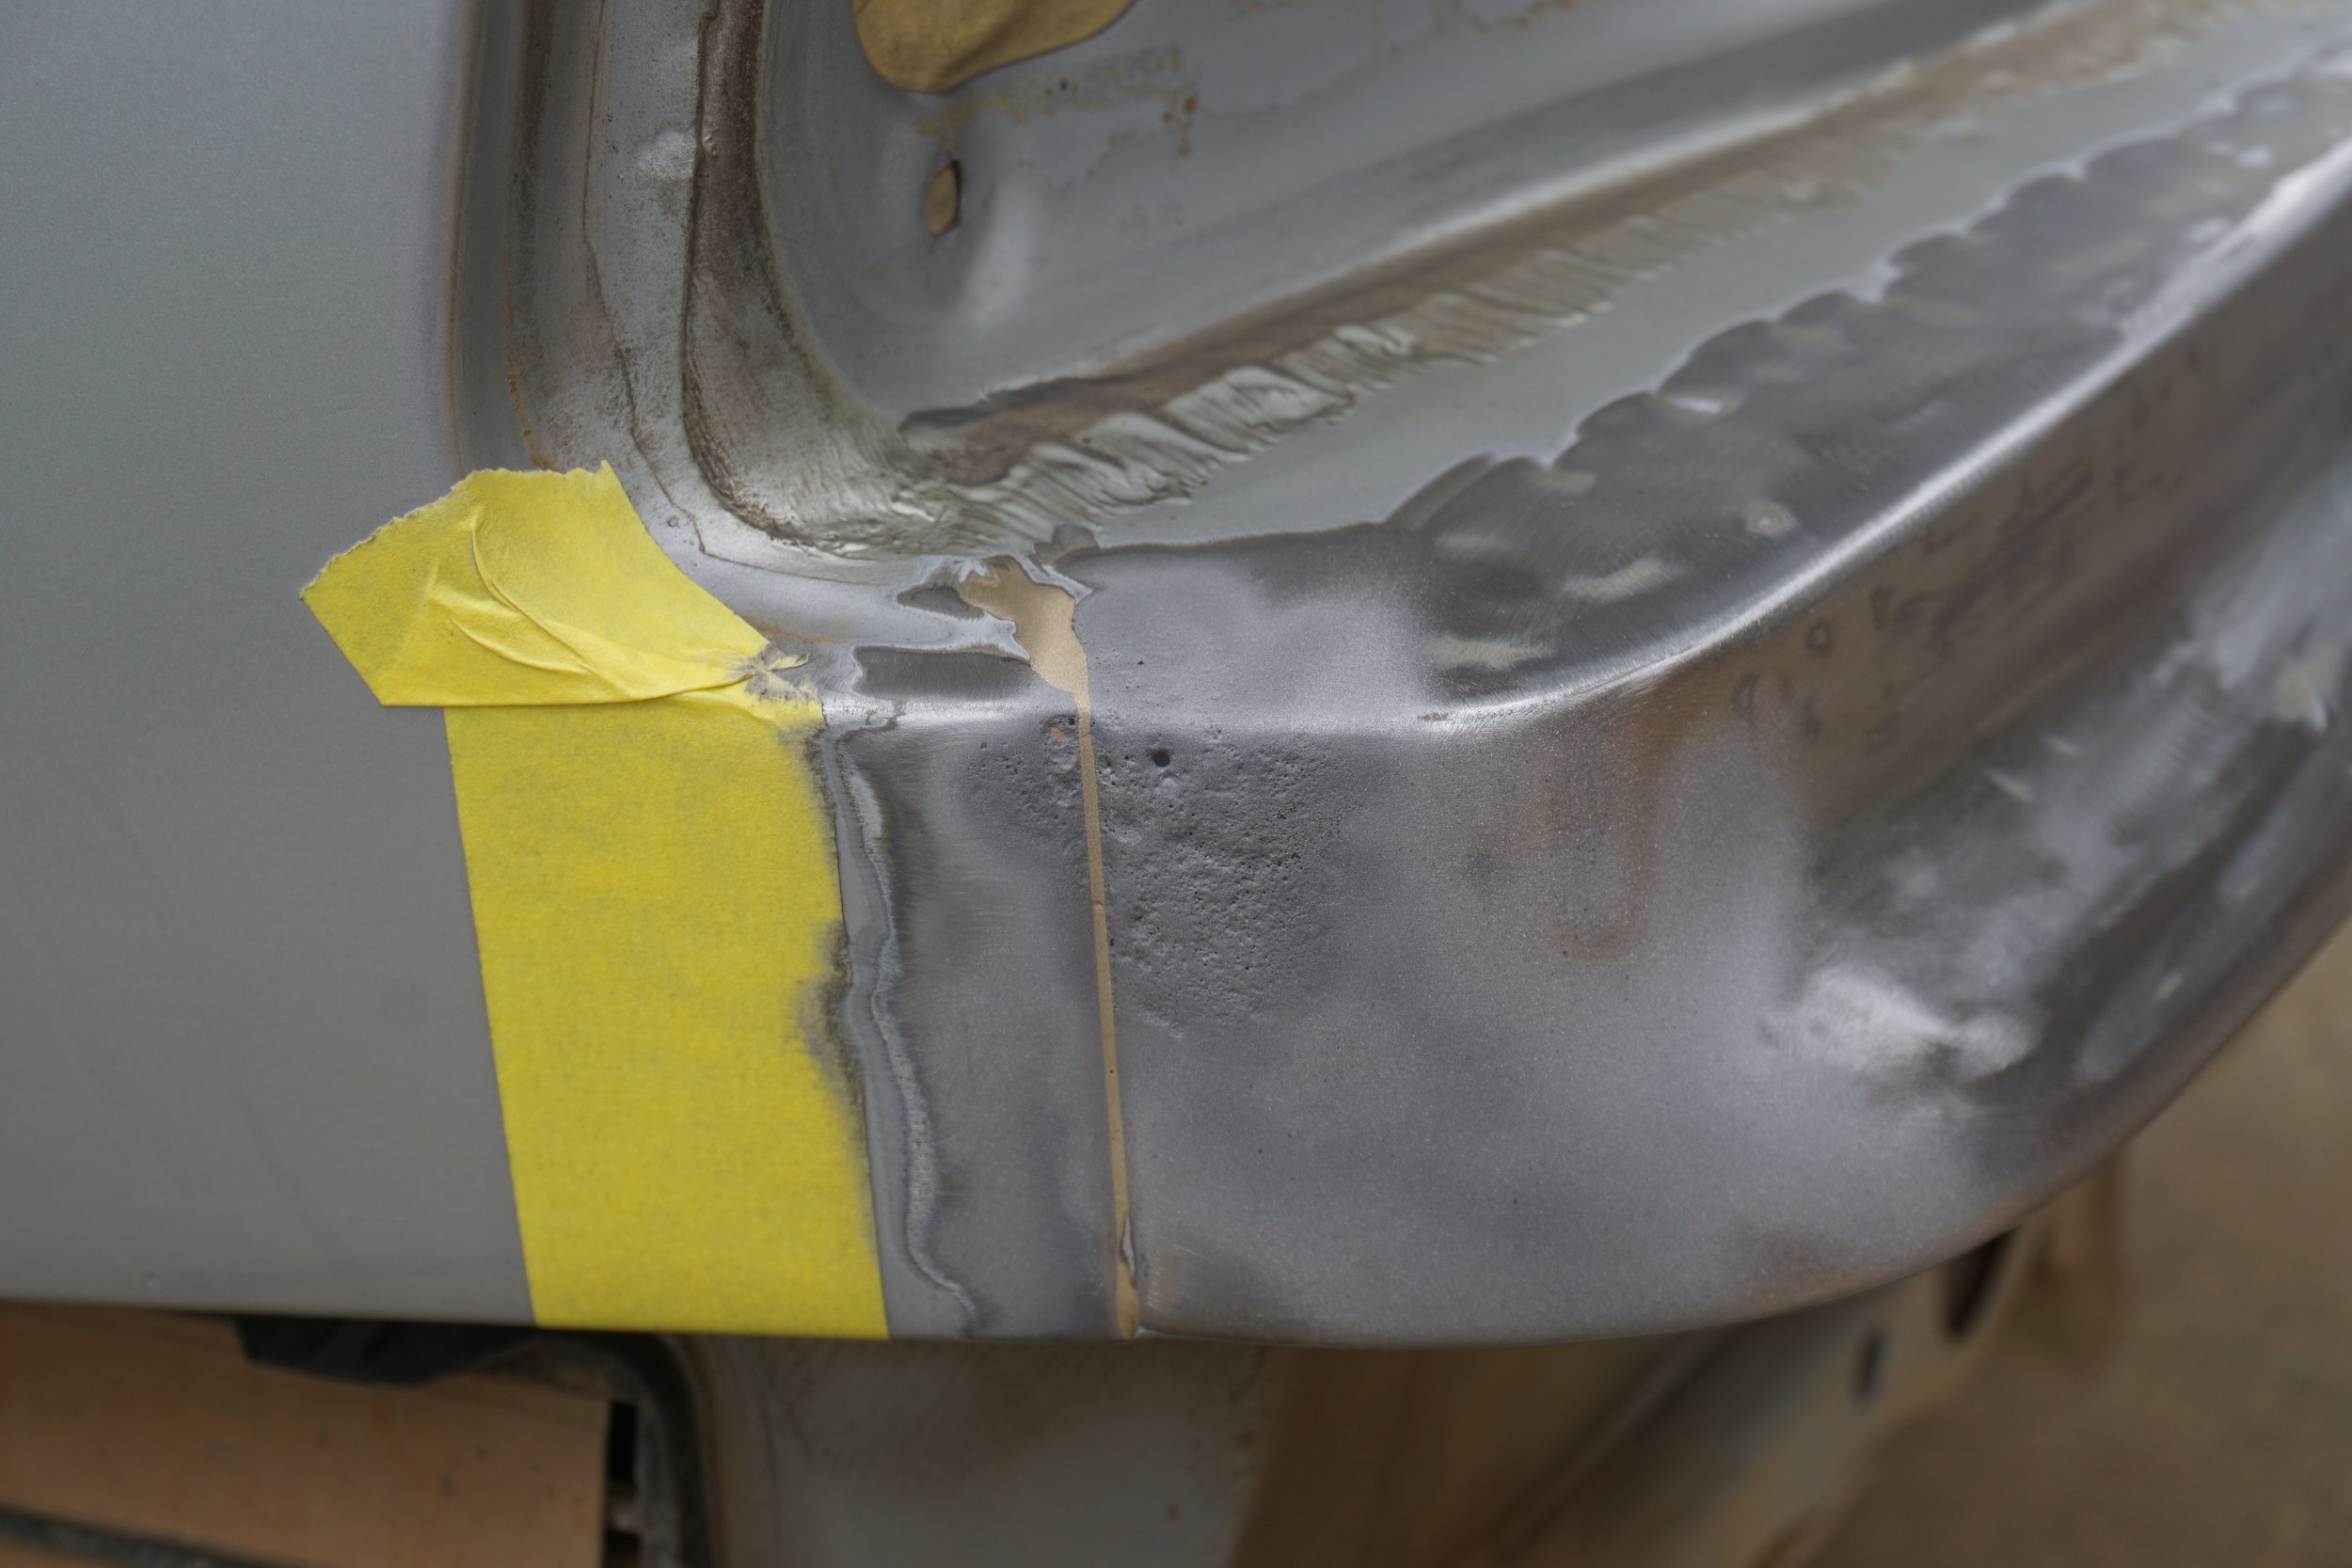
The PS rear quarter panel of the M3 was rusting pretty bad from an old accident that was never repaired properly. Three years ago I did a hack repair before I could weld or paint properly. Here's what it was looking like back then:

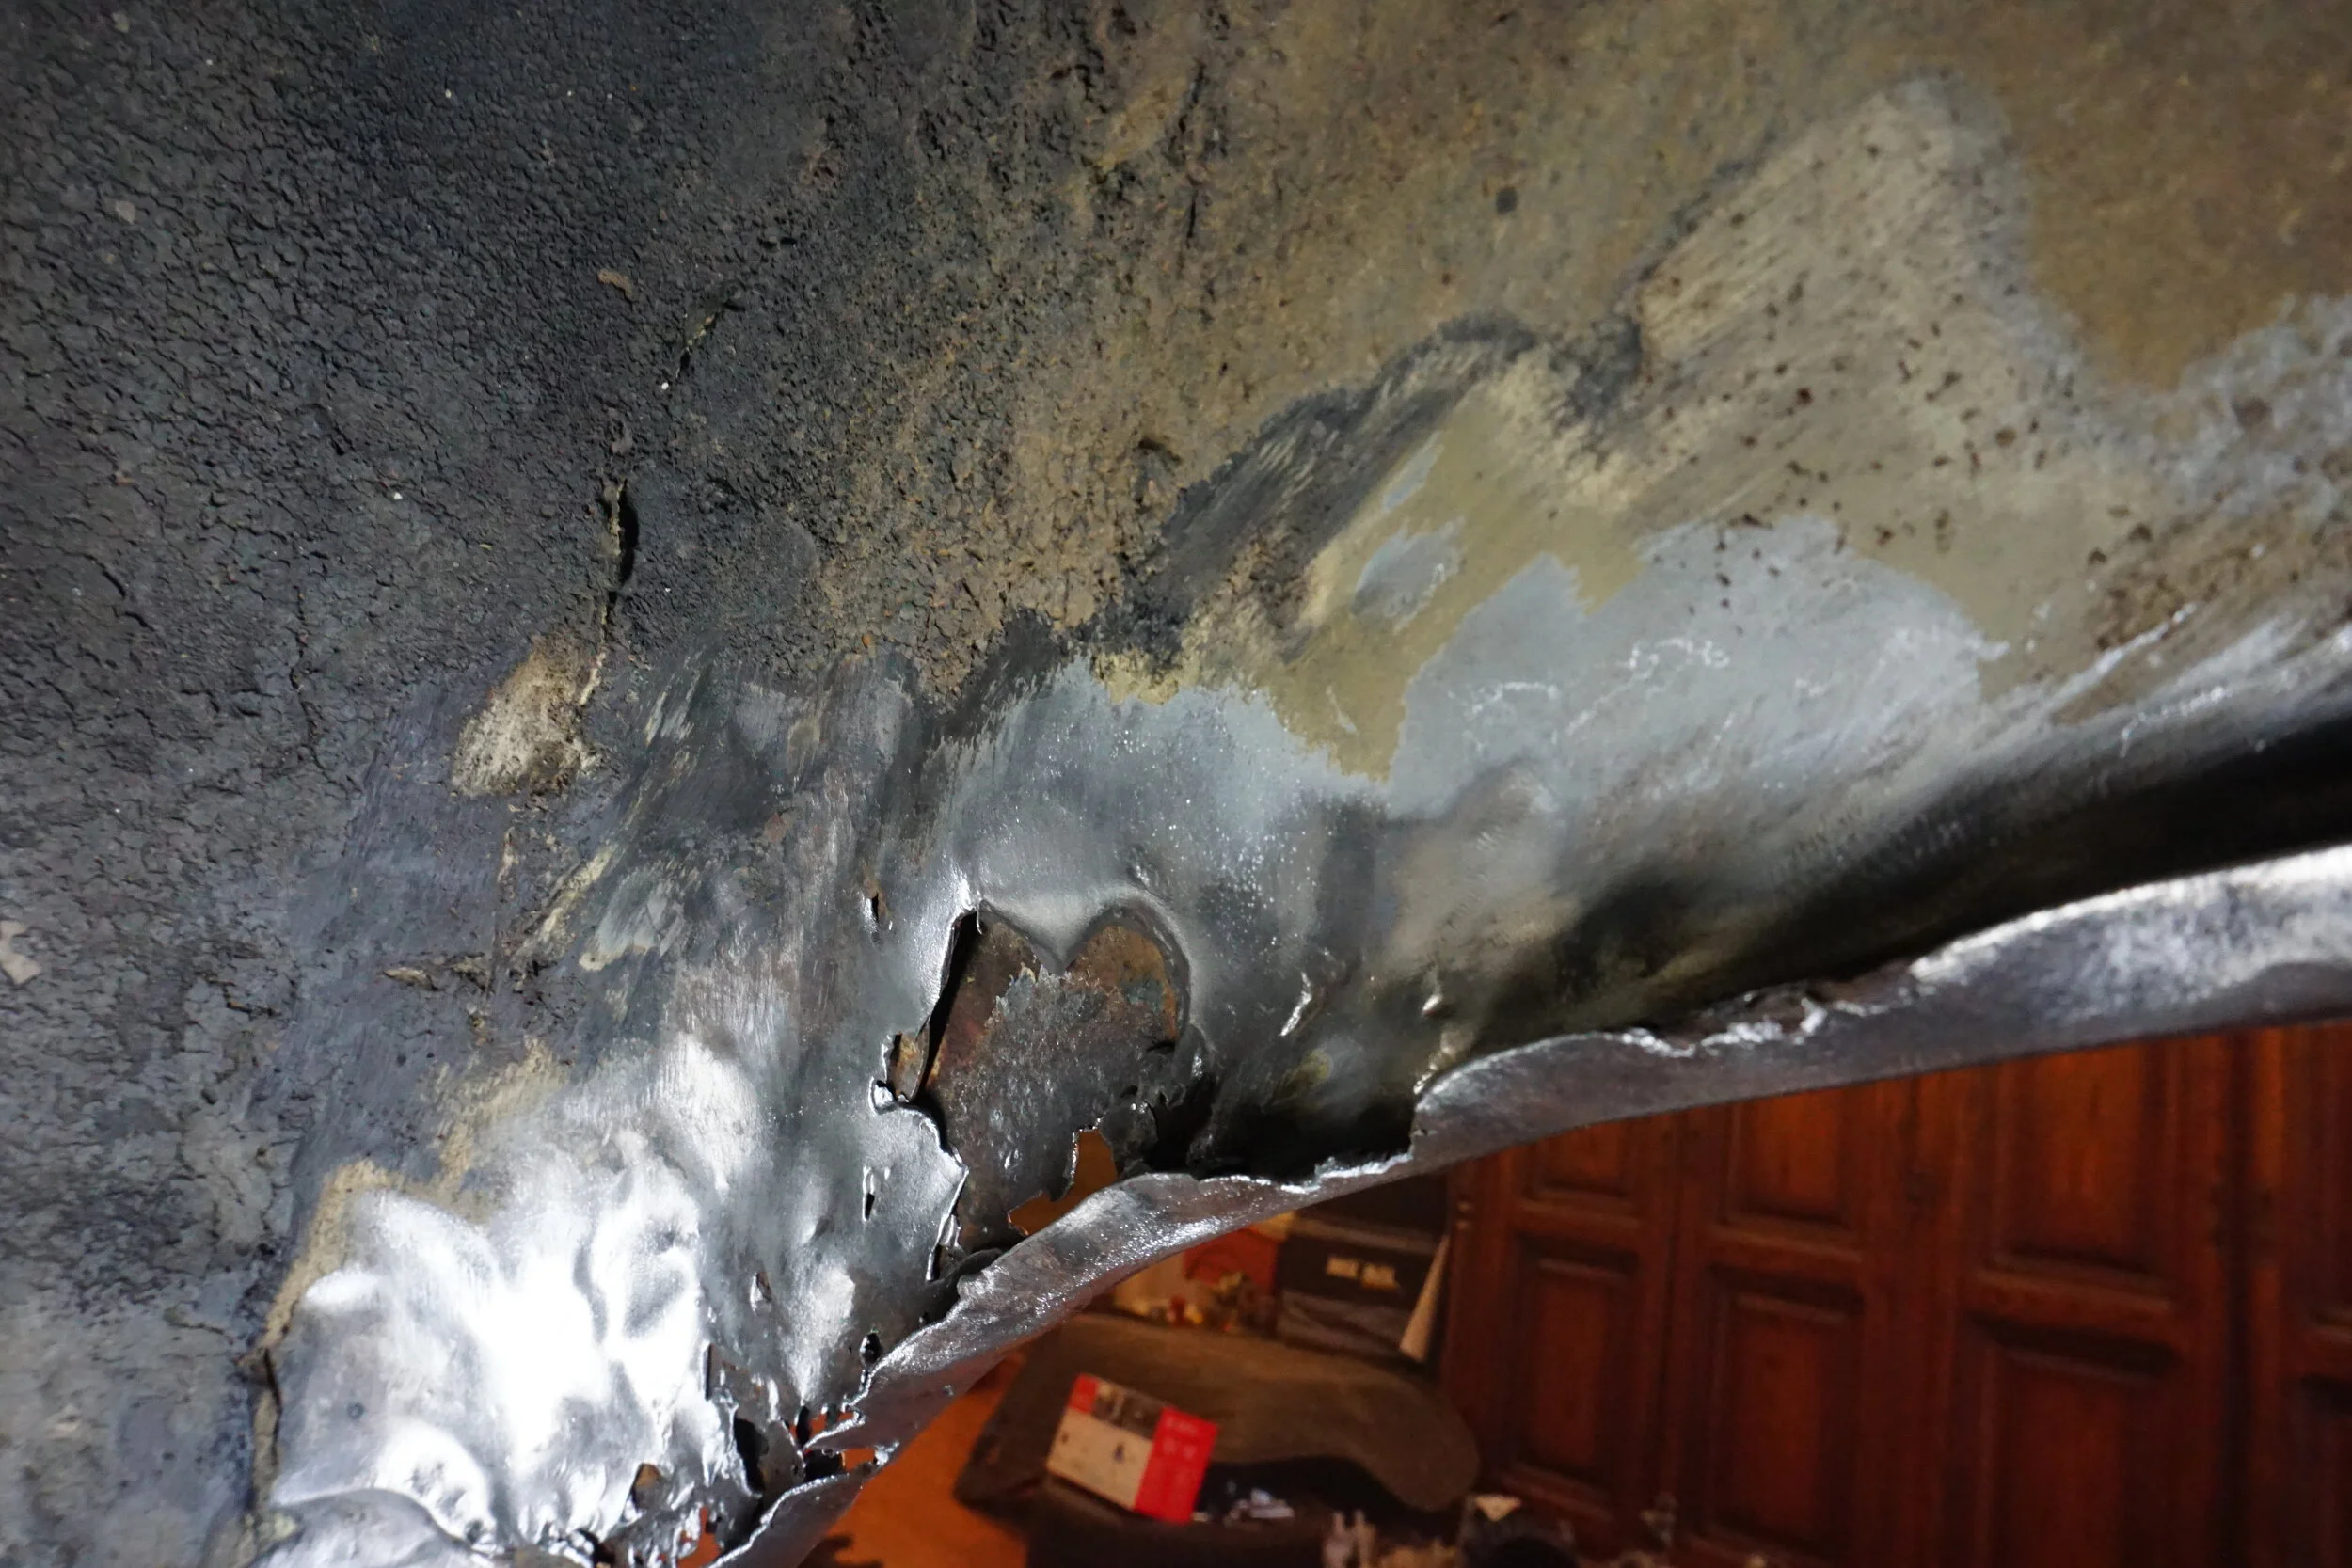
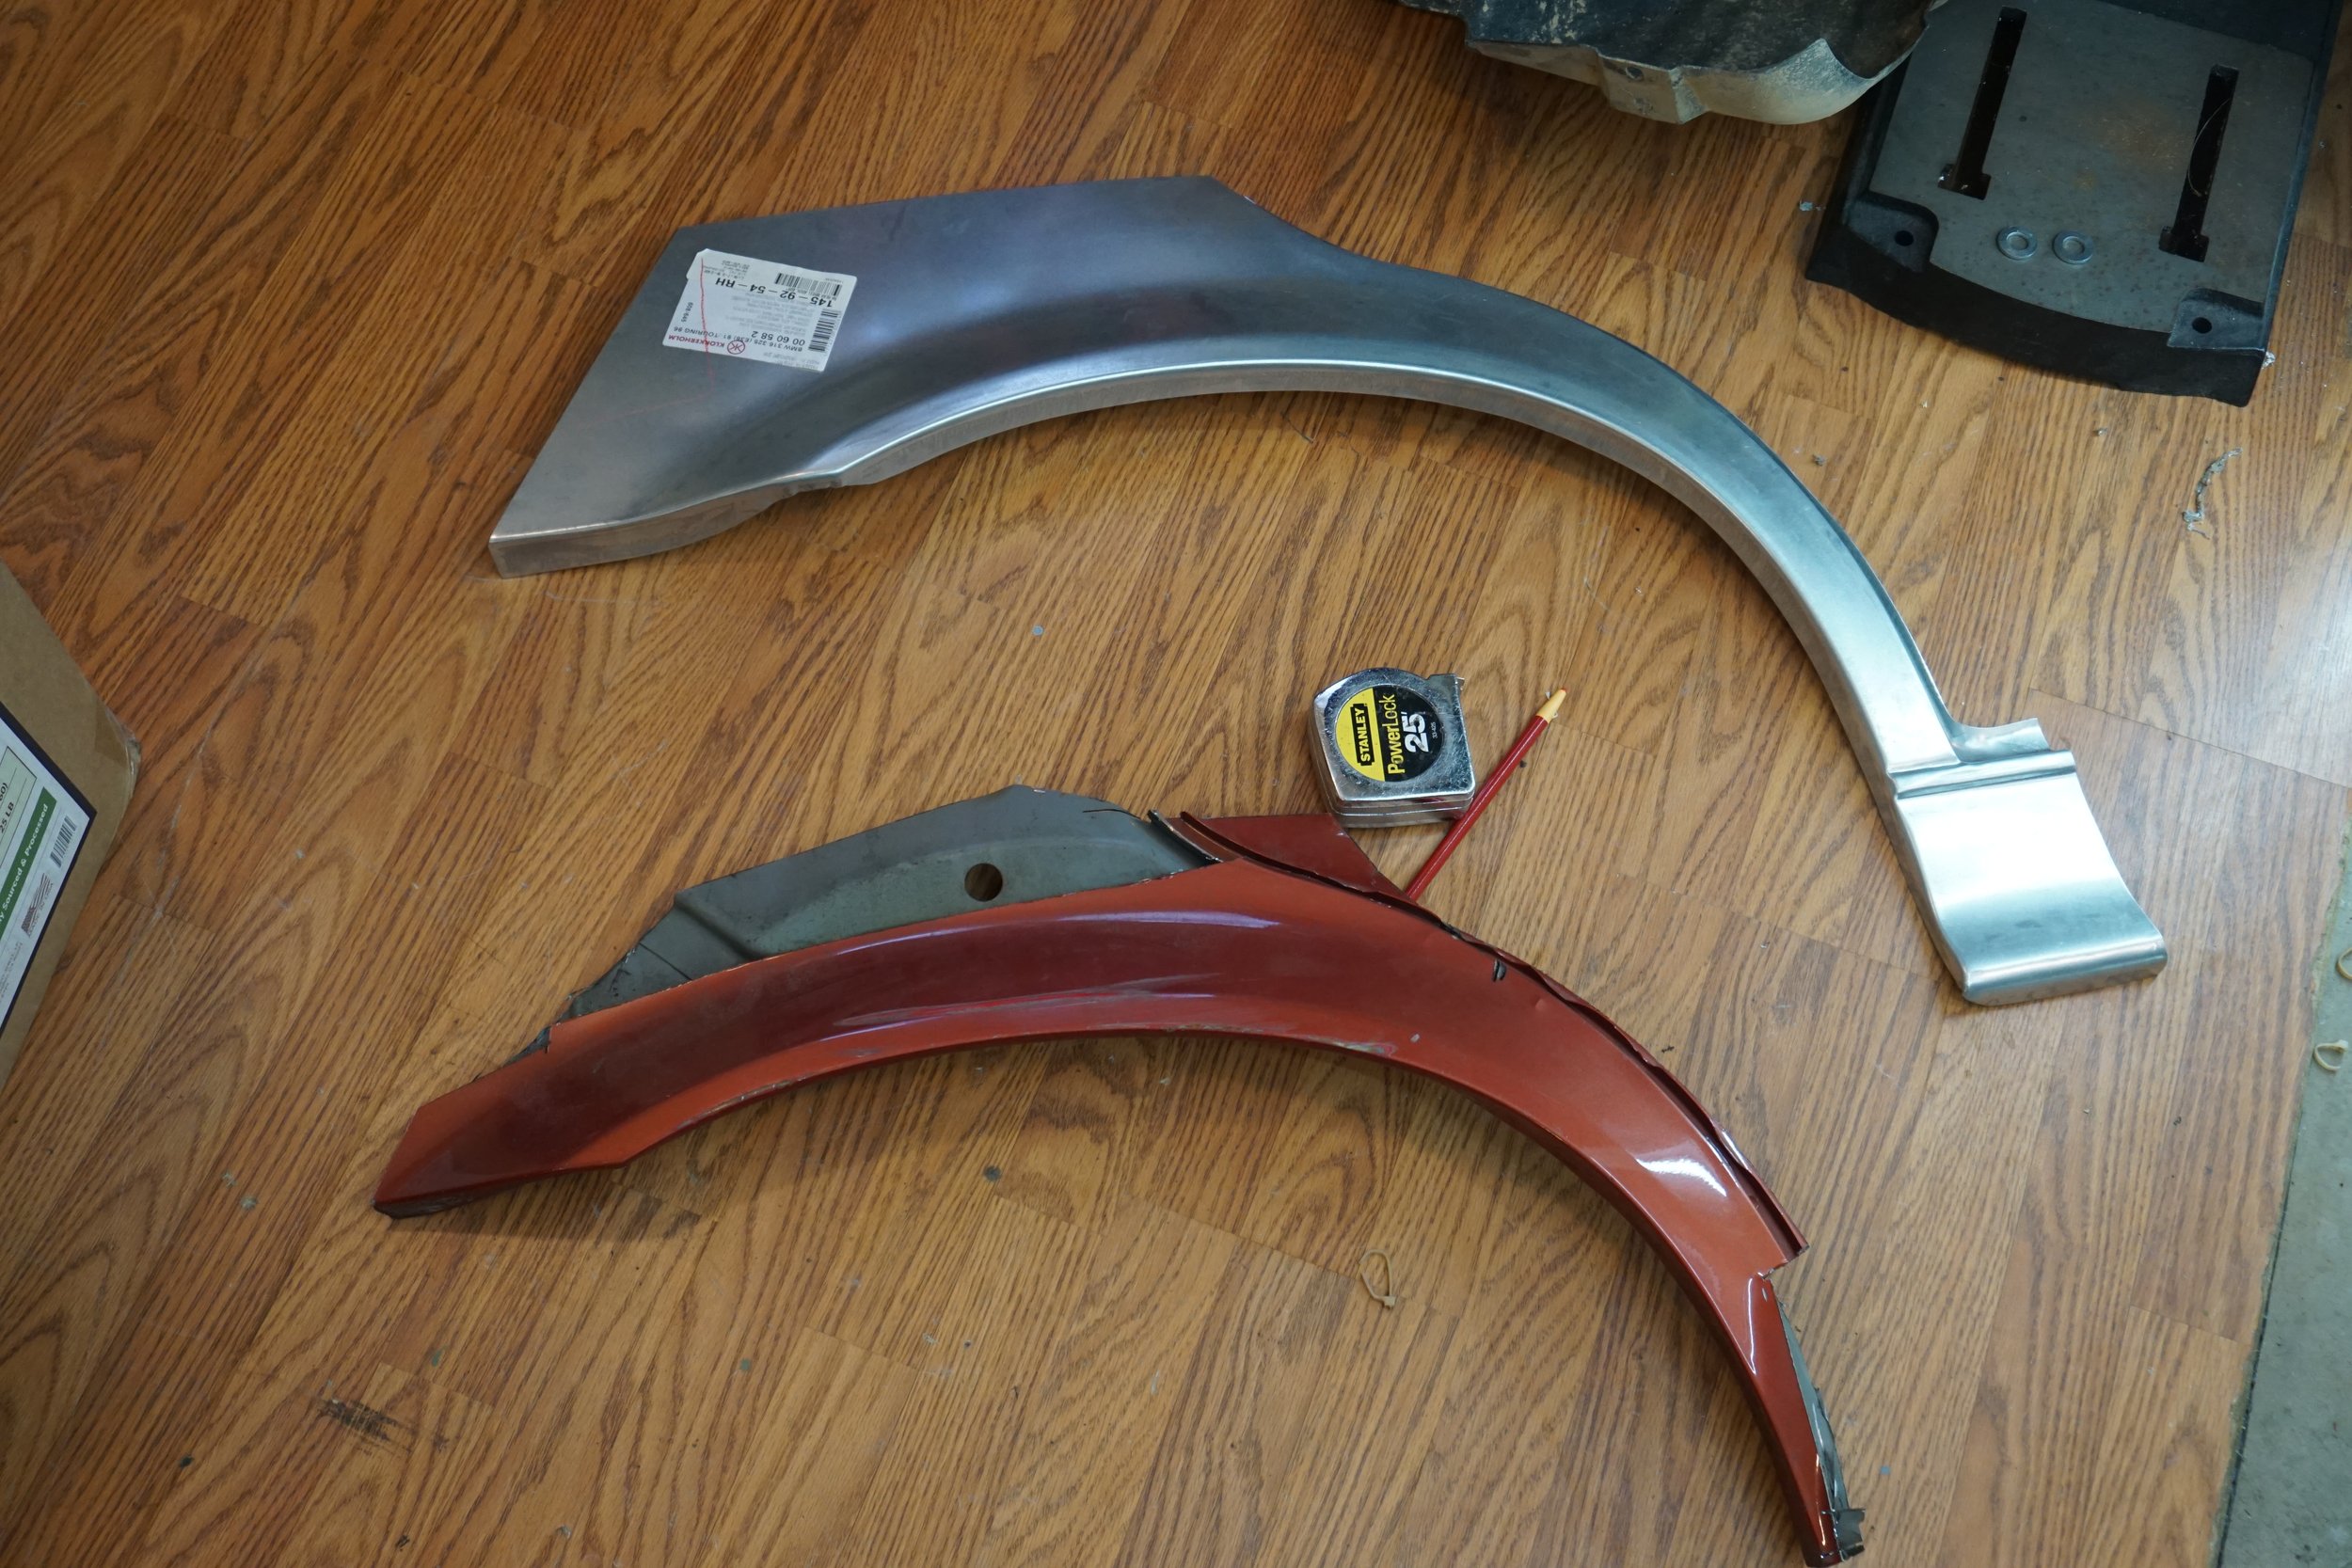
Well, my hack job lasted about three years, and the rust bubbles were starting to pop through again. I knew I needed to weld in fresh metal, so I bought a replacement outer piece and then found a local car being parted to get the inner piece from.
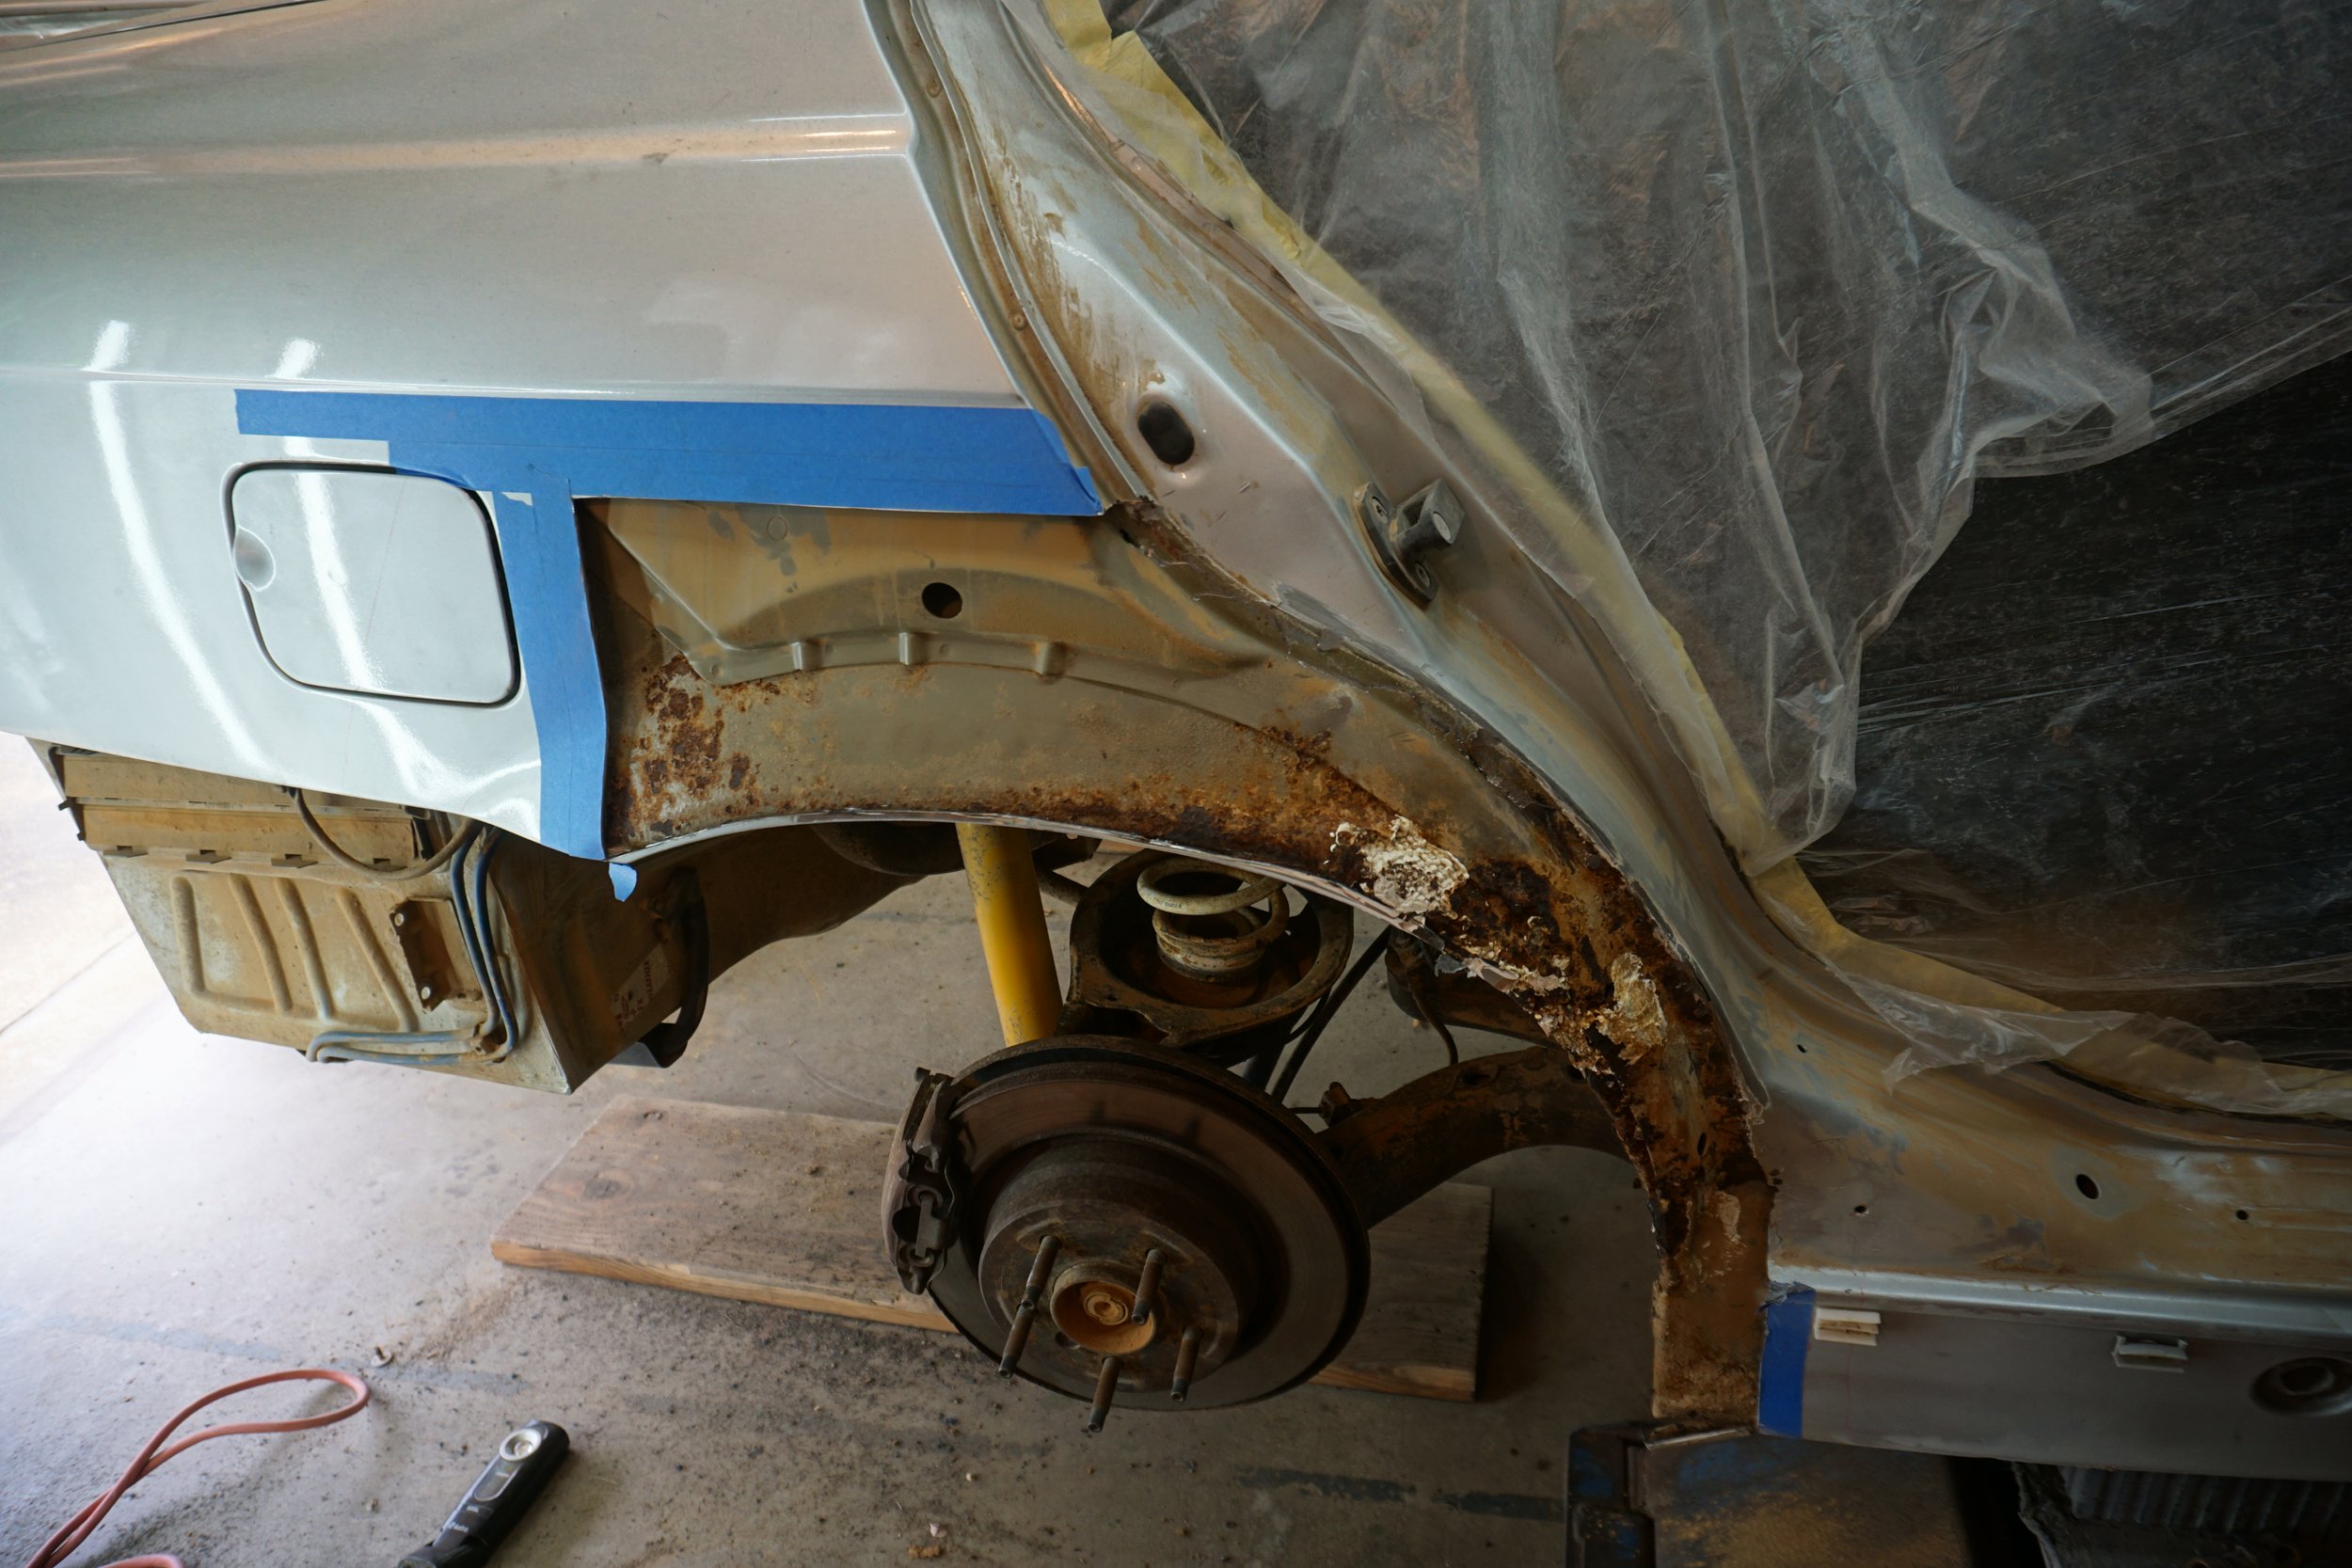
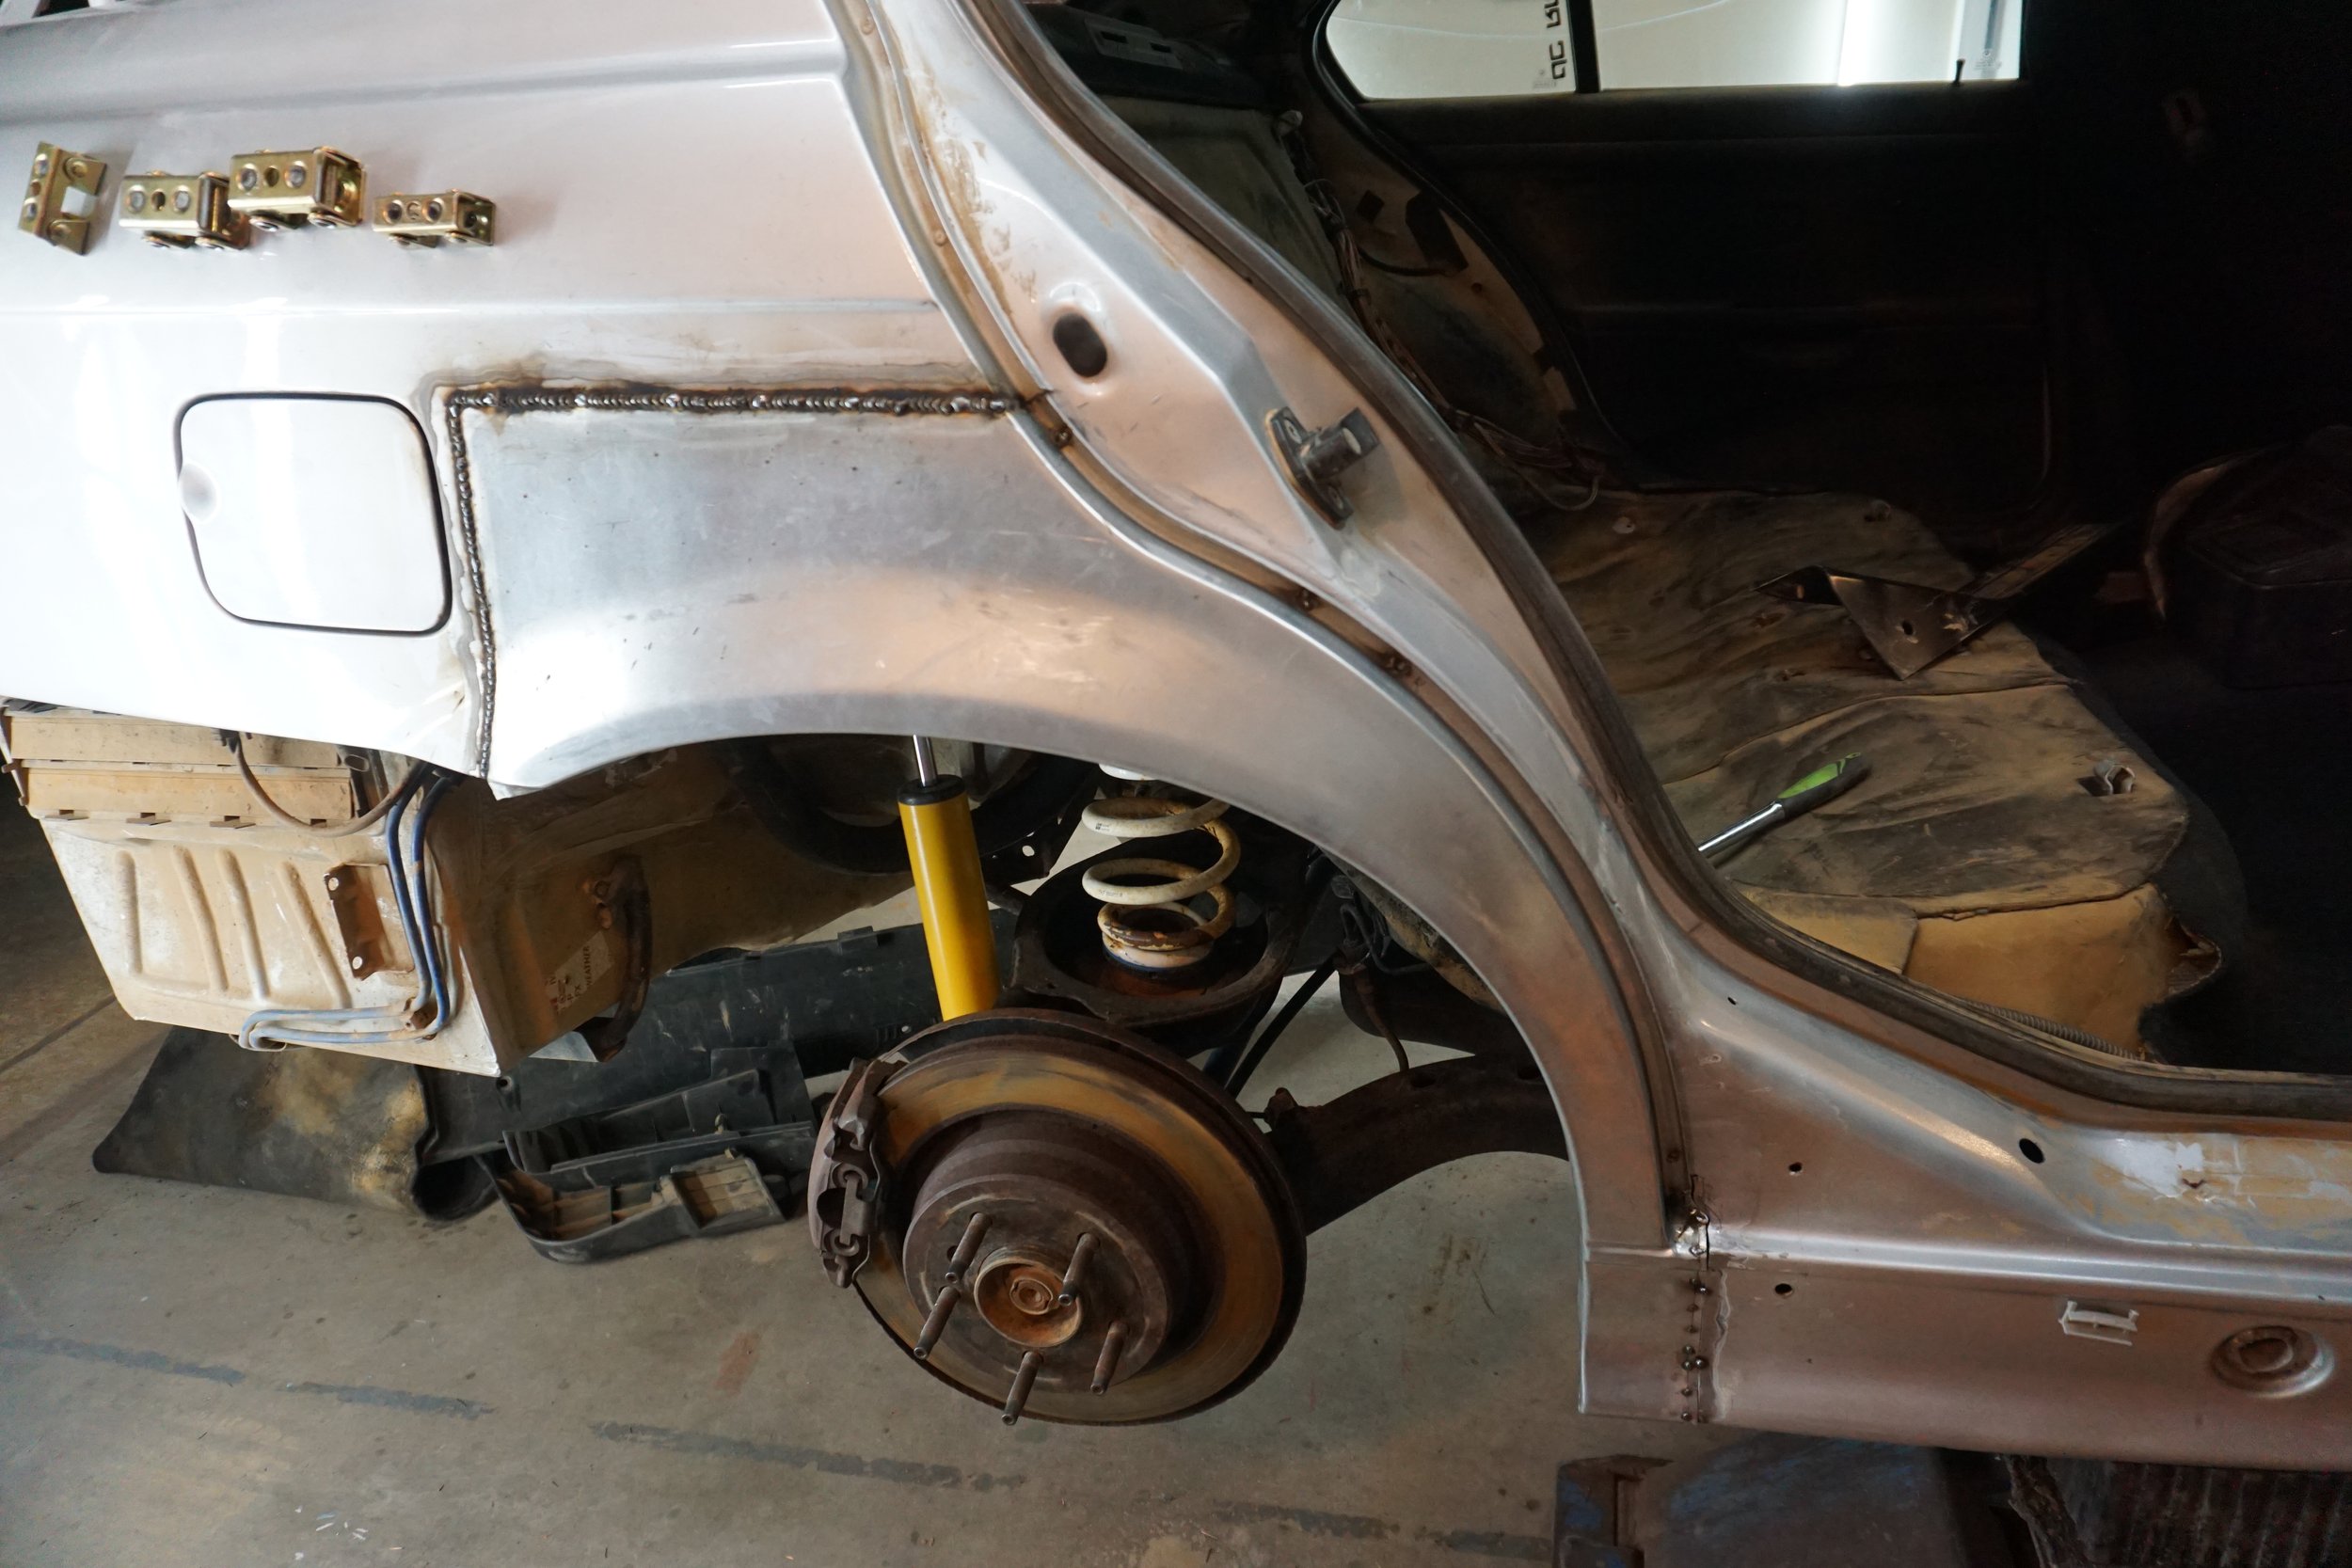
Things were looking pretty gnarly in there...
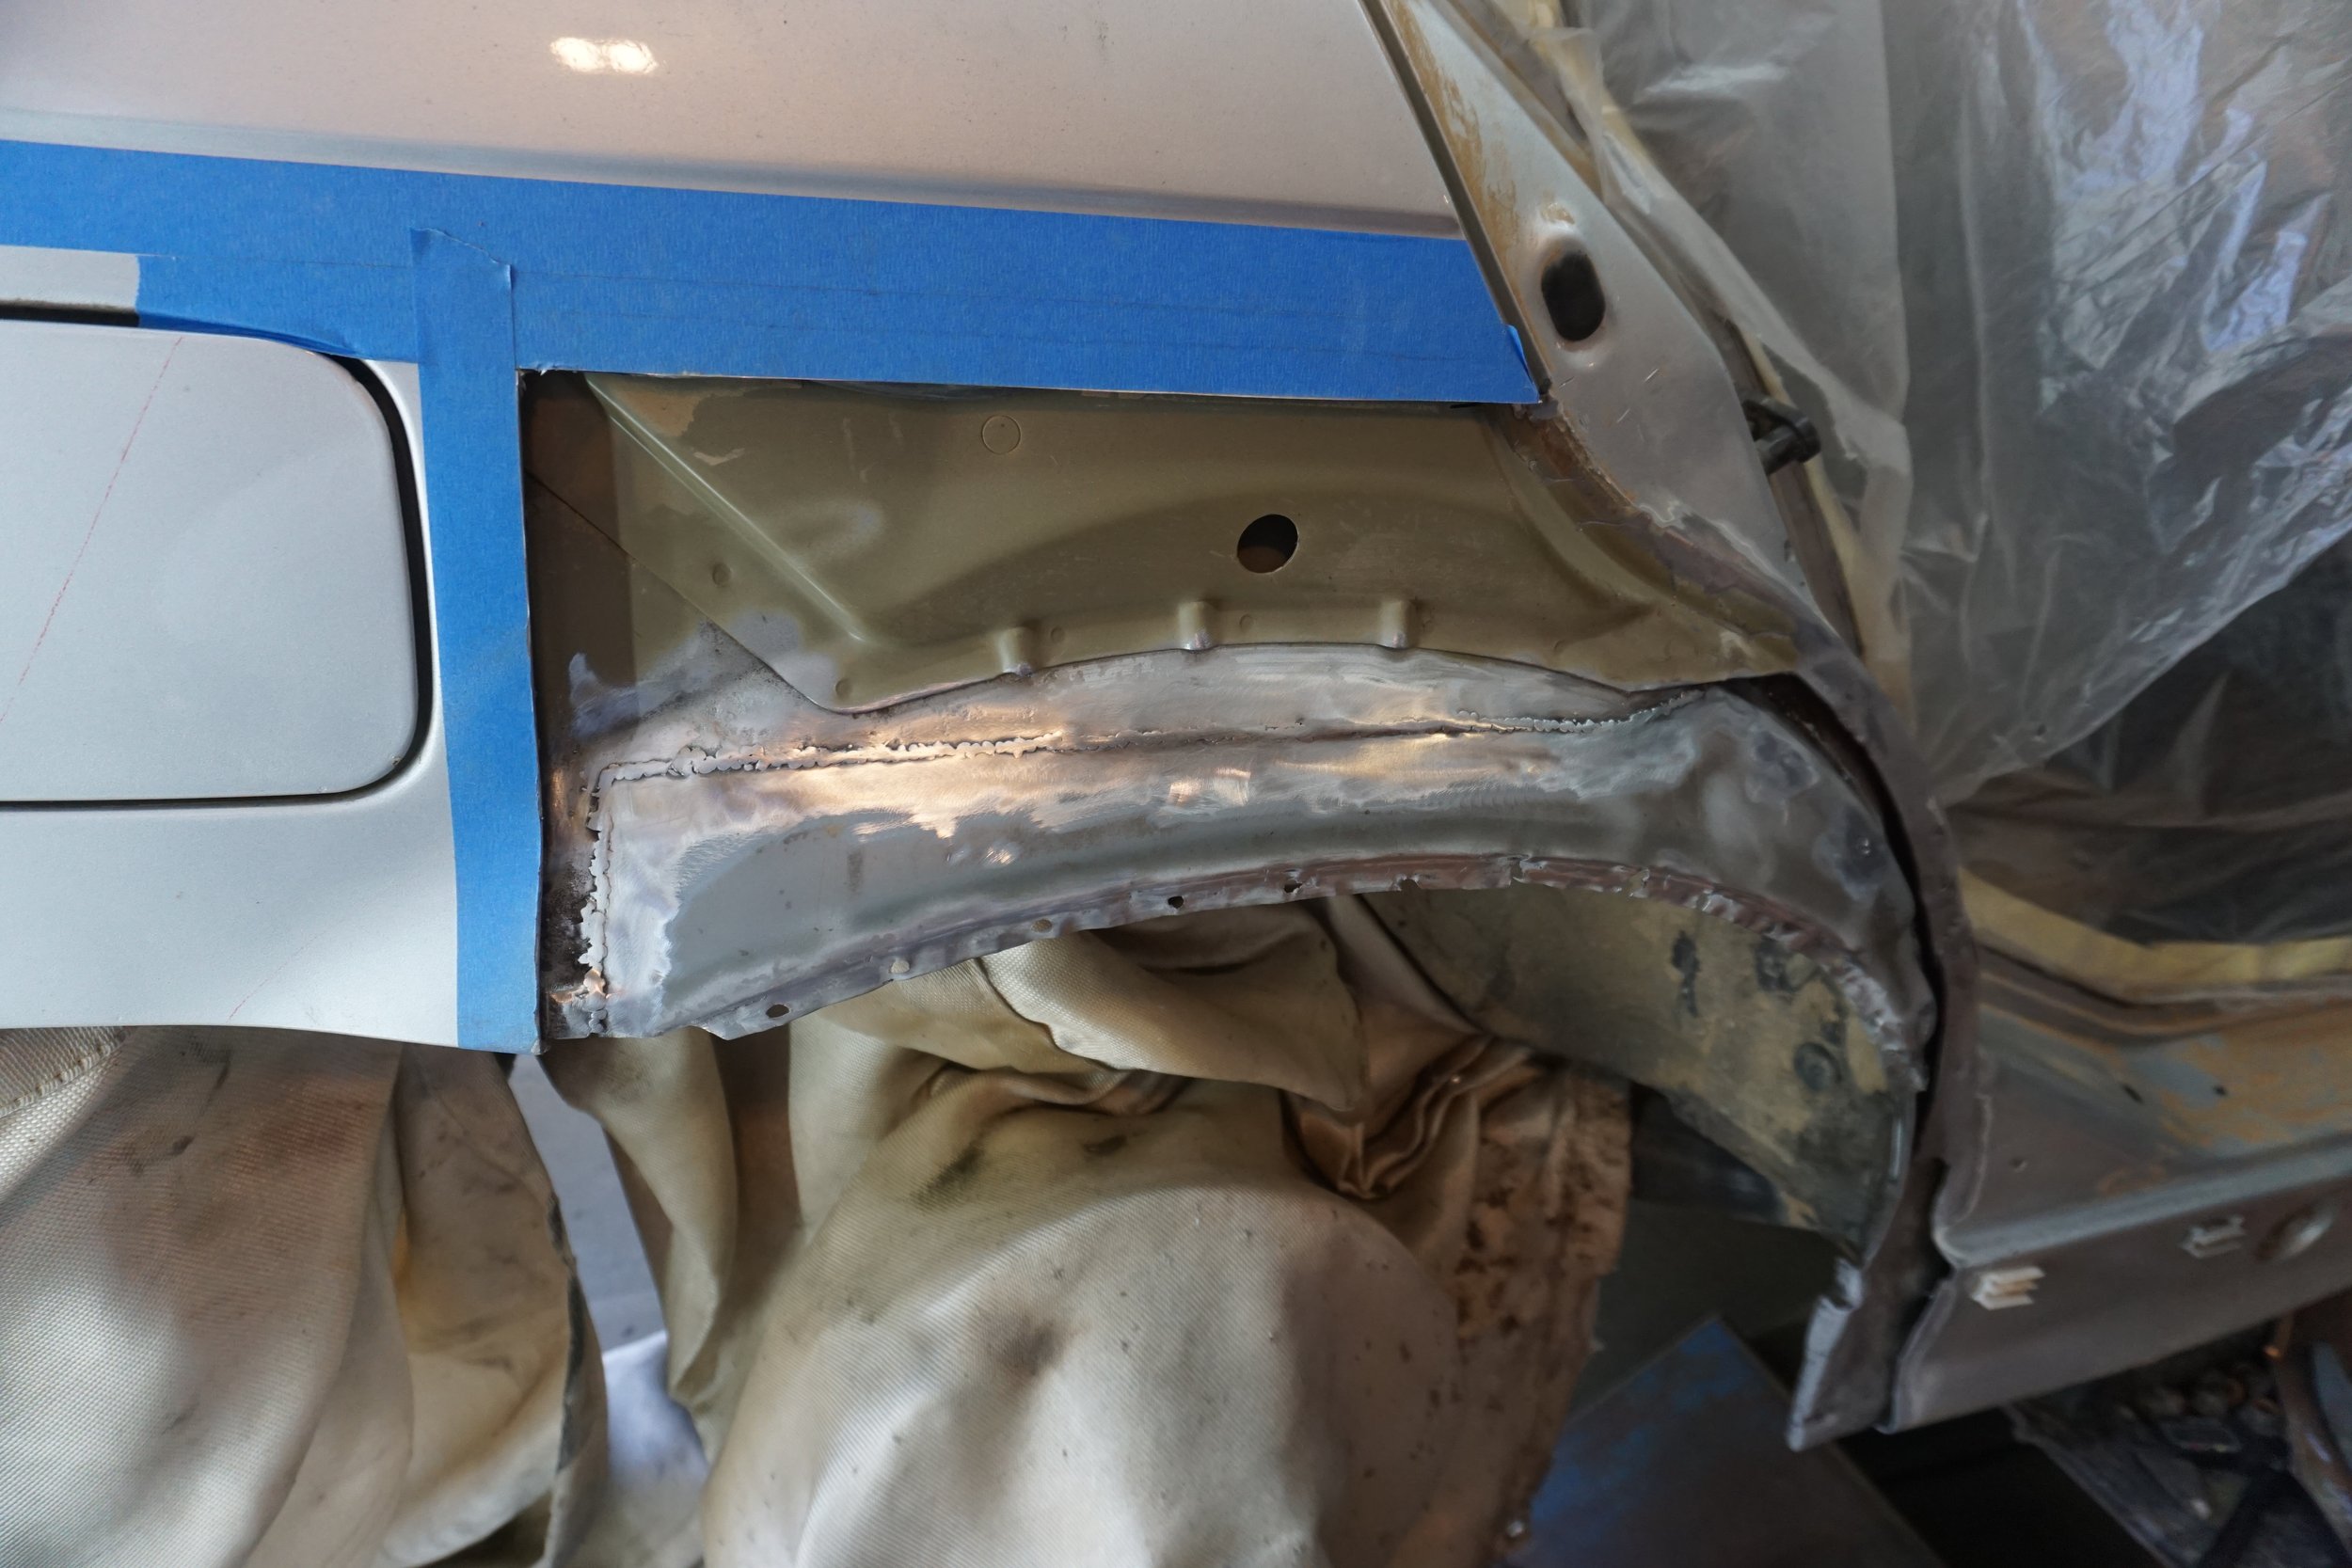
So I first welded in the "new" inner piece
And painted it with Mastercoat. NOTE: POR15 SUCKS, do not ever use POR15, it doesn't work. I'm so mad at myself for using it previously on my I30, I'll probably have to re-do all of that with Mastercoat eventually.
Skipping ahead many steps, I got the outer piece welded on. Getting it to line up with the door shut line and everything else was a big challenge.
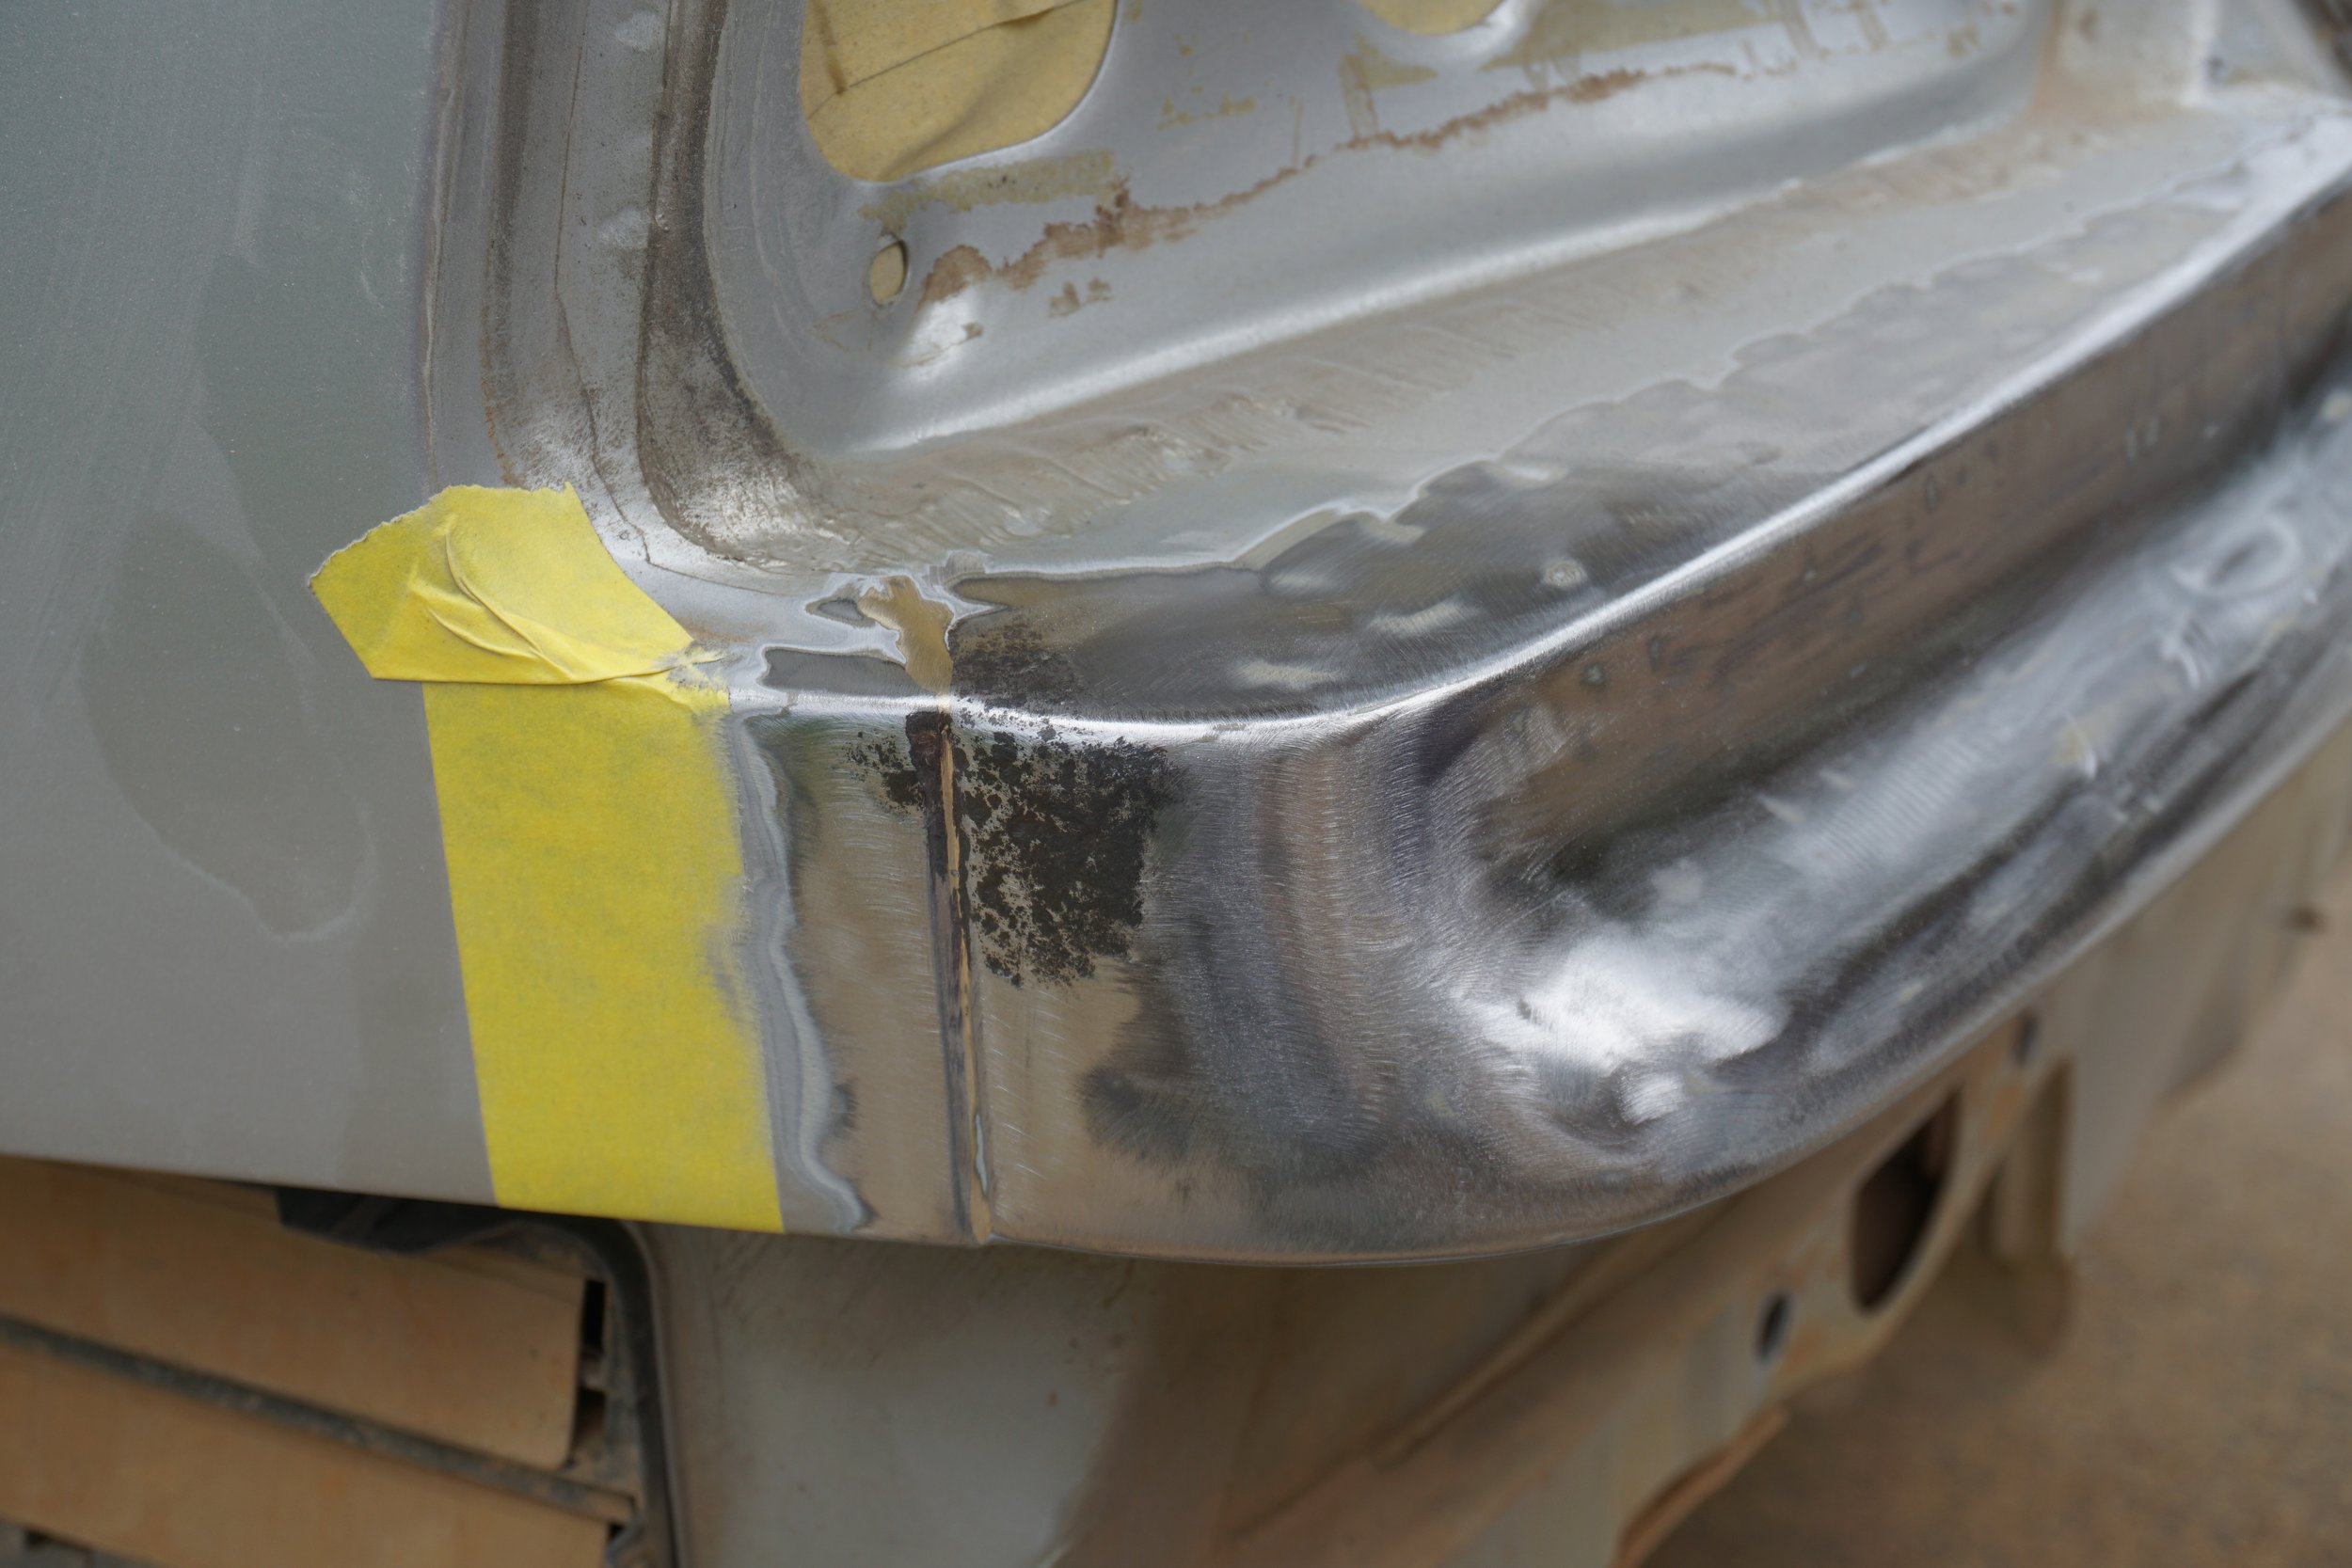
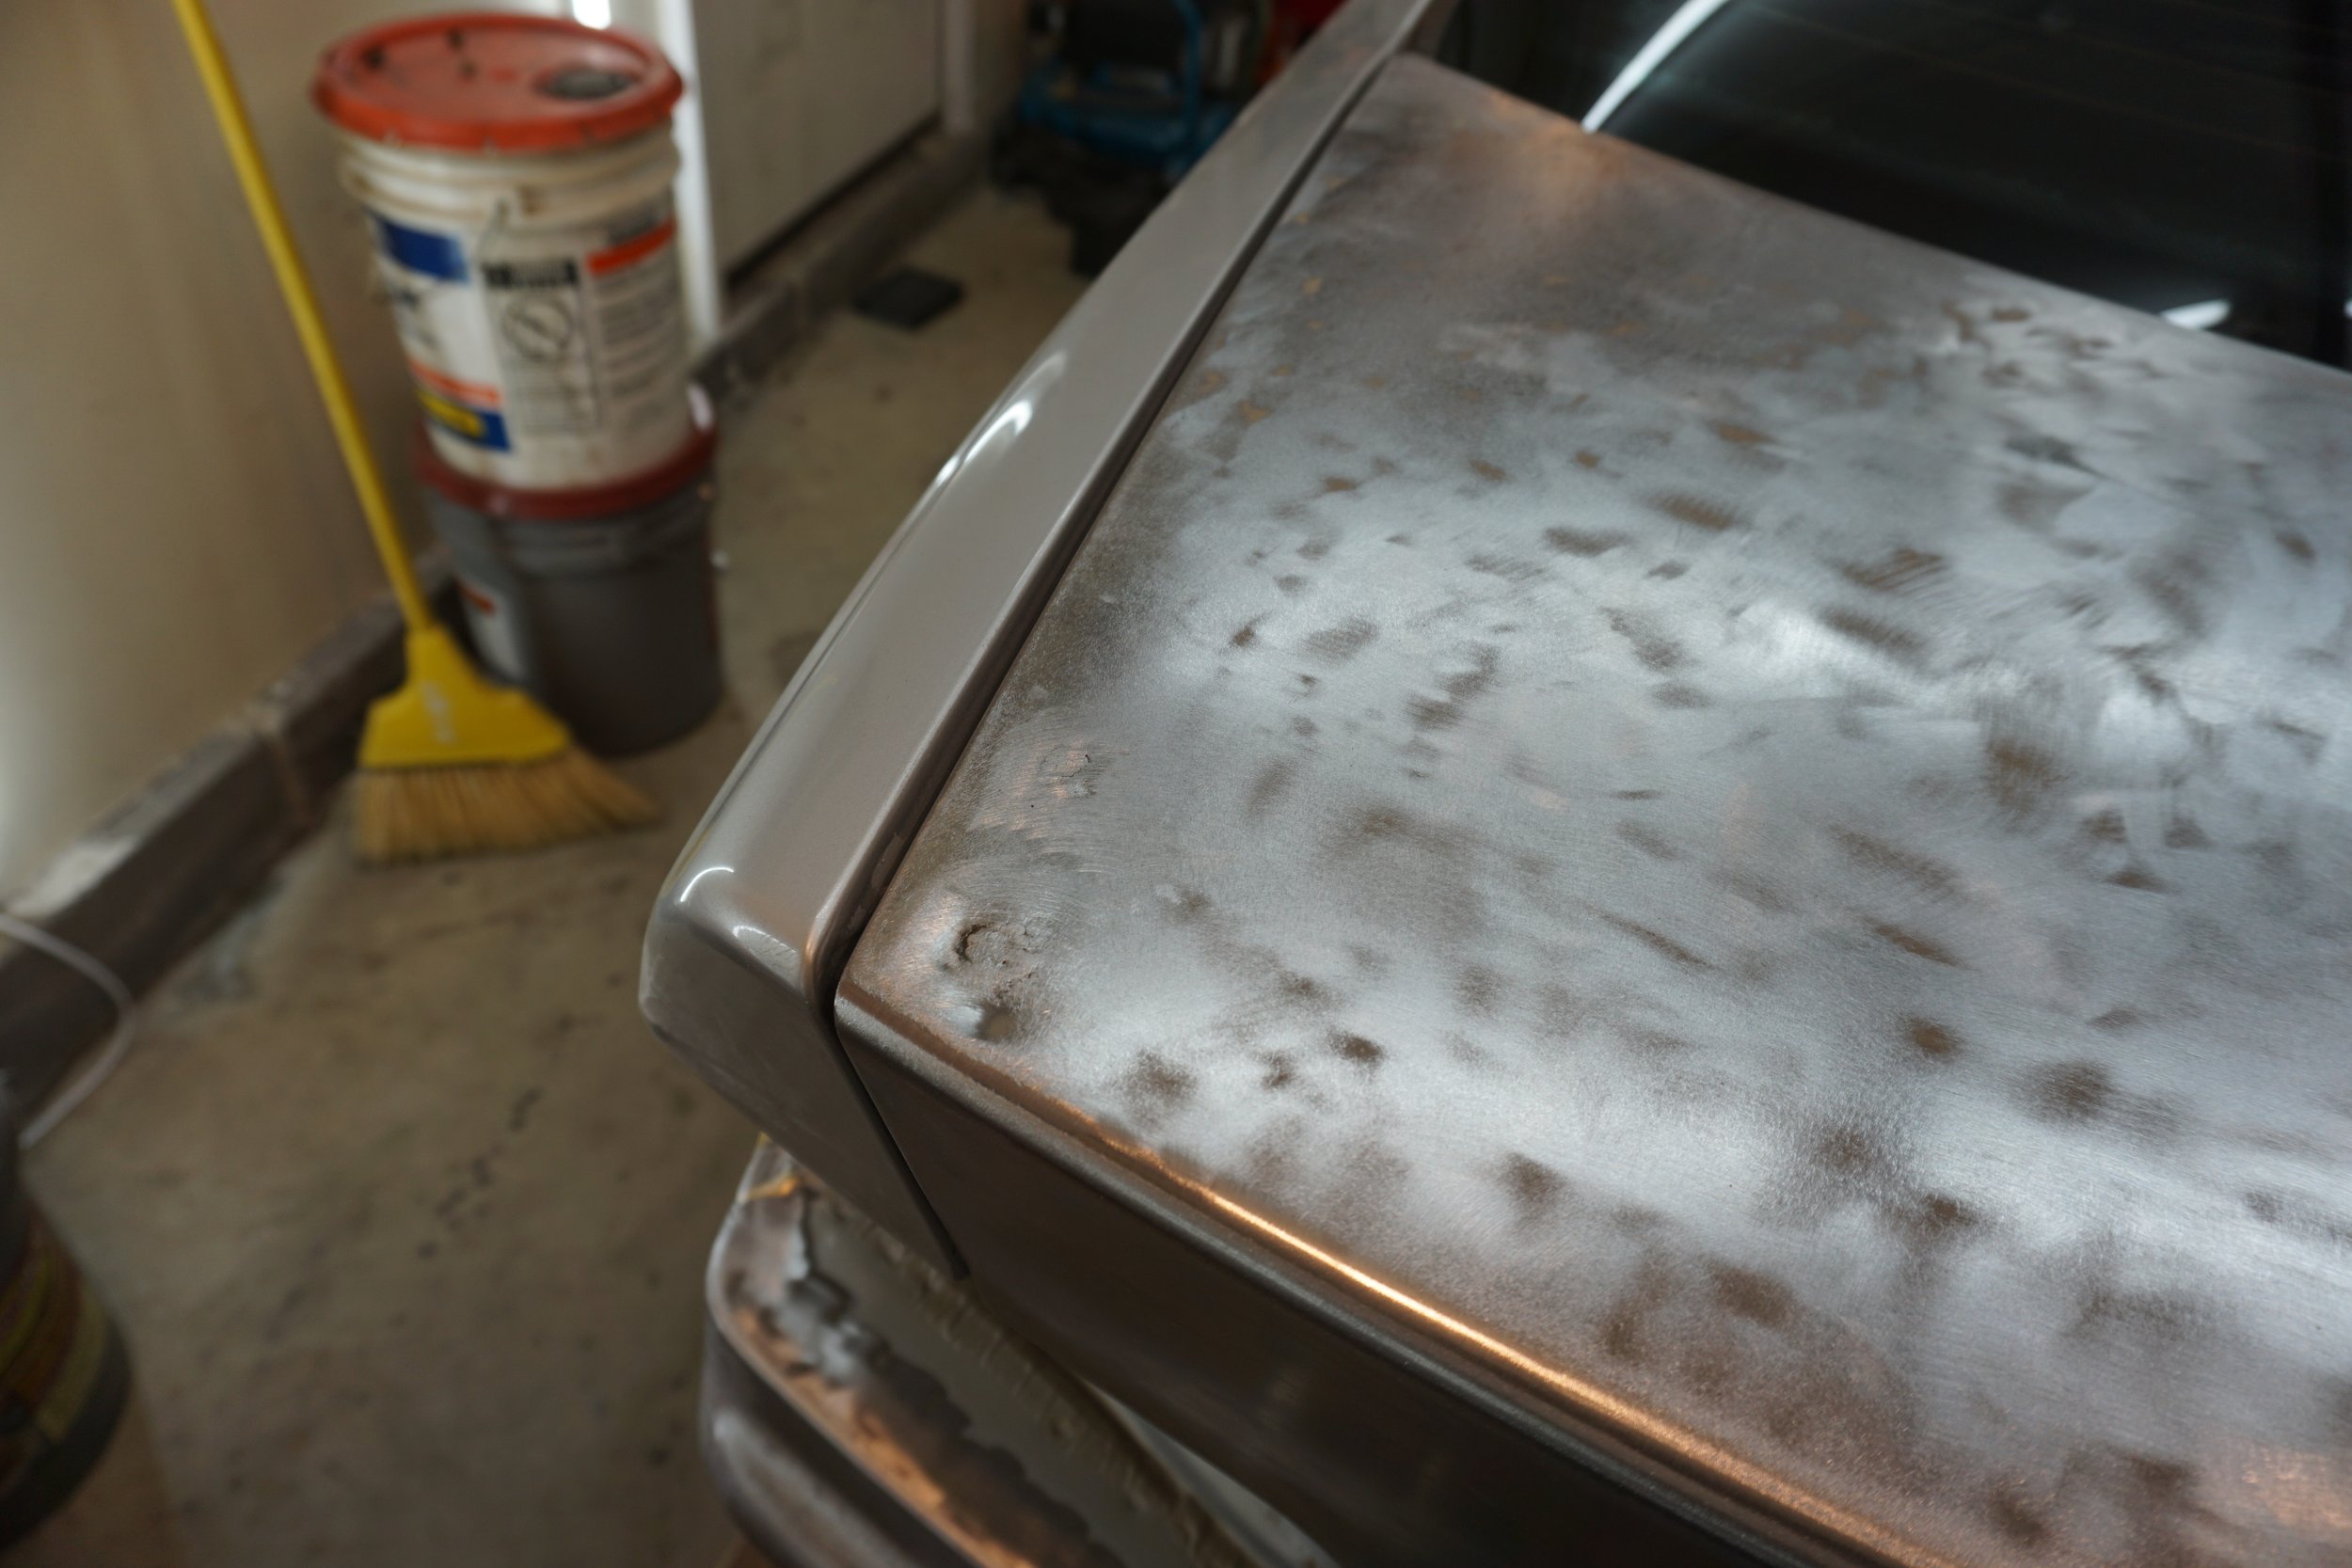
I got to use my blasting tank some more to get rid of some deep rust around one of the tail lights. It just goes into all the pits and blasts out all of the rust. It's awesome!
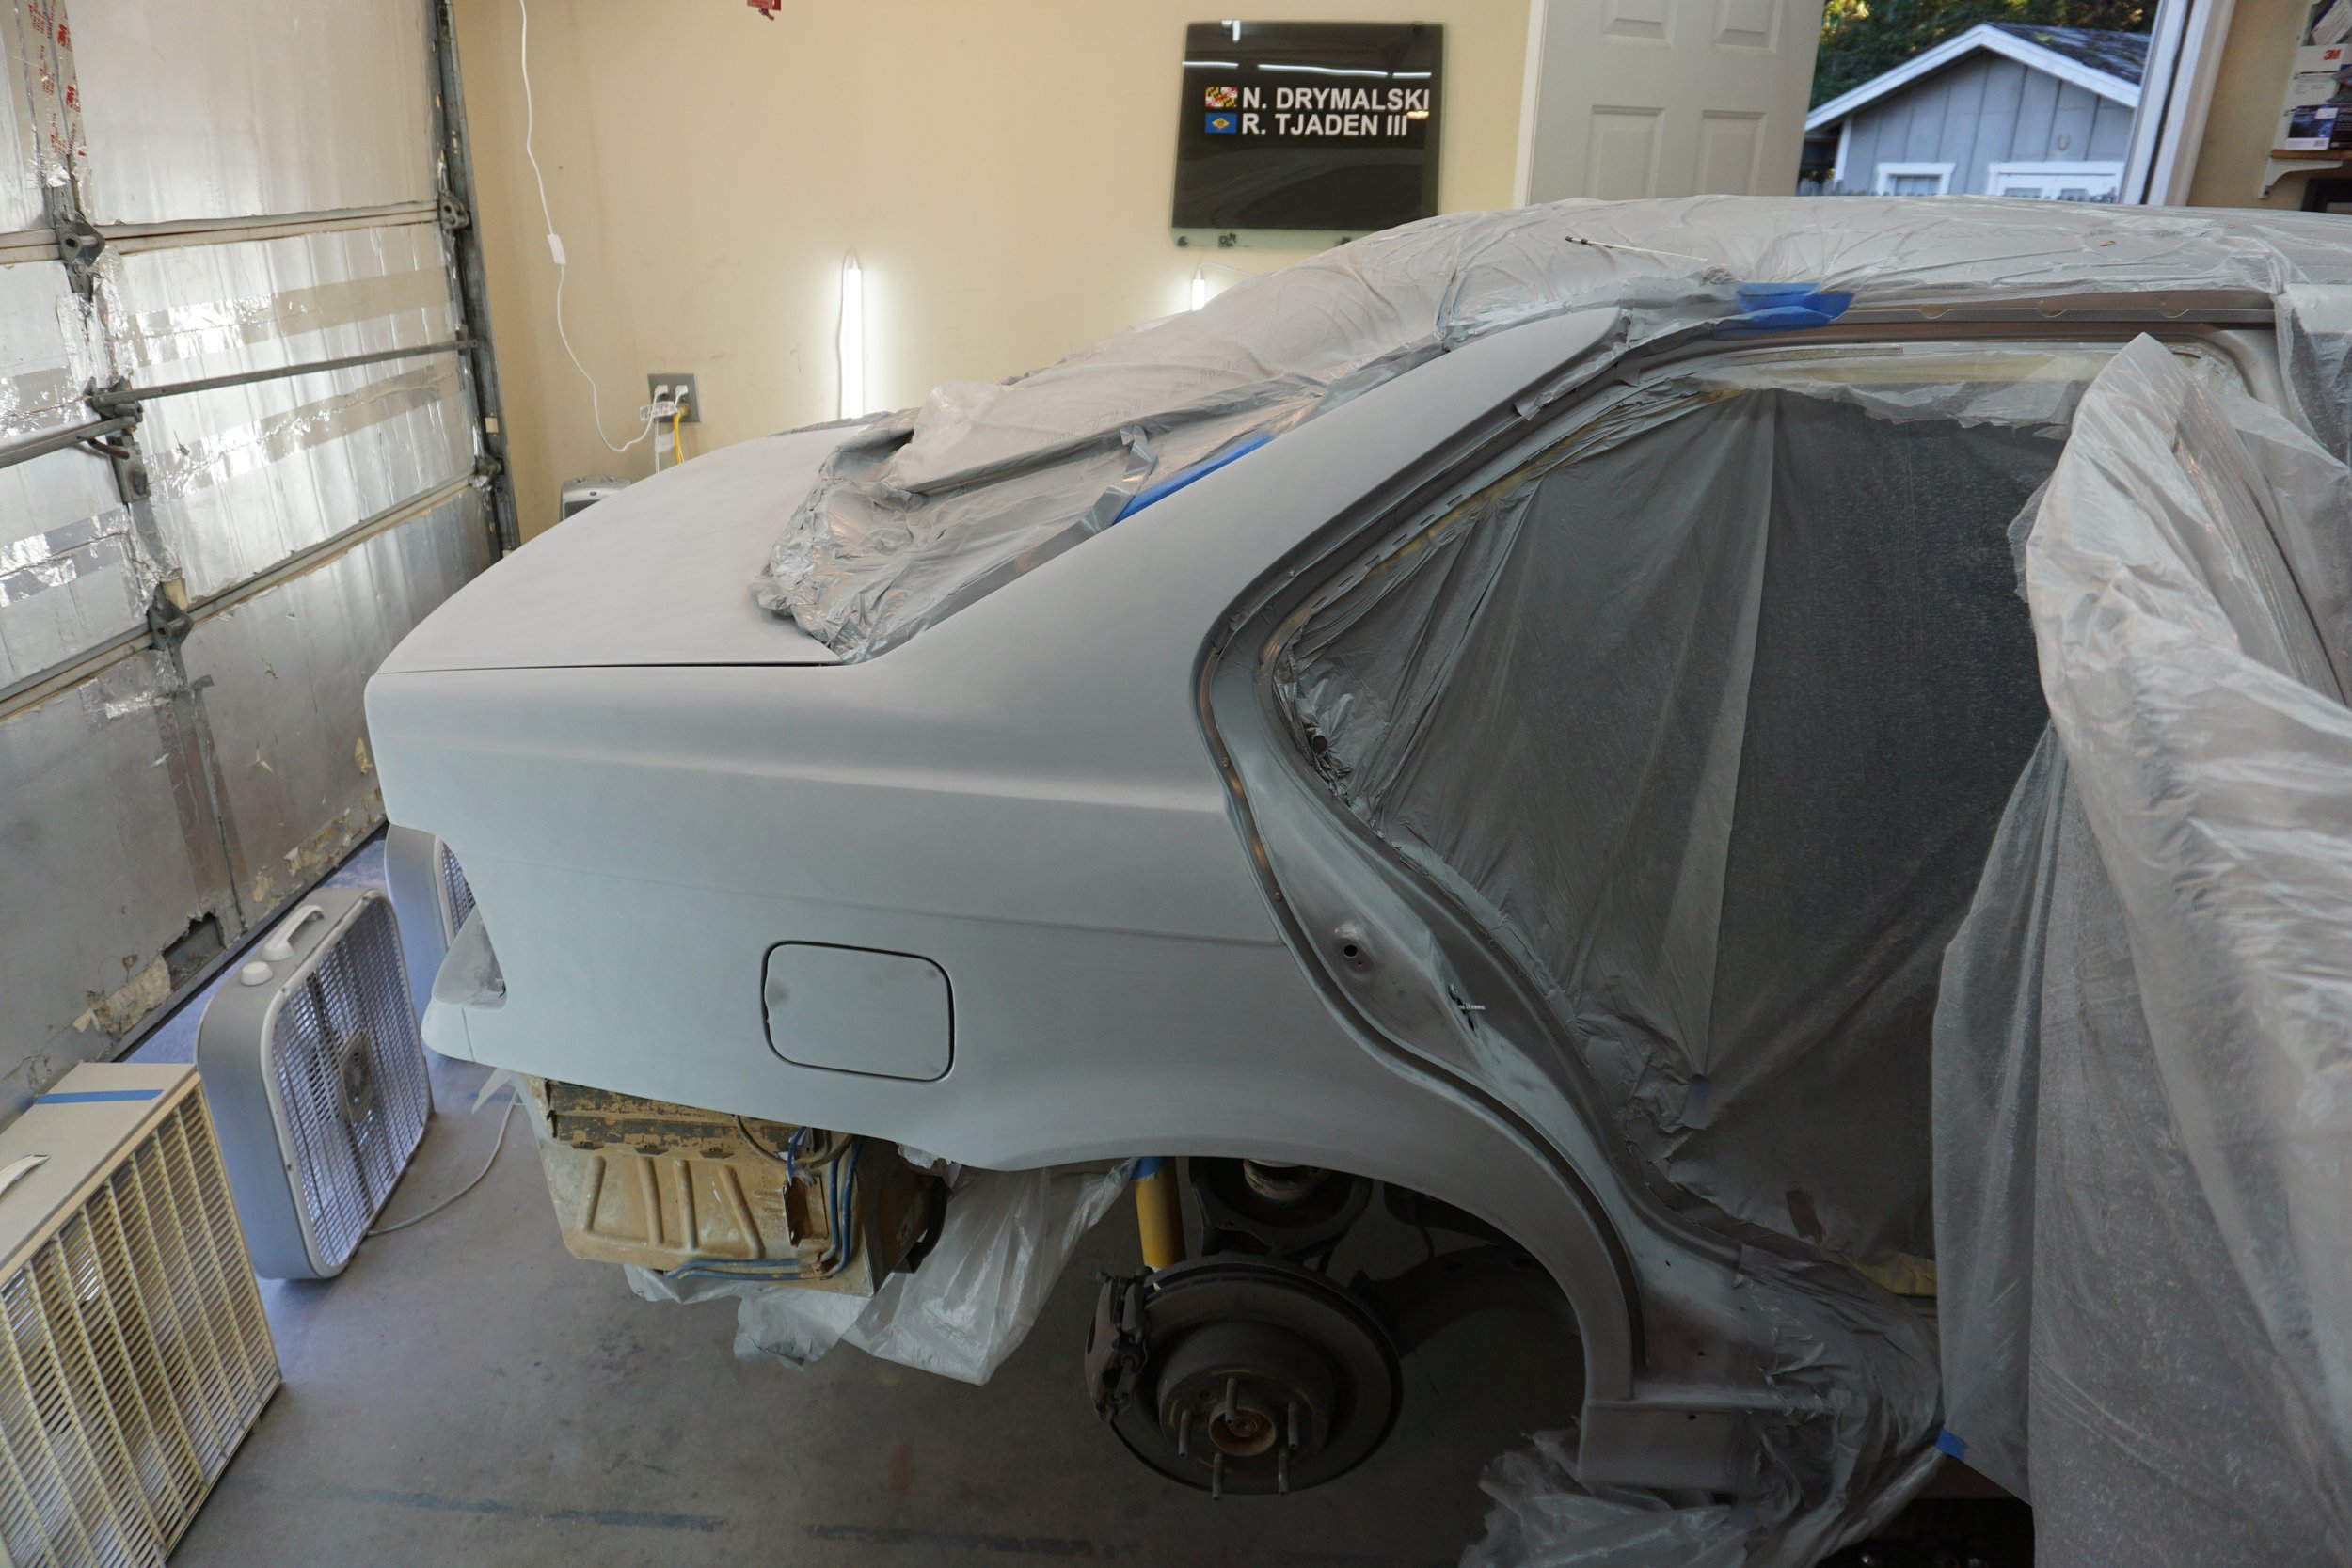
Got rid of the spoiler and welded up the holes:
Epoxy primer, body filler, more epoxy, 2K, and then reduced epoxy as a sealer, sanded to 600 and ready for base coat.
Base went on great
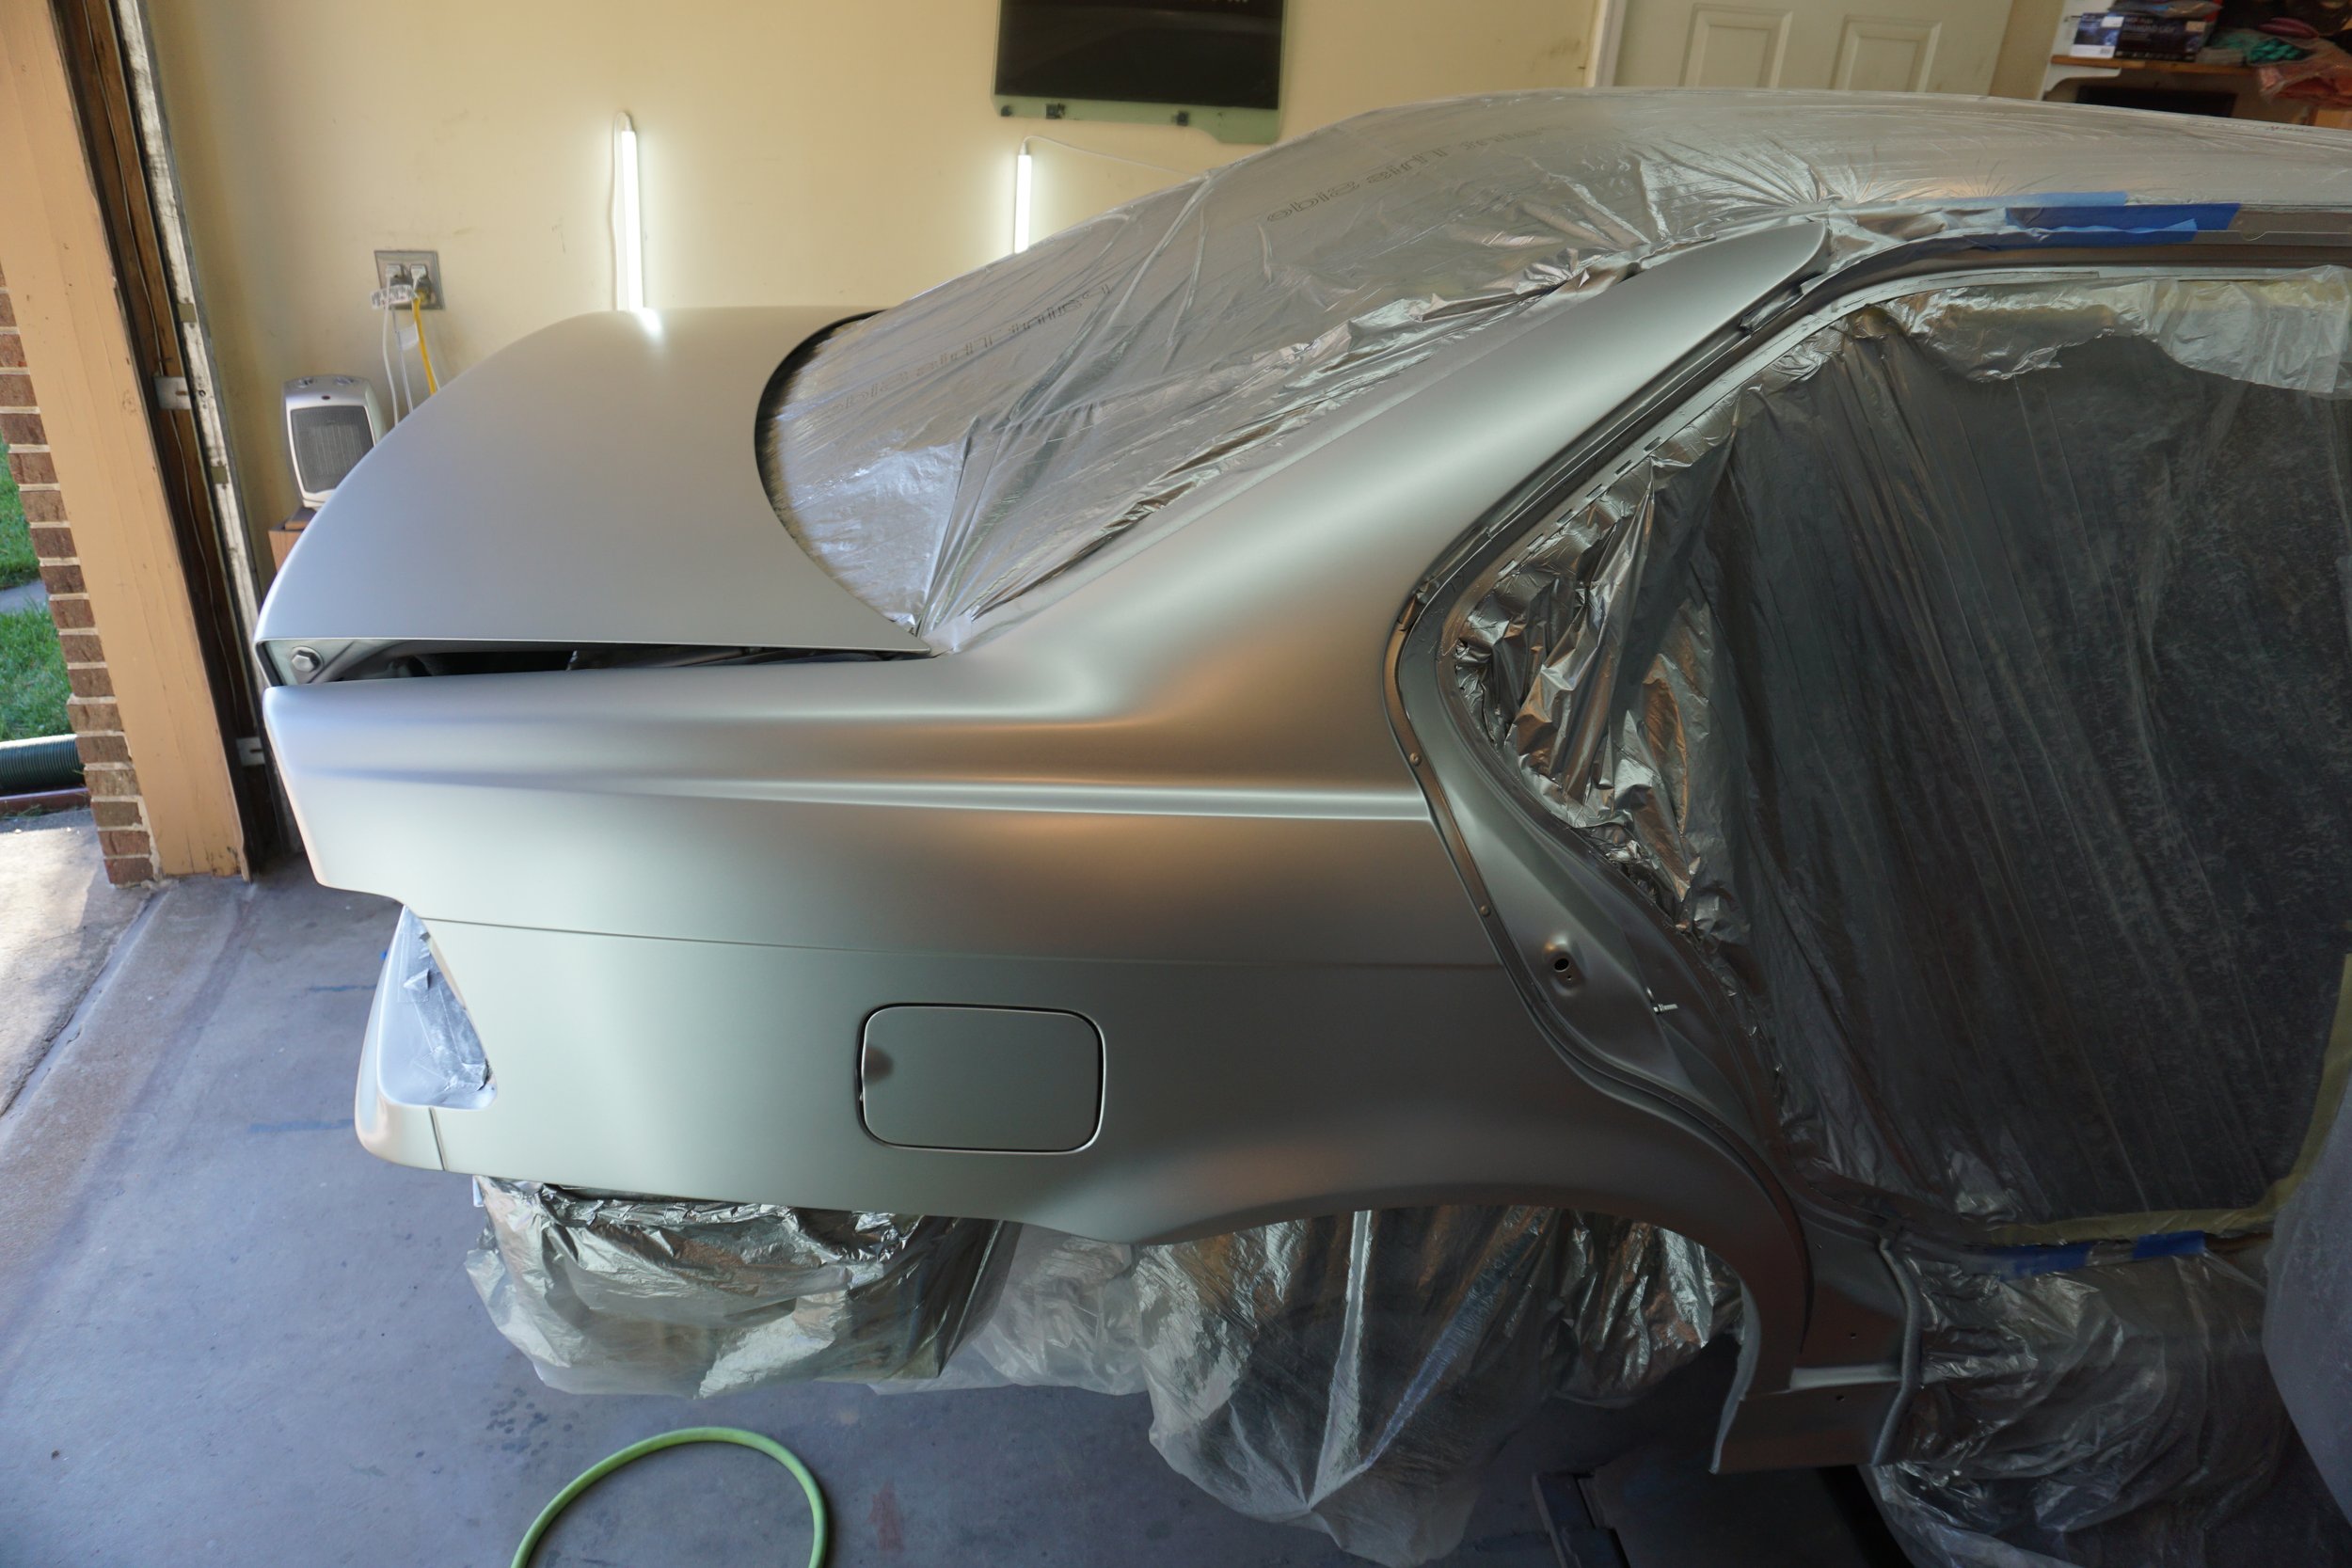
4 coats of clear didn't go on as smooth as I would have liked, but I can wet sand and polish it to my liking.
This will be good enough to tide me over for a few years until I can respray the whole car the factory Estoril Blue


This has all been practice for the work I need to do on the I30, which probably now won't happen until the spring since it seems the warm weather is all done for the year.
The PS rear quarter panel of the M3 was rusting pretty bad from an old accident that was never repaired properly. Three years ago I did a hack repair before I could weld or paint properly. Here's what it was looking like back then:
Well, my hack job lasted about three years, and the rust bubbles were starting to pop through again. I knew I needed to weld in fresh metal, so I bought a replacement outer piece and then found a local car being parted to get the inner piece from.
Things were looking pretty gnarly in there...
So I first welded in the "new" inner piece
And painted it with Mastercoat. NOTE: POR15 SUCKS, do not ever use POR15, it doesn't work. I'm so mad at myself for using it previously on my I30, I'll probably have to re-do all of that with Mastercoat eventually.
Skipping ahead many steps, I got the outer piece welded on. Getting it to line up with the door shut line and everything else was a big challenge.
I got to use my blasting tank some more to get rid of some deep rust around one of the tail lights. It just goes into all the pits and blasts out all of the rust. It's awesome!
Got rid of the spoiler and welded up the holes:
Epoxy primer, body filler, more epoxy, 2K, and then reduced epoxy as a sealer, sanded to 600 and ready for base coat.
Base went on great
4 coats of clear didn't go on as smooth as I would have liked, but I can wet sand and polish it to my liking.
This will be good enough to tide me over for a few years until I can respray the whole car the factory Estoril Blue
This has all been practice for the work I need to do on the I30, which probably now won't happen until the spring since it seems the warm weather is all done for the year.
11-21-2023, 03:13 PM
#897
Time to catch up on some racing results!
The second of three summer trackcross events was held back in July. I had just finished up installing the FA coilovers and the day before the event I had an appointment scheduled to get my car aligned. But the shop didn't book enough time for my car, so all they were able to do was to get the toe straightened out, so my camber and caster were all over the place and far from ideal. At the event we ran a new and terrible layout which really ruined the flow of the course. We also had a new entrant in the SF2 class, a new Elantra N. Long story short, I came in third in both the morning and afternoon behind the Elantra and Al in his GTI. The car didn't feel terrible, but it also didn't feel dialed in. It didn't help that in the afternoon I dropped a wheel off course coming out of one of the stupid cut-throughs they decided to use, which knocked my alignment even further off and caused the steering wheel to get cocked to the left pretty bad. So yeah, not exactly a great day, and not worth making a video over.
As described above, the alignment was dialed in perfectly for the third and final event of the summer season. Unfortunately the Elantra N didn't come back, so I couldn't get a more accurate comparison between the two cars. The car felt great aside from the ongoing brake pad knock back issue. The layout of the track we used didn't have any sections for me to use 4th gear, which somewhat equalized things between the slower and faster cars. I beat Al and his GTI by a nice margin, and came in 12th of out 88 cars.
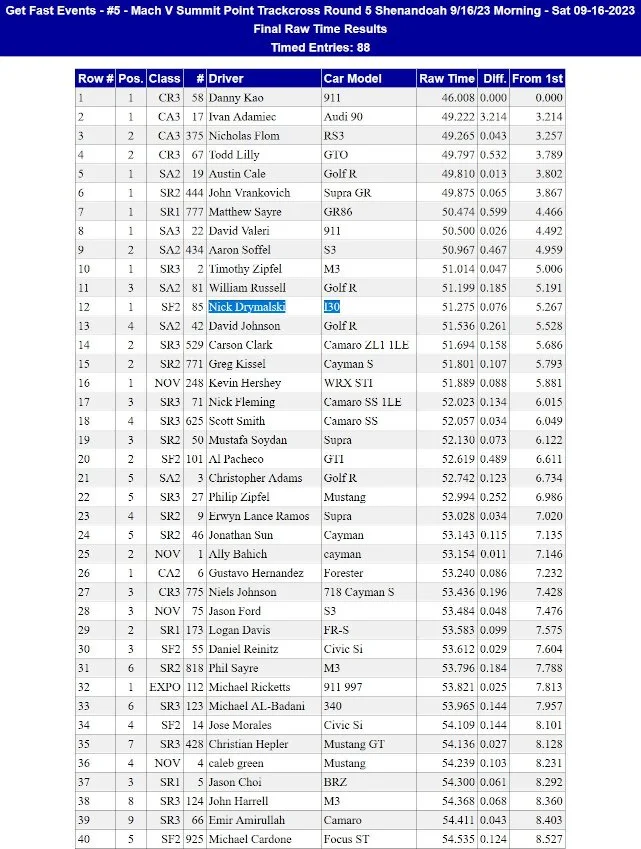
Hell, I beat a ZL1 1LE Camaro by over a second!
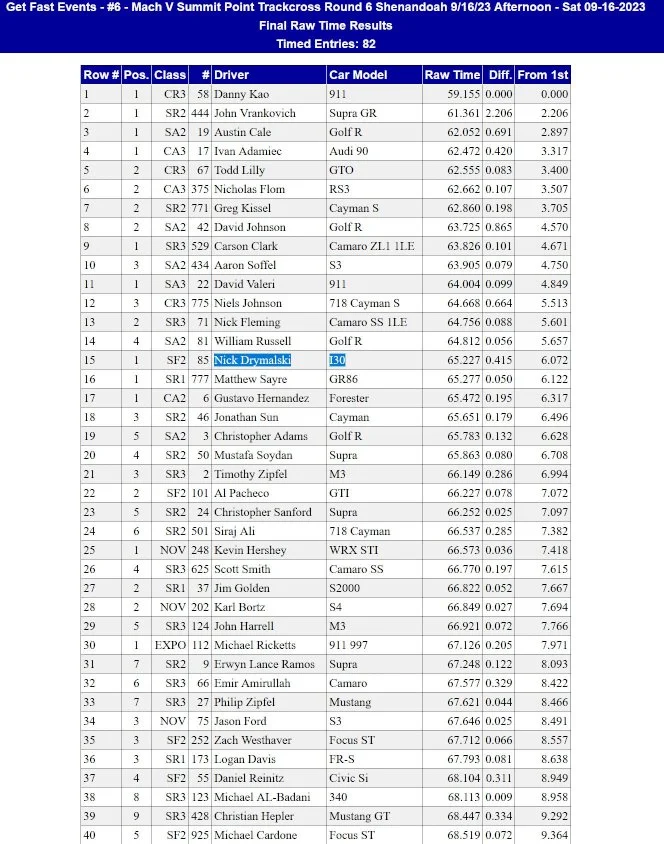
The course was flipped in the afternoon, and once again I took the win over Al in his GTI. I finished 15/82 overall, and won the championship for the summer season.
Check out the video!
Since then I did some research and determined I can install Wilwood knock back springs in my calipers without replacing the pistons, so I'm hoping to get that done before the first event of the winter season. I'm also still losing time to that very annoying stutter when I shift sometimes, which I know is costing me time out there. But if I get my braking issue fixed, which I think is possible, and I can improve the shifting problem, I should be close to breaking into the top 10 at these events. I'm still no closer to installing a 3rd gen 3.5 in the car, but that should certainly help too!
The second of three summer trackcross events was held back in July. I had just finished up installing the FA coilovers and the day before the event I had an appointment scheduled to get my car aligned. But the shop didn't book enough time for my car, so all they were able to do was to get the toe straightened out, so my camber and caster were all over the place and far from ideal. At the event we ran a new and terrible layout which really ruined the flow of the course. We also had a new entrant in the SF2 class, a new Elantra N. Long story short, I came in third in both the morning and afternoon behind the Elantra and Al in his GTI. The car didn't feel terrible, but it also didn't feel dialed in. It didn't help that in the afternoon I dropped a wheel off course coming out of one of the stupid cut-throughs they decided to use, which knocked my alignment even further off and caused the steering wheel to get cocked to the left pretty bad. So yeah, not exactly a great day, and not worth making a video over.
As described above, the alignment was dialed in perfectly for the third and final event of the summer season. Unfortunately the Elantra N didn't come back, so I couldn't get a more accurate comparison between the two cars. The car felt great aside from the ongoing brake pad knock back issue. The layout of the track we used didn't have any sections for me to use 4th gear, which somewhat equalized things between the slower and faster cars. I beat Al and his GTI by a nice margin, and came in 12th of out 88 cars.
Hell, I beat a ZL1 1LE Camaro by over a second!
The course was flipped in the afternoon, and once again I took the win over Al in his GTI. I finished 15/82 overall, and won the championship for the summer season.
Check out the video!
Since then I did some research and determined I can install Wilwood knock back springs in my calipers without replacing the pistons, so I'm hoping to get that done before the first event of the winter season. I'm also still losing time to that very annoying stutter when I shift sometimes, which I know is costing me time out there. But if I get my braking issue fixed, which I think is possible, and I can improve the shifting problem, I should be close to breaking into the top 10 at these events. I'm still no closer to installing a 3rd gen 3.5 in the car, but that should certainly help too!
Last edited by 95maxrider; 11-21-2023 at 03:18 PM.
11-22-2023, 11:09 AM
#899
Nothing wrong sharing video's of stupid errors or mechanical challenges, often those are more entertaining Oh, say hi to Logan Davis at the next event for me. He's coming out west here often to play in our larger events in IL, IN, and MO.
Oh, say hi to Logan Davis at the next event for me. He's coming out west here often to play in our larger events in IL, IN, and MO.
11-23-2023, 08:09 AM
#900
I've been dealing with an extremely annoying issue for a long time, so I finally made a thread about it instead of whining about it in this thread. If you have any ideas about what may be causing my problem with the car stuttering after quick shifts, please post up in my thread about the topic.
https://maxima.org/forums/general-ma...ml#post9256219
Thanks!
https://maxima.org/forums/general-ma...ml#post9256219
Thanks!
12-15-2023, 02:54 PM
#901
I've got a few little things I figured I'd post up while I prepare the video from the last race.
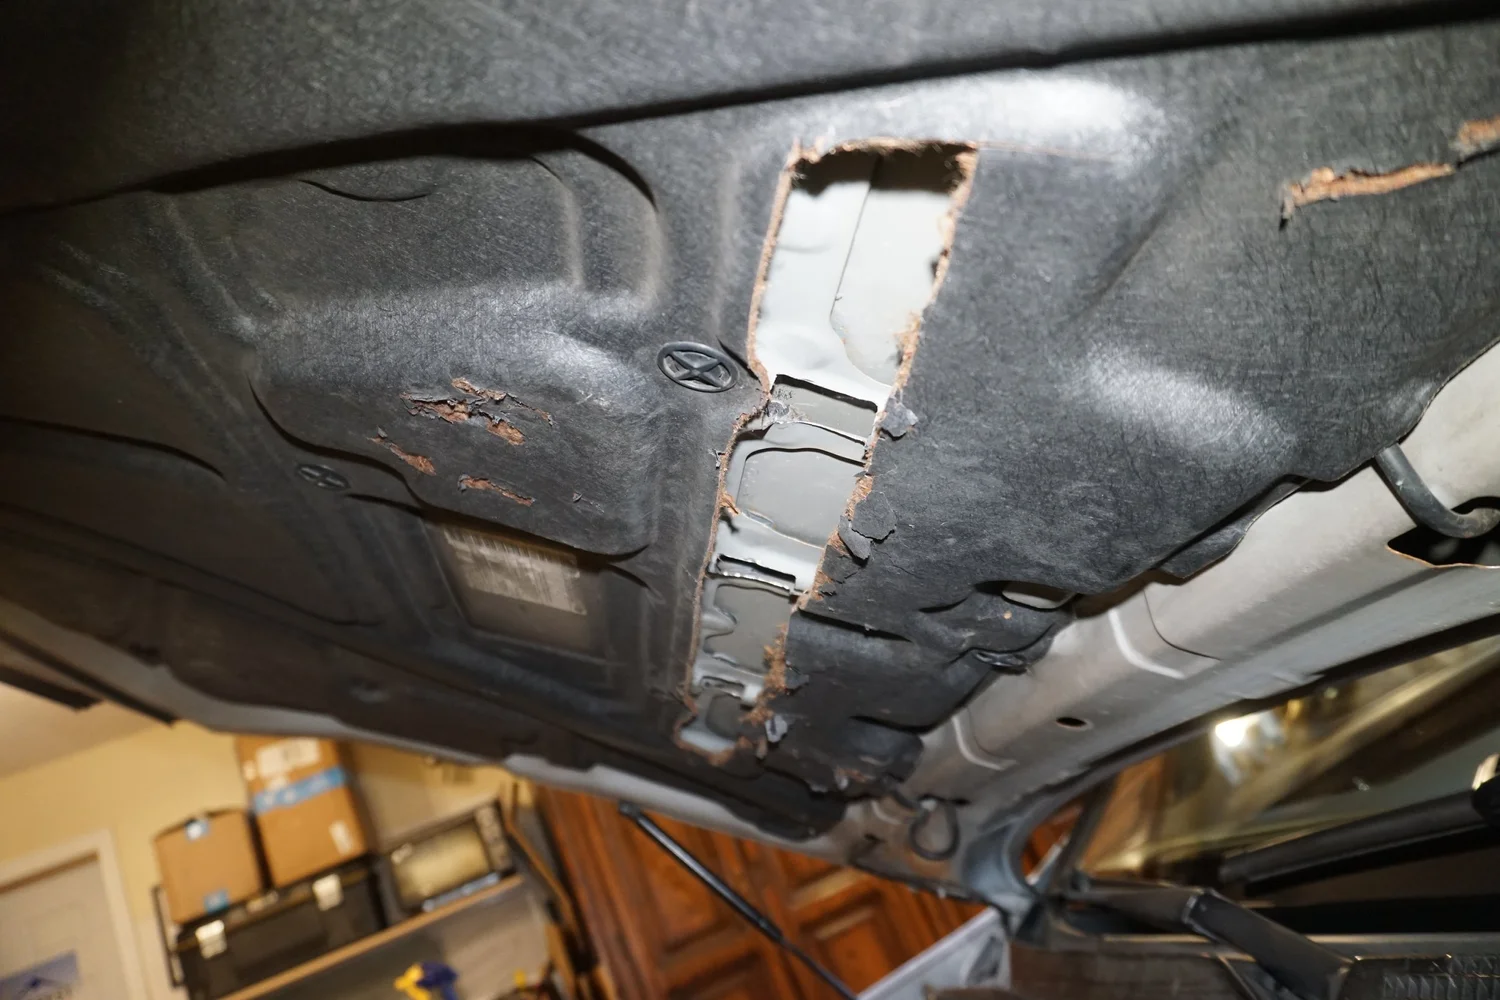
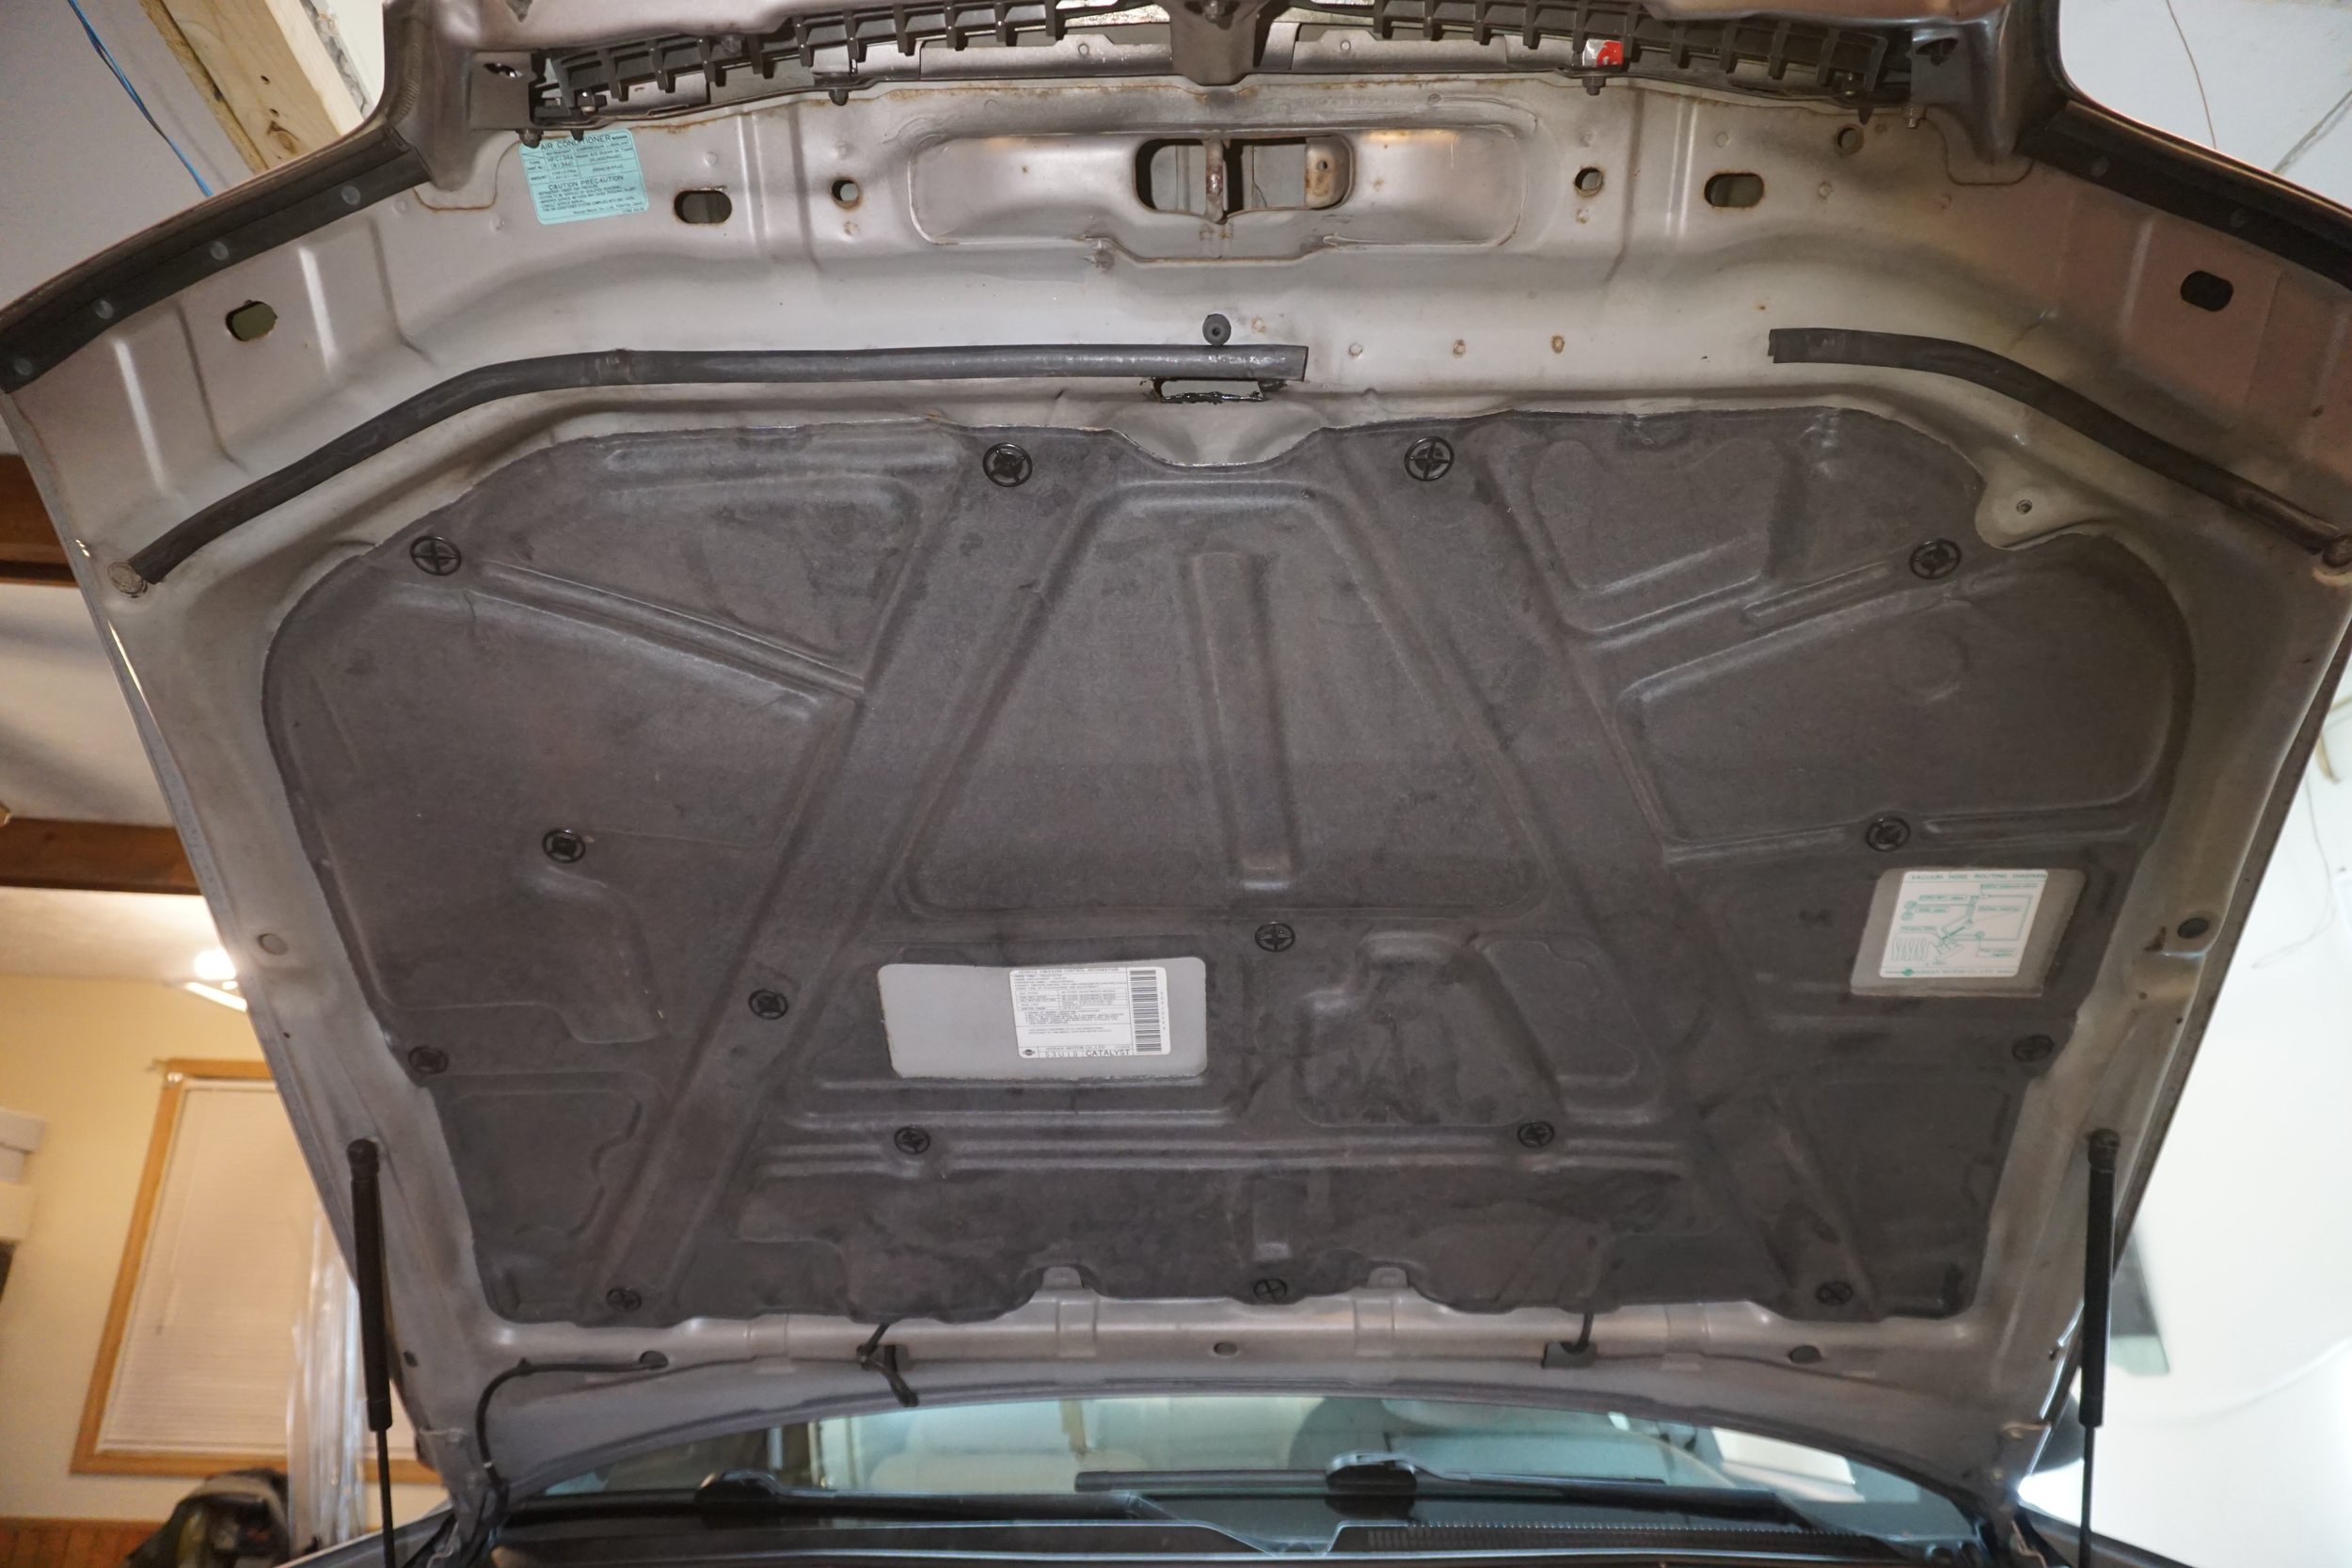
First up was some fresh under hood insulation. I was unhappy with how my recent trimming had turned out to get the FSTB to fit....
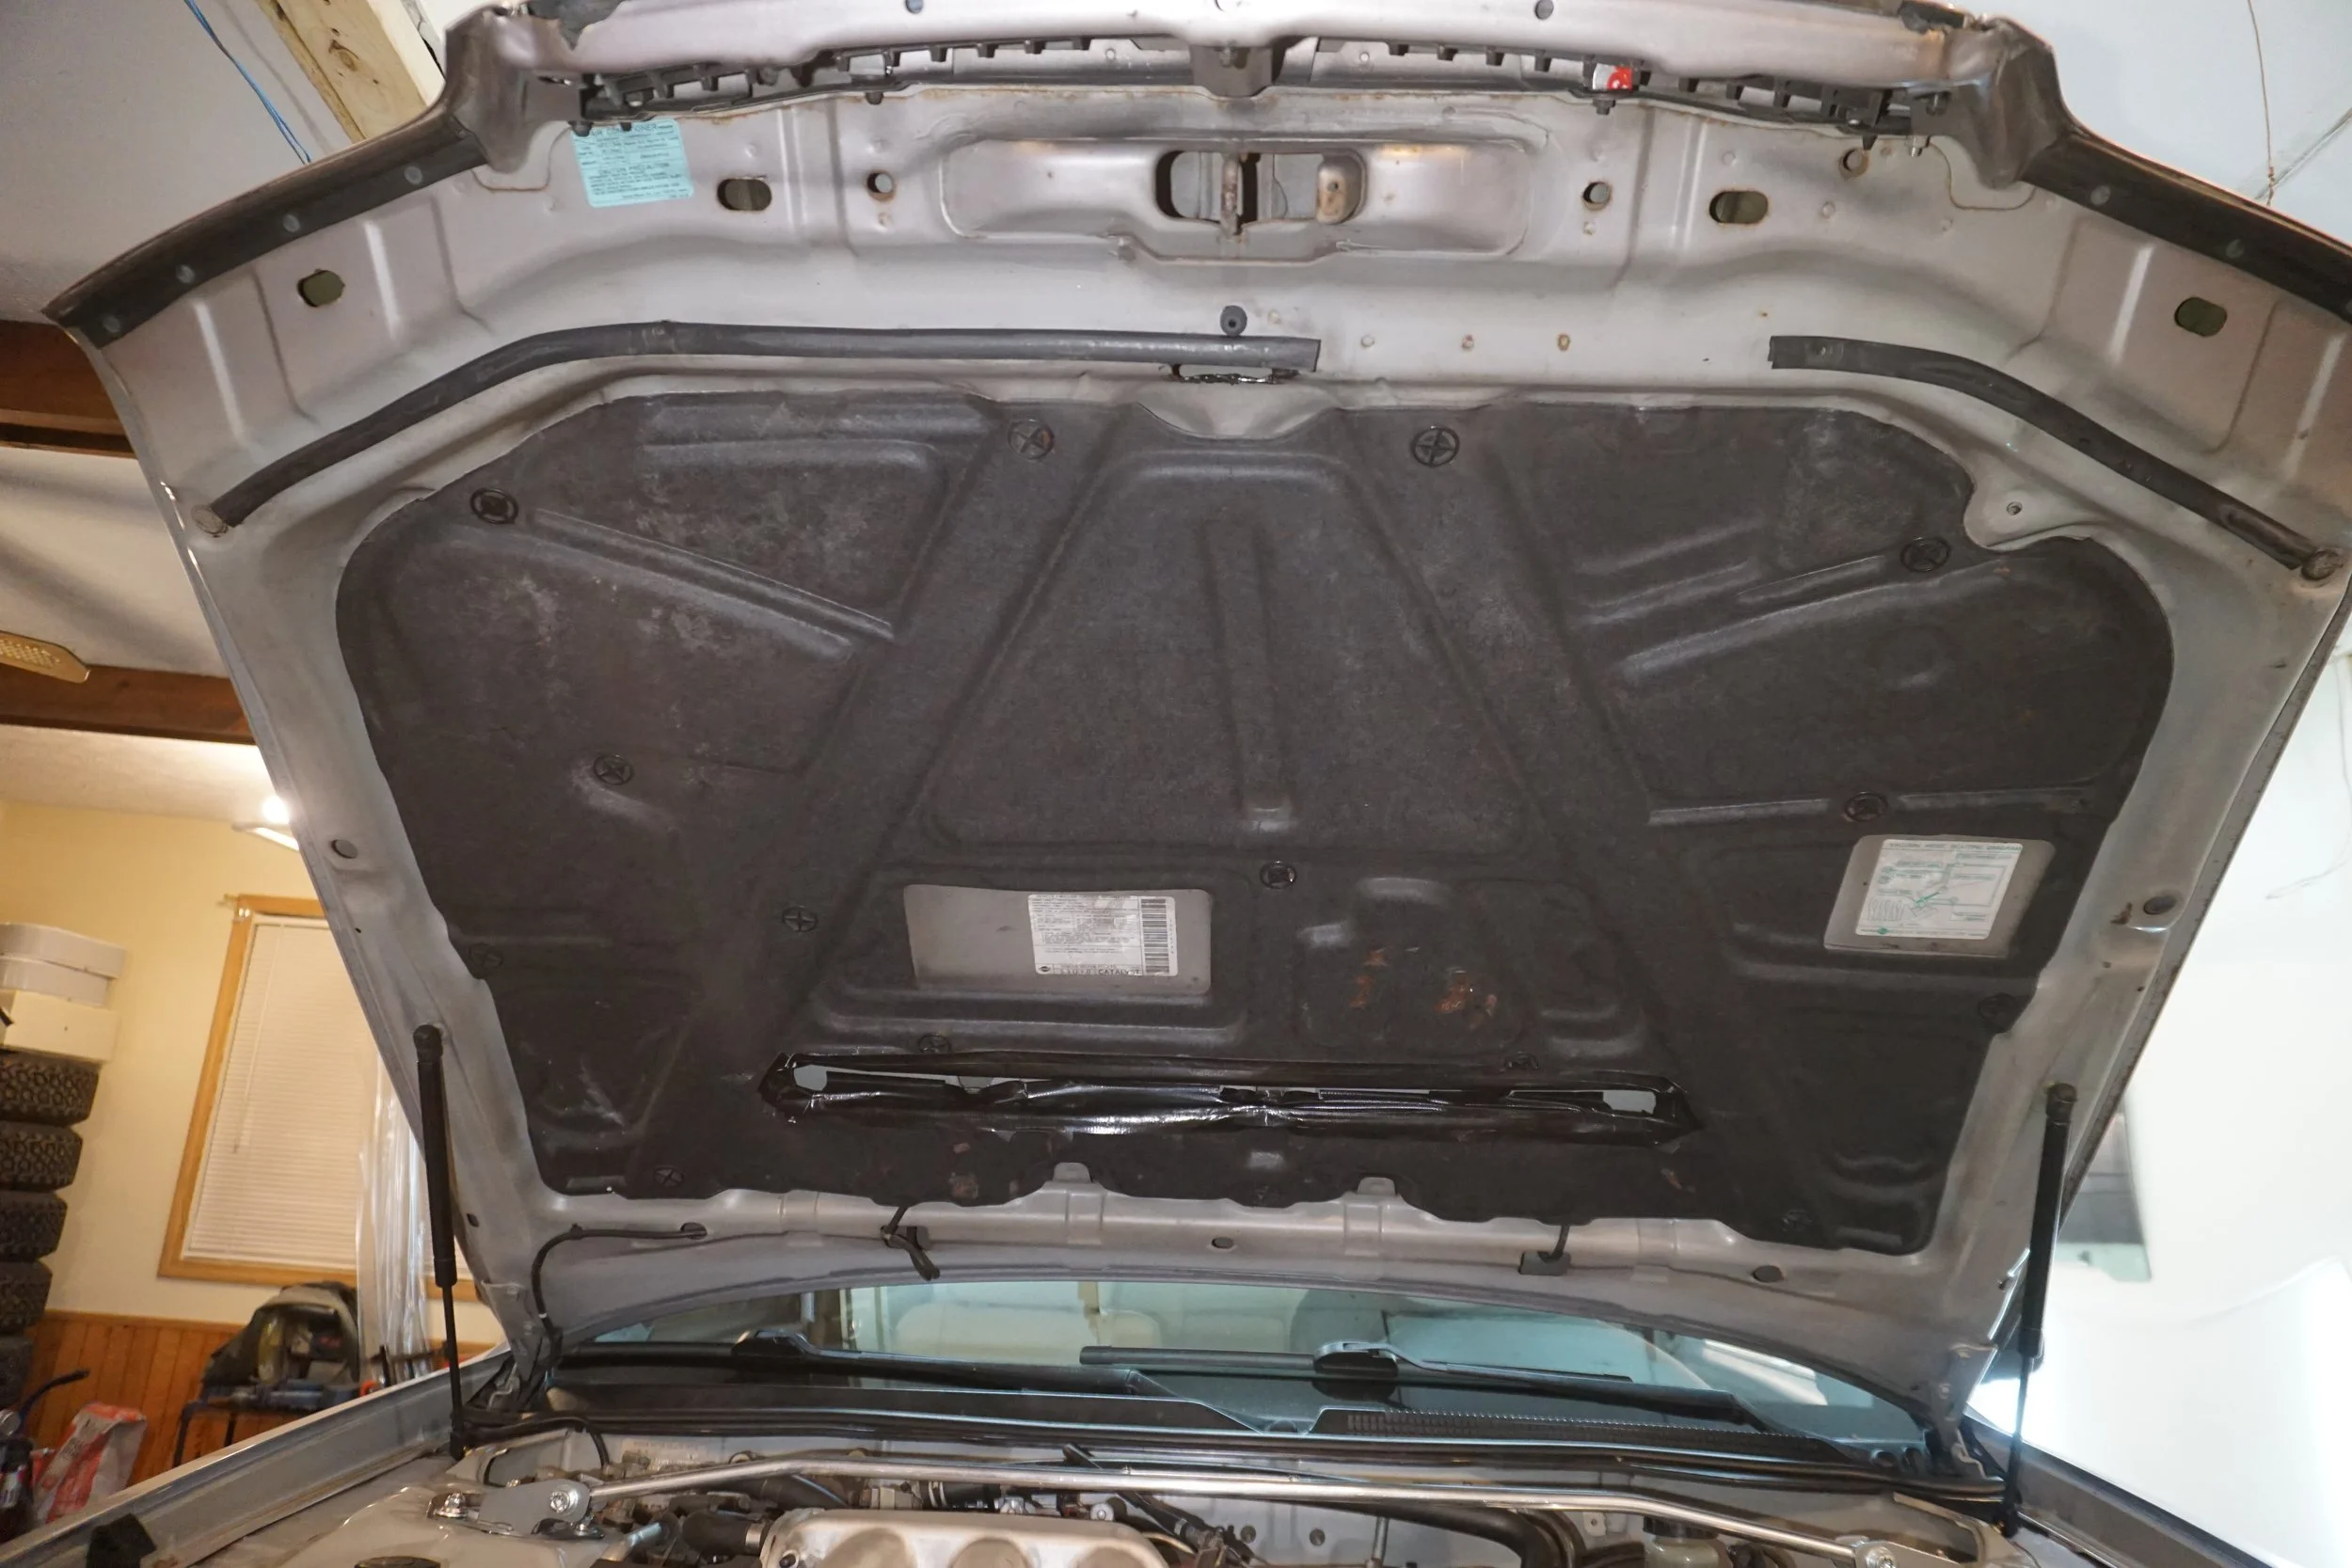
But with the metal on the hood trimmed, I figured I could probably run a normal insulator, so I grabbed one in good condition from a junkyard. My original one had been torn up in a few spots over the years, so this new one was a welcome upgrade.
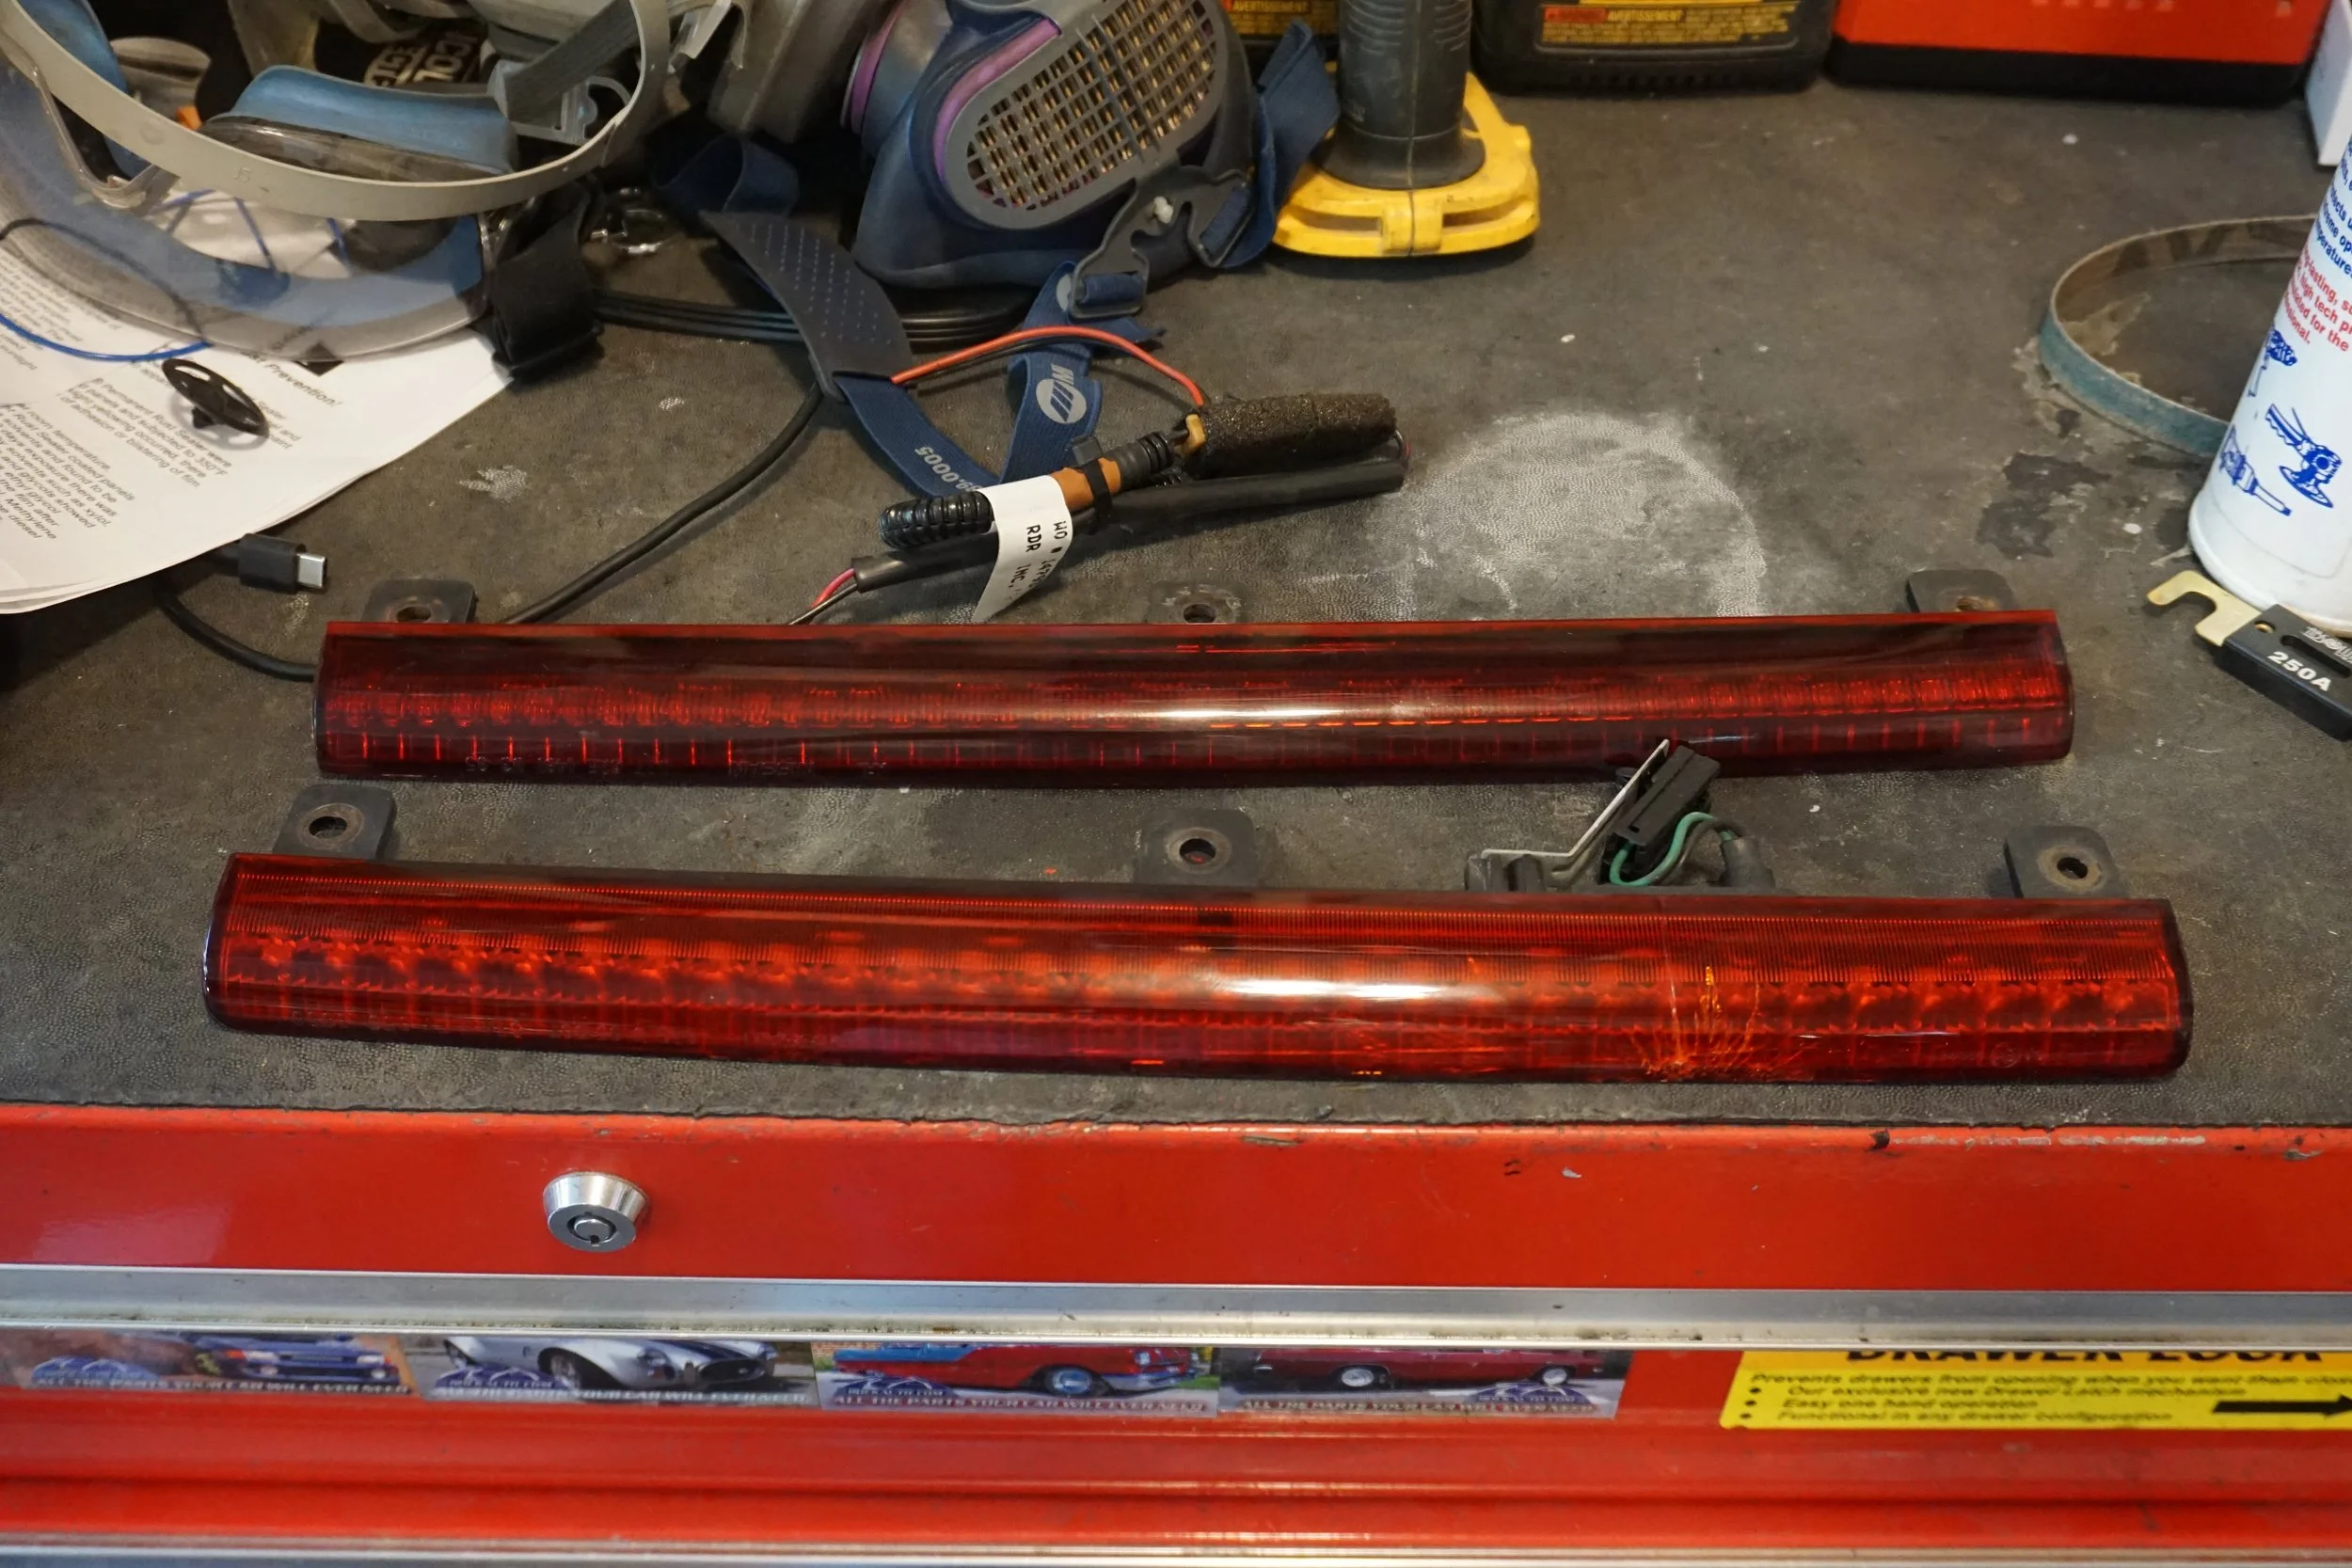
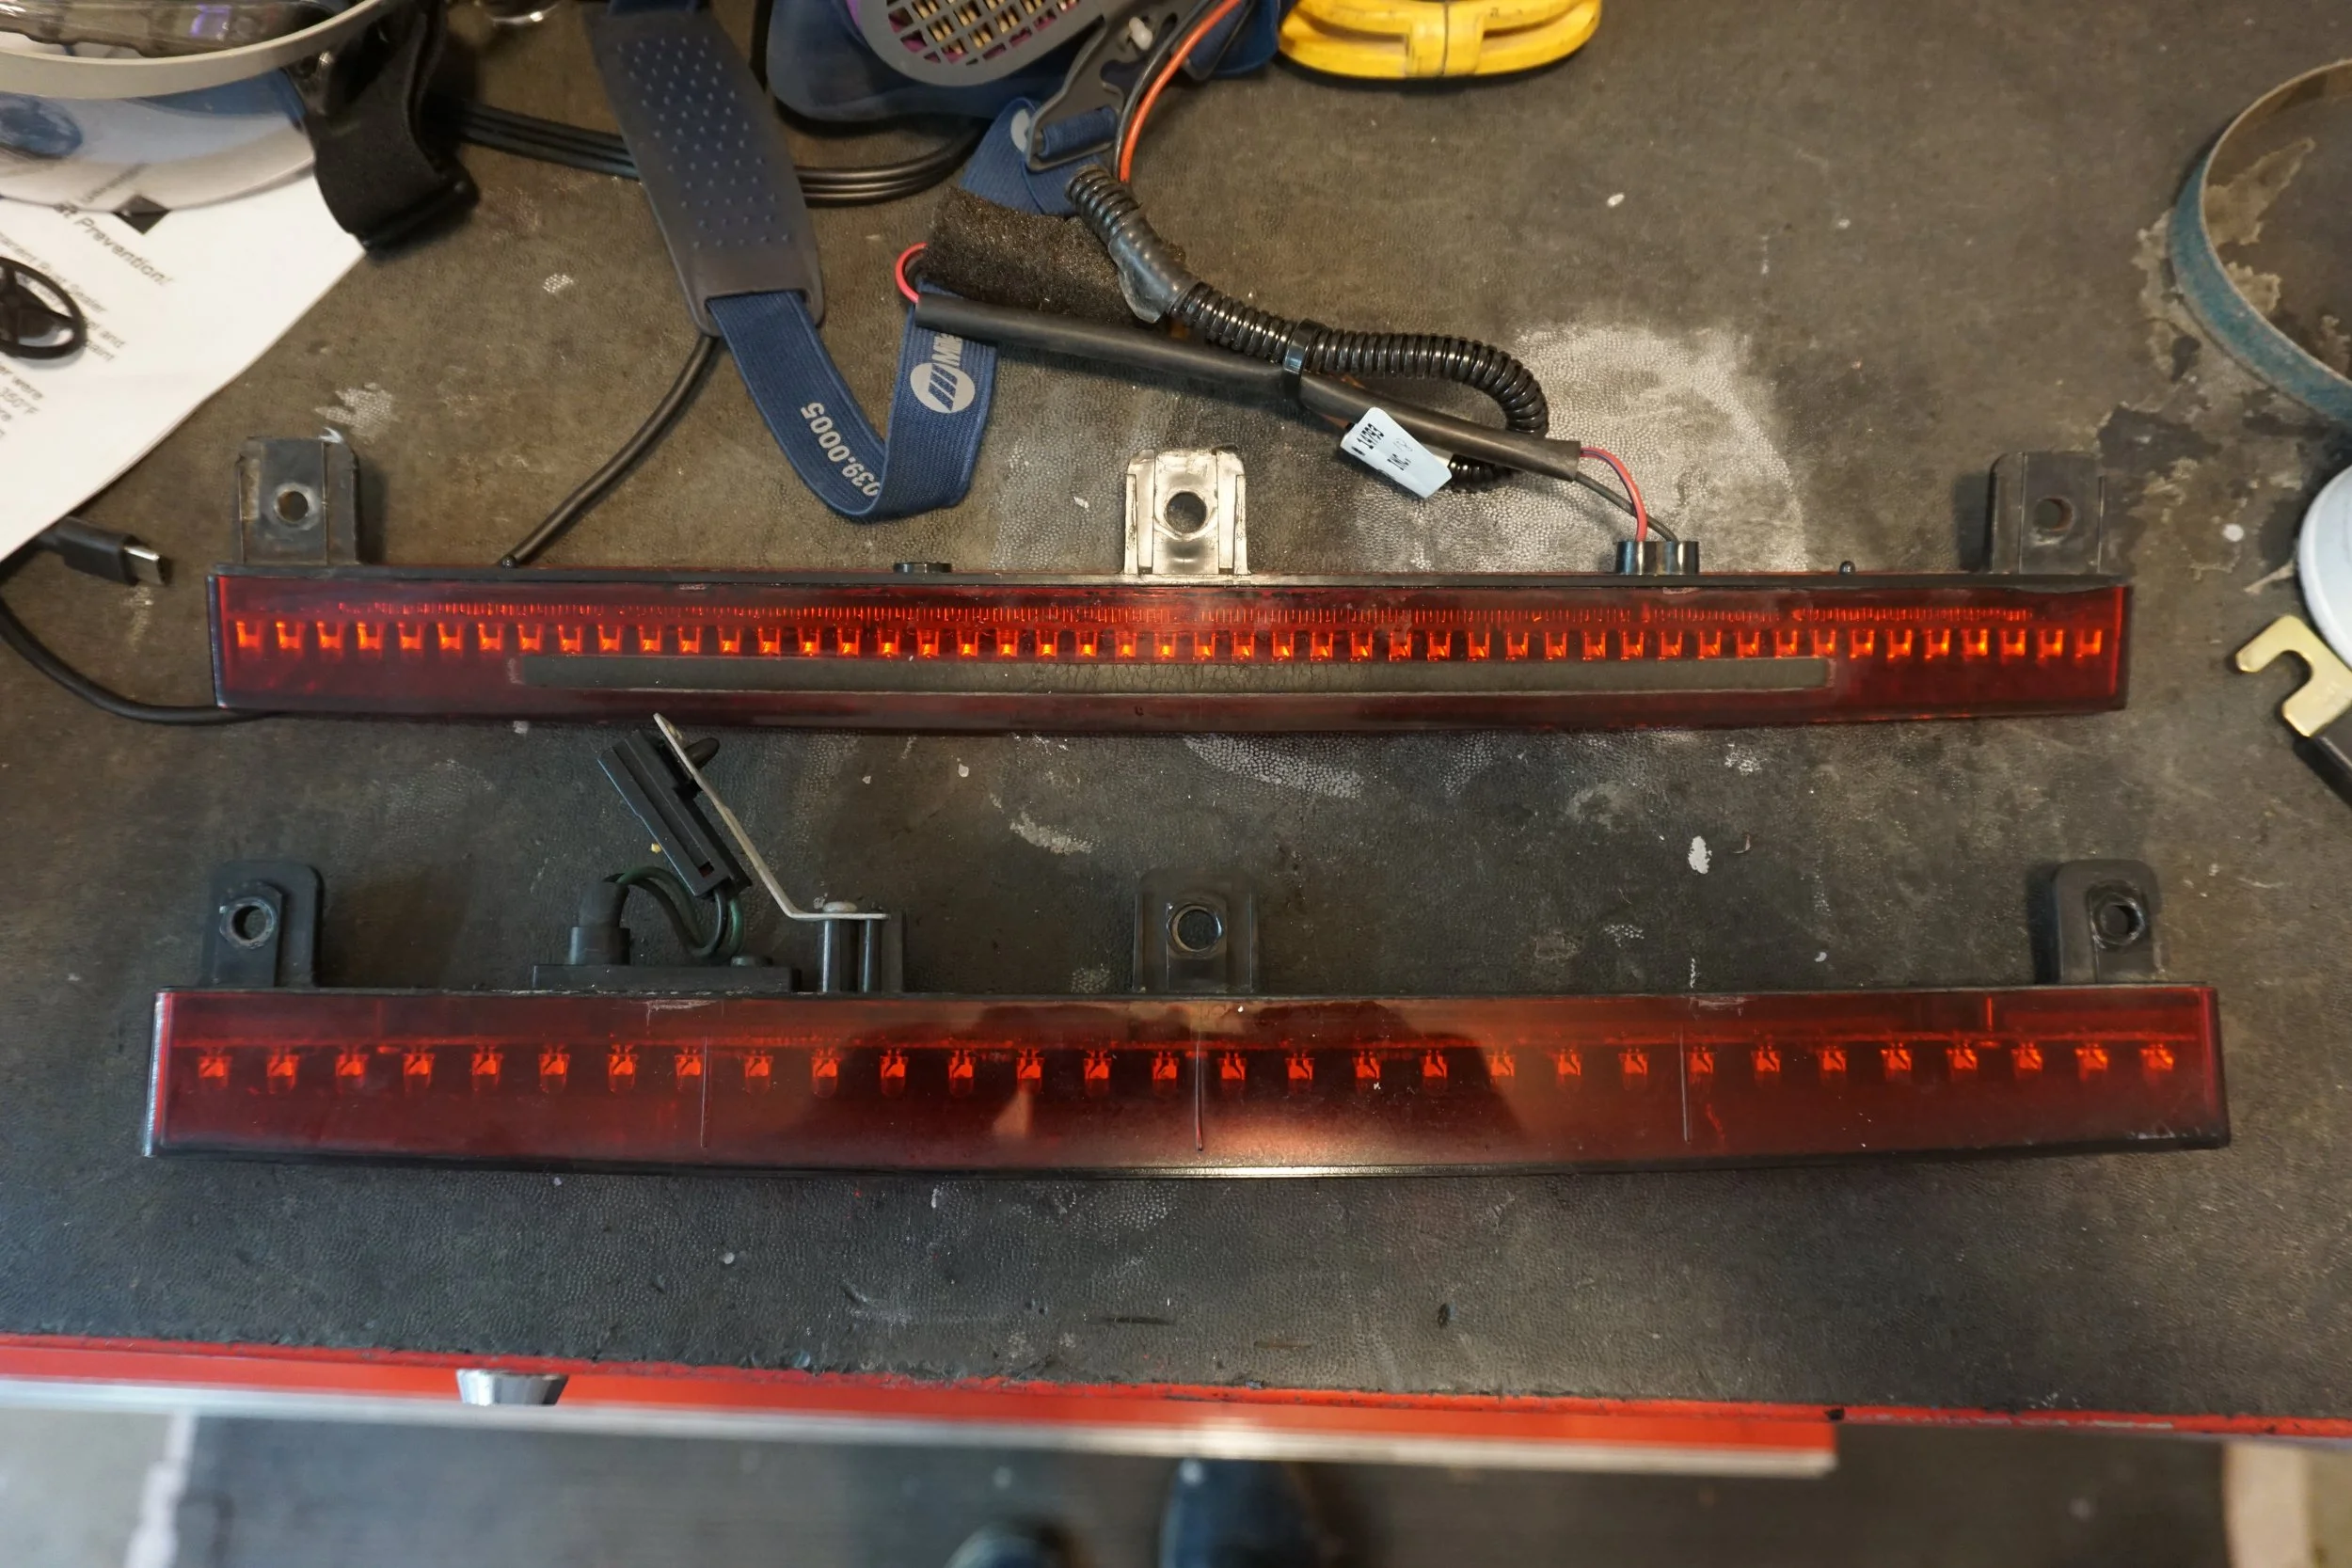
I also finally found a spoiler light in good condition at the yard, this time off a 97-99. It seems like it was slightly redesigned with a lot more LEDs and a darker finish to the plastic compared to the 95/96 ones. I really like it!
But more importantly, it was time to do something about the brake pad knock back I've been experiencing when racing. Sometimes the brake pedal would behave as you would expect, and sometimes there was a dead zone at the top of the travel that you would need to push through, or pump in advance to get the pads to sit where they're supposed to. And when you're braking from 100 mph and pointed at a wall, you really want to be able to trust your brakes to behave consistently. This was forcing me to brake really early when at the track in case the pads had gotten knocked back, slowing me down and endangering my safety. So I purchased a set of the right anti knock back springs from Wilwood with the hopes they would solve my problem. Apparently newer versions of my calipers come with the springs already installed, but my older calipers didn't. While I was going to be in there, I also wanted to replace the seals.
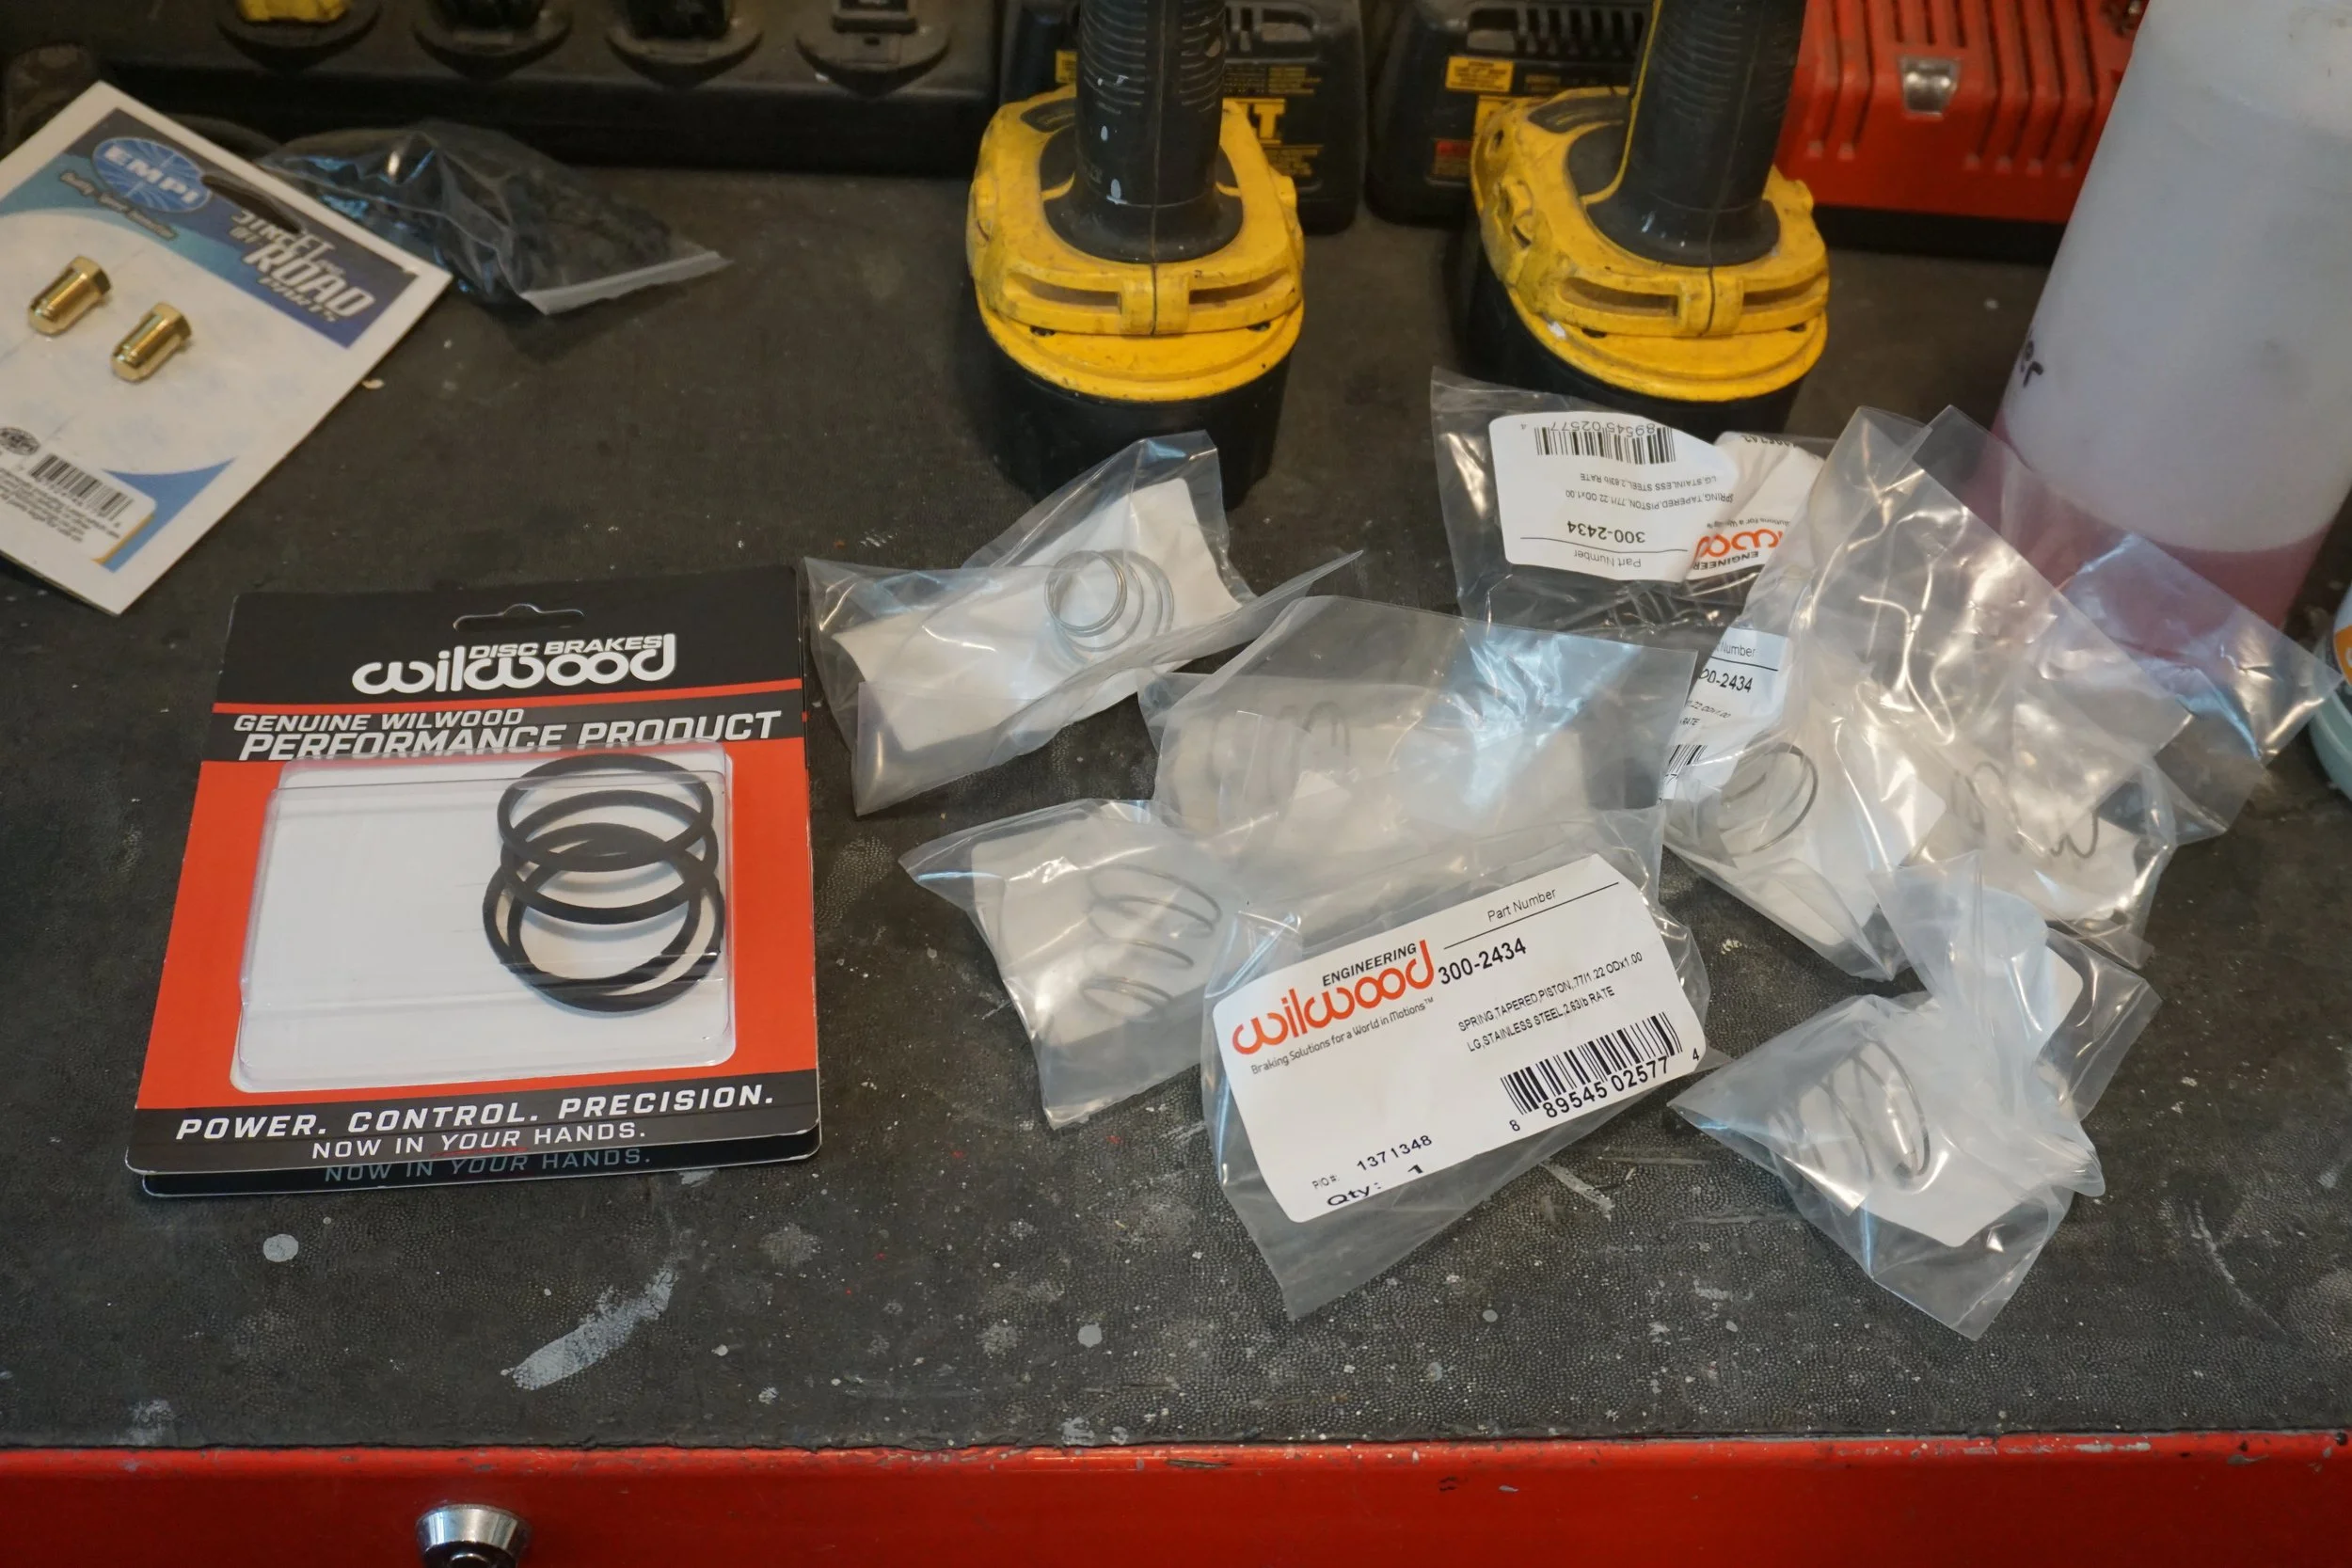
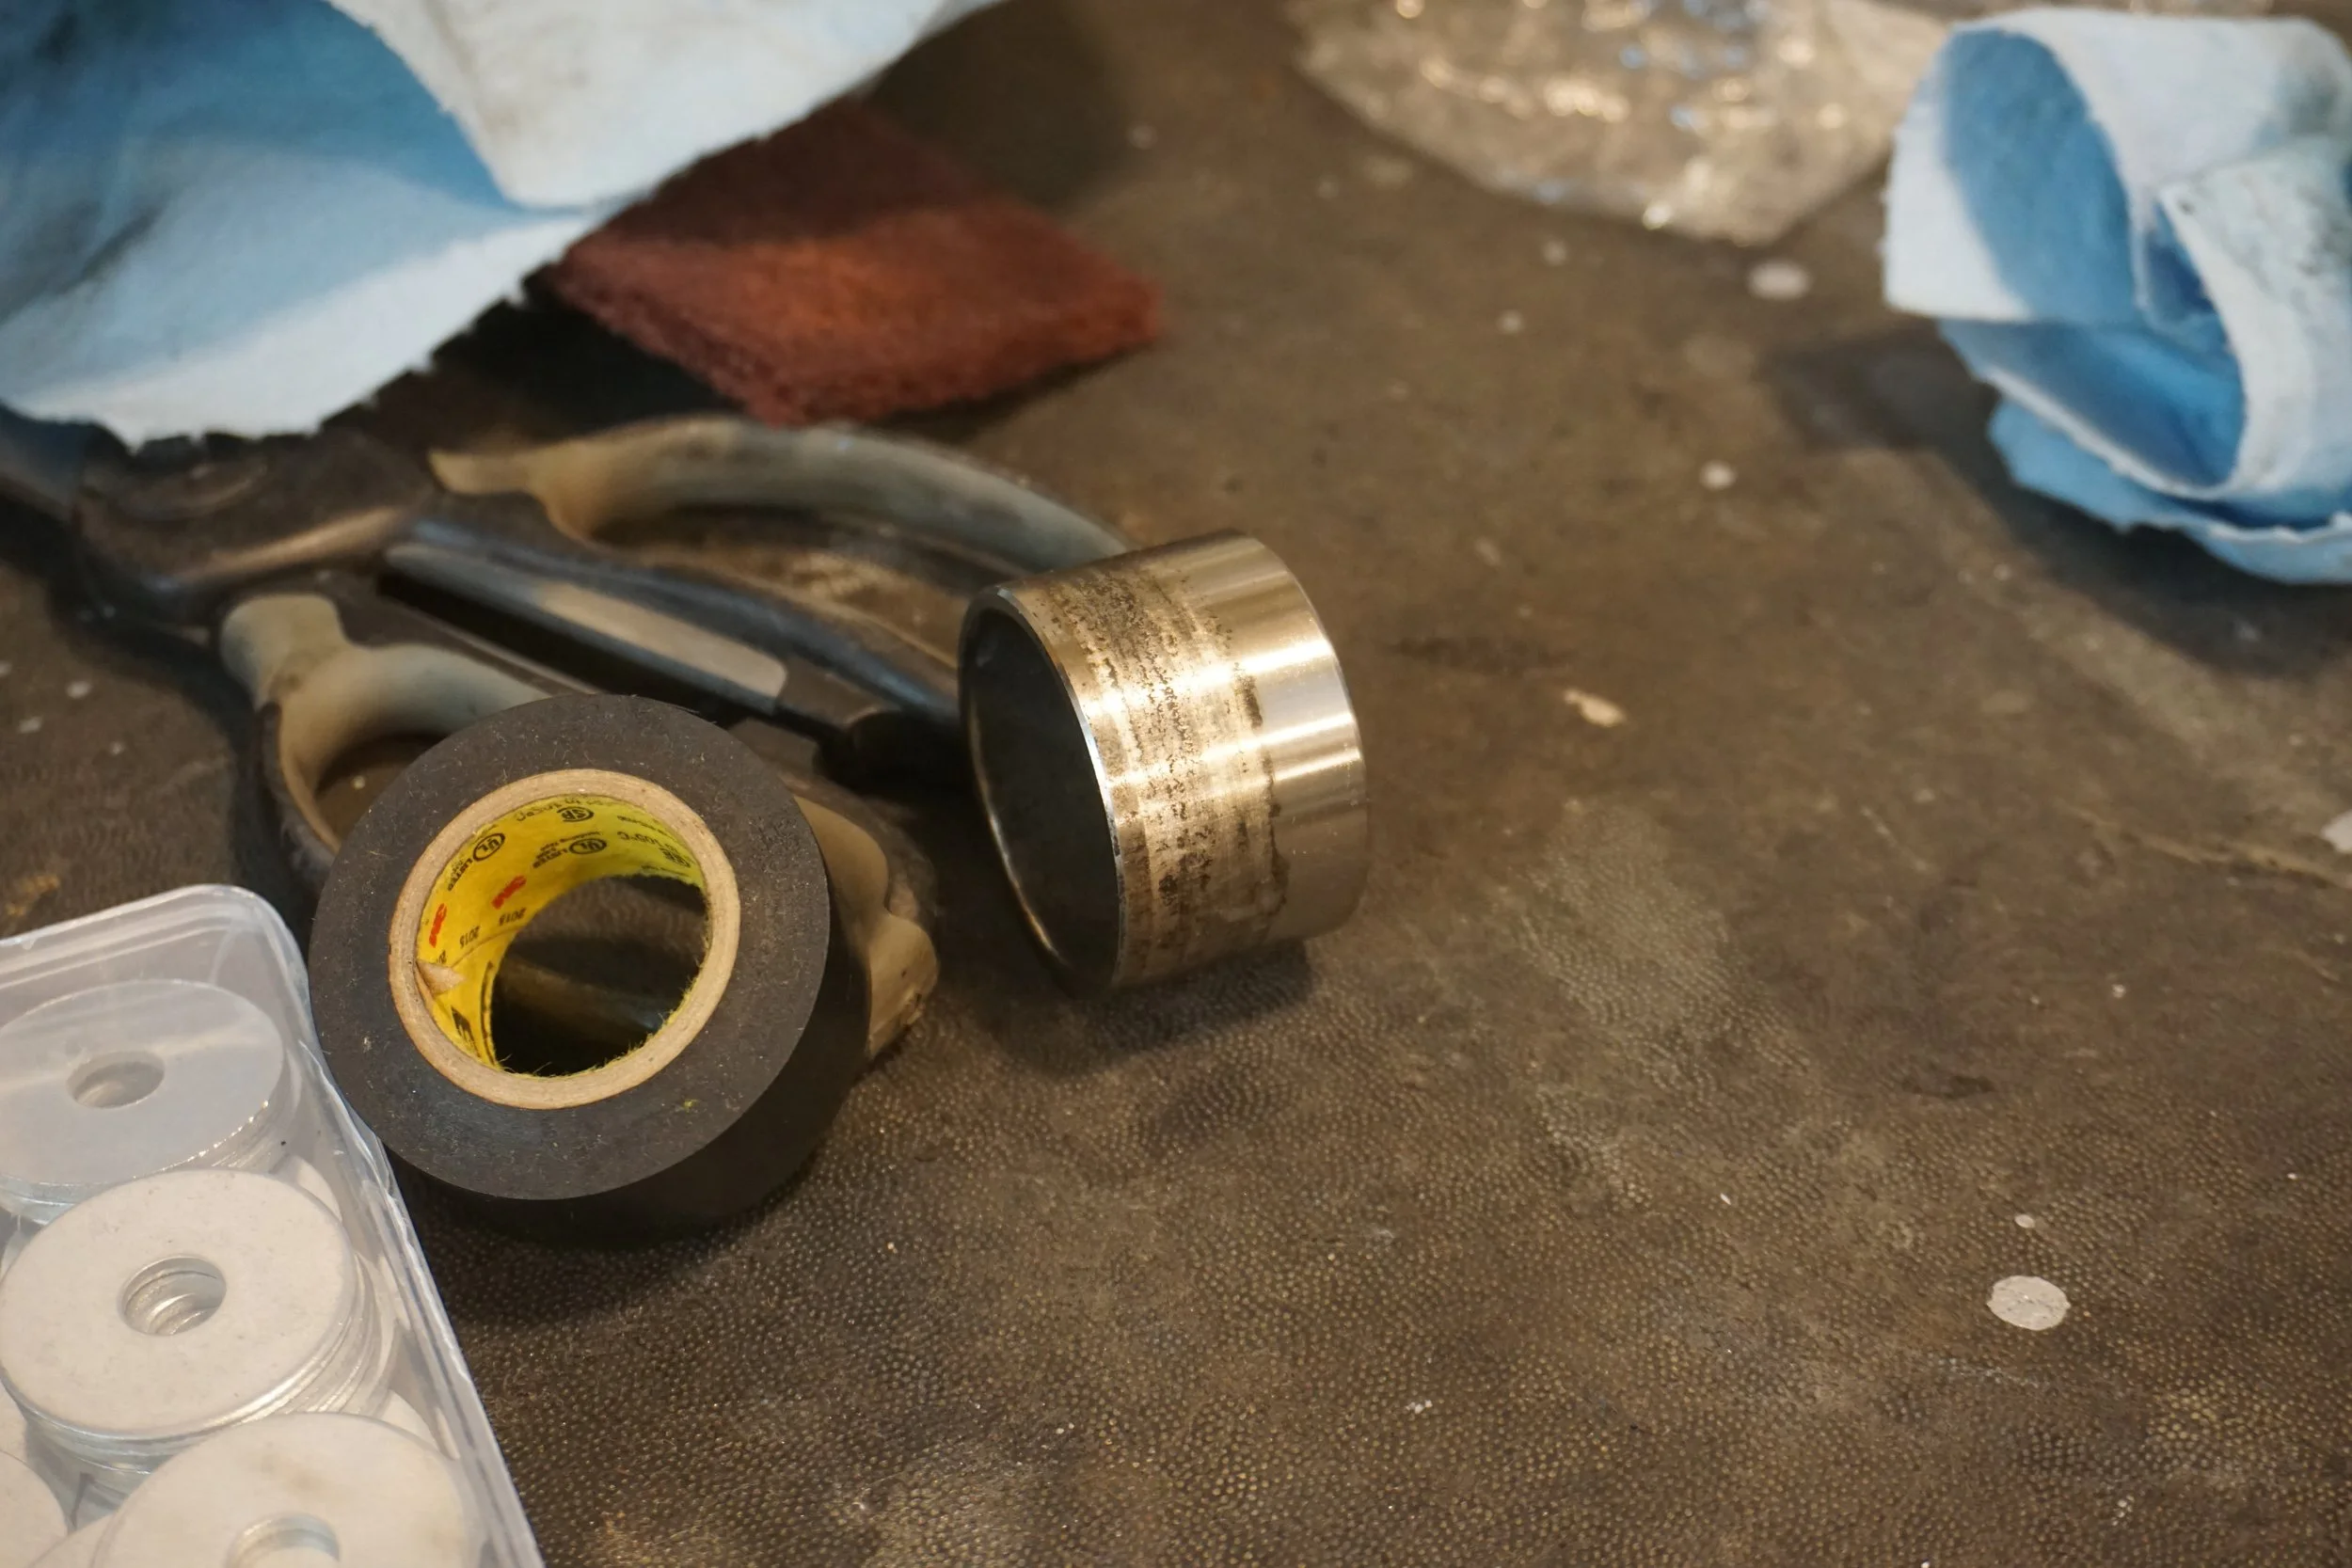
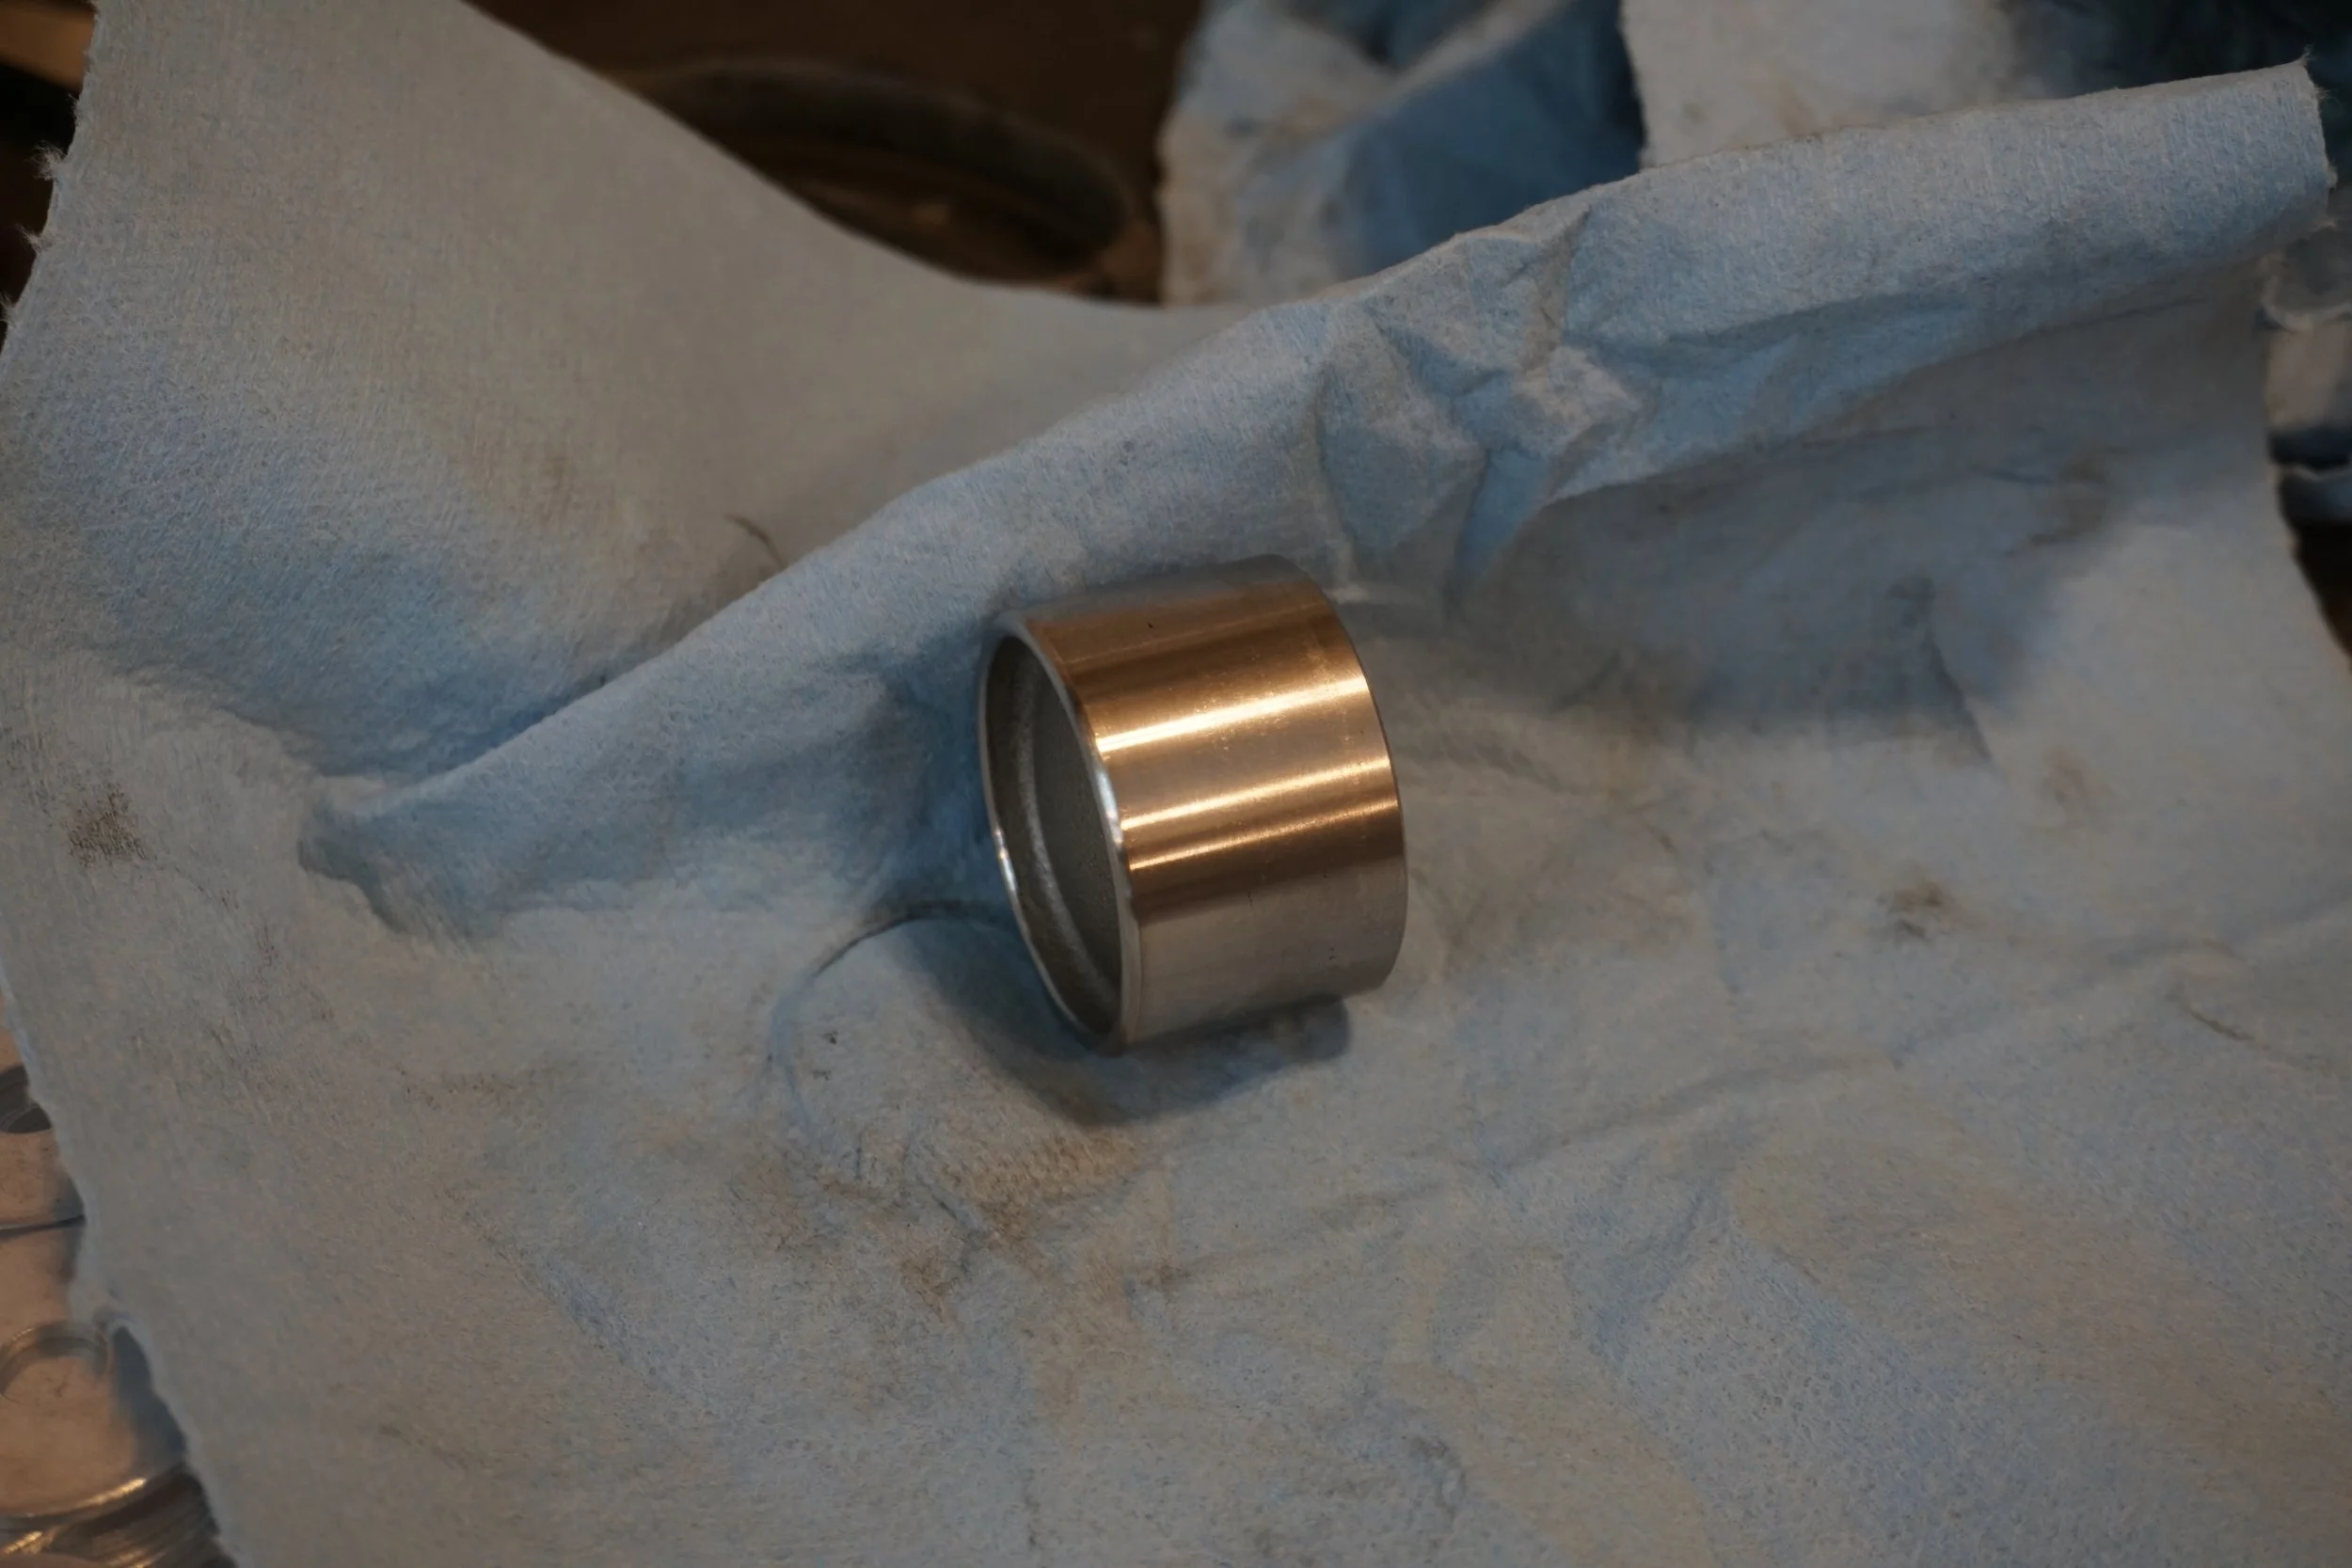
I popped this pistons out one by one and cleaned them up with a pad:
And reinstalled them with the springs and new seals. Knock back was never an issue on the street, so I wouldn't know if the problem was solved until I was on the track. Thankfully, a race was right around the corner....
First up was some fresh under hood insulation. I was unhappy with how my recent trimming had turned out to get the FSTB to fit....
But with the metal on the hood trimmed, I figured I could probably run a normal insulator, so I grabbed one in good condition from a junkyard. My original one had been torn up in a few spots over the years, so this new one was a welcome upgrade.
I also finally found a spoiler light in good condition at the yard, this time off a 97-99. It seems like it was slightly redesigned with a lot more LEDs and a darker finish to the plastic compared to the 95/96 ones. I really like it!
But more importantly, it was time to do something about the brake pad knock back I've been experiencing when racing. Sometimes the brake pedal would behave as you would expect, and sometimes there was a dead zone at the top of the travel that you would need to push through, or pump in advance to get the pads to sit where they're supposed to. And when you're braking from 100 mph and pointed at a wall, you really want to be able to trust your brakes to behave consistently. This was forcing me to brake really early when at the track in case the pads had gotten knocked back, slowing me down and endangering my safety. So I purchased a set of the right anti knock back springs from Wilwood with the hopes they would solve my problem. Apparently newer versions of my calipers come with the springs already installed, but my older calipers didn't. While I was going to be in there, I also wanted to replace the seals.
I popped this pistons out one by one and cleaned them up with a pad:
And reinstalled them with the springs and new seals. Knock back was never an issue on the street, so I wouldn't know if the problem was solved until I was on the track. Thankfully, a race was right around the corner....

Thread
Thread Starter
Forum
Replies
Last Post
DetailersDomain
Detailing
3
01-29-2013 10:01 AM
mrjasonlyrics
6th Generation Maxima (2004-2008)
26
10-30-2012 06:37 PM