Trouble COde P0400- 4th generation
 05-06-2014, 06:45 AM
#1
Newbie - Just Registered
Thread Starter

Join Date: Oct 2010
Location: Delaware
Posts: 10
Trouble COde P0400- 4th generation
I had a P0400 trouble code show up on my '98 Maxima with 106K miles. EGR Flow Malfunction. I made a video describing the issue and some tips and tricks to getting the EGR tube out that has the EGR temperature sensor in it. I Hope the video will be helpful to anyone tackling this repair. Take it easy - Ozz

 05-18-2014, 02:08 PM
#3
Senior Member

Join Date: Jan 2011
Location: Central AR
Posts: 3,041
Cool video! I just finished re-installing the entire EGR assembly yesterday. I had clogged up pipes like most with over 100,000 miles. I took the whole assembly off the car and soaked the EGR mount and curved UIM pipe assembly in carburetor cleaner for a week to get them all cleaned up like new. No kidding it was a mess.
The 99 model has an electric EGR. The EGR valve part was so carbon filled that the valve would barely open and close. I don't actually think the value was closing and opening for normal expected operation. I took the EGR valve all apart to separate the iron valve body from the electric motor part and soaked it in carb cleaner overnight to get it all cleaned up. Now the valve opens and closes easily.
If you can catch it in time, a good "all out clean up" will cure temp sensor woes and remedy a clogged up EGR valve.
I recently purchased a "catch can" that will be installed next weekend to hopefully reduce some of the sludge that I see being recirculated through the system.
 05-19-2014, 03:20 AM
#5

I ****ing hated removing the extra length on that stud. Goddamn I was pouring sweat in the summer working that **** with a POS rounded out saw blade lol
05-19-2014, 01:45 PM
#6
Senior Member

Join Date: Apr 2006
Location: Oakland, CA
Posts: 704
I did this a few months ago, and sawing the bolt off only took about 10 minutes. Use a good hacksaw blade and a pair of mechanics gloves, and it's pretty easy. I sawed towards the rear of the car, with one hand on each end of the blade, and got plenty of leverage.
06-18-2014, 11:25 AM
#7
I used a dremel (200 series) and a diamond wheel attachment to grind the stud down...also i took ozzstars advice in the youtube video and grinded down a 12mm wrench for the fitment.
What i didnt do though was indent a deep 12 to remove the sensor...i took the egr tube out and used my 14 mm wrench and no issue.
What may help others...i jacked the entire front end up and got that bolt that we need to grind down from underneath the car...way easier! Minimal bloodshed on myself too.
Hope mine stays away i had carbon on 1 side of the pipe/tube.
06-22-2014, 12:58 PM
#8

I don't actually remember how I did this job but I did not have to hack off that stud. I was redoing my valve covers and I decided to replace the EGR and EGR-BPT valves and got it out but the EGR valve big nut was difficult as it was caked on.
06-22-2014, 03:55 PM
#9
Senior Member
Join Date: Jan 2011
Location: Central AR
Posts: 3,041
Here are some pictures I snapped when I cleaned the EGR below. As you can see, I bypassed using the EGR port coolant hose. I capped off the coolant pipe connection so so it doesn't look like an open tube that is missing a hose.
I start by finger tightening the EGR bolt nuts so I can swing the EGR tube into position against the plenum. I've also used a 5mm socket to remove the EGR stud bolts.
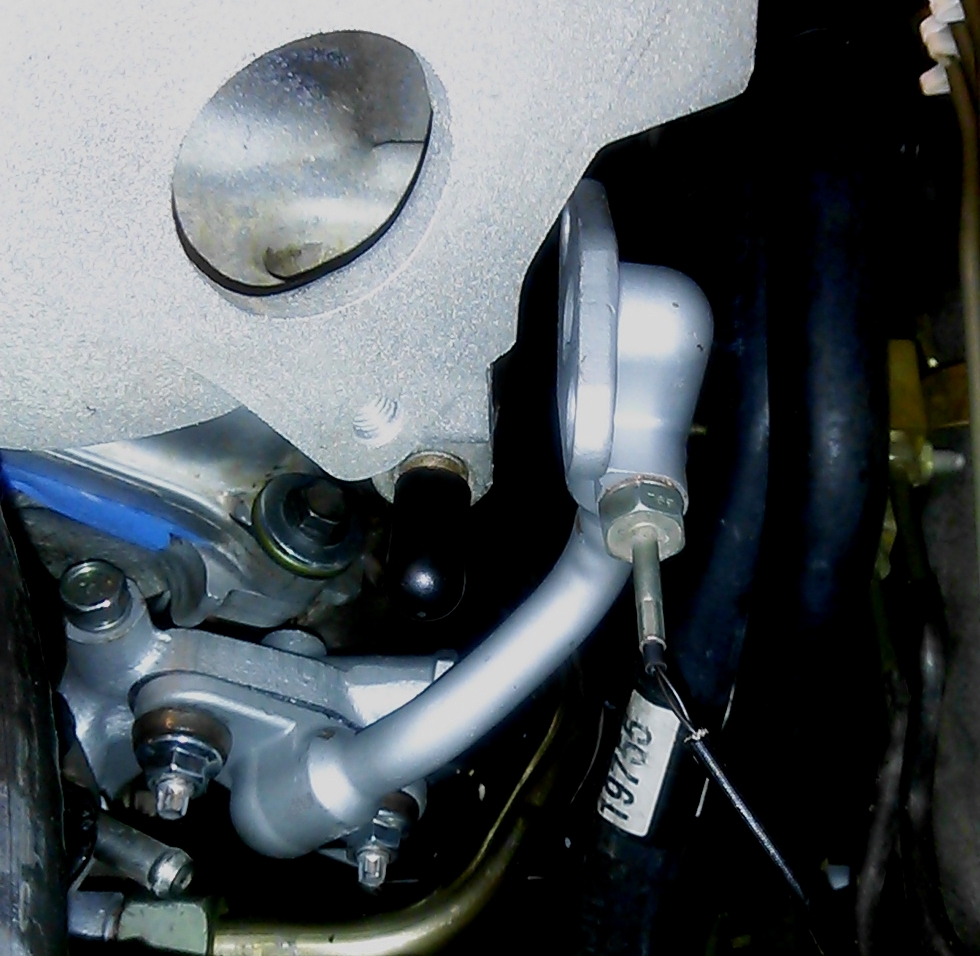
I use a Craftsman 3/8 drive flex head wrench with to reach behind the EGR tube to tighten to the plenum. I happened to use a long on barrel socket on the day I replaced the plenum.
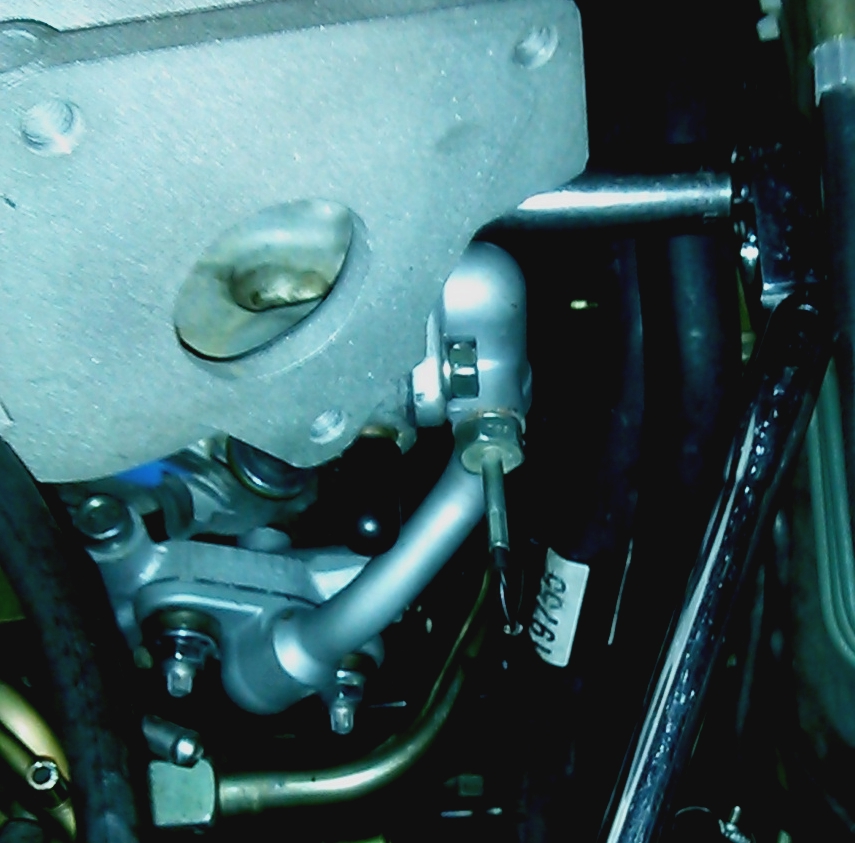
For tightening the front facing EGR bolt nut, I use a long barrel.
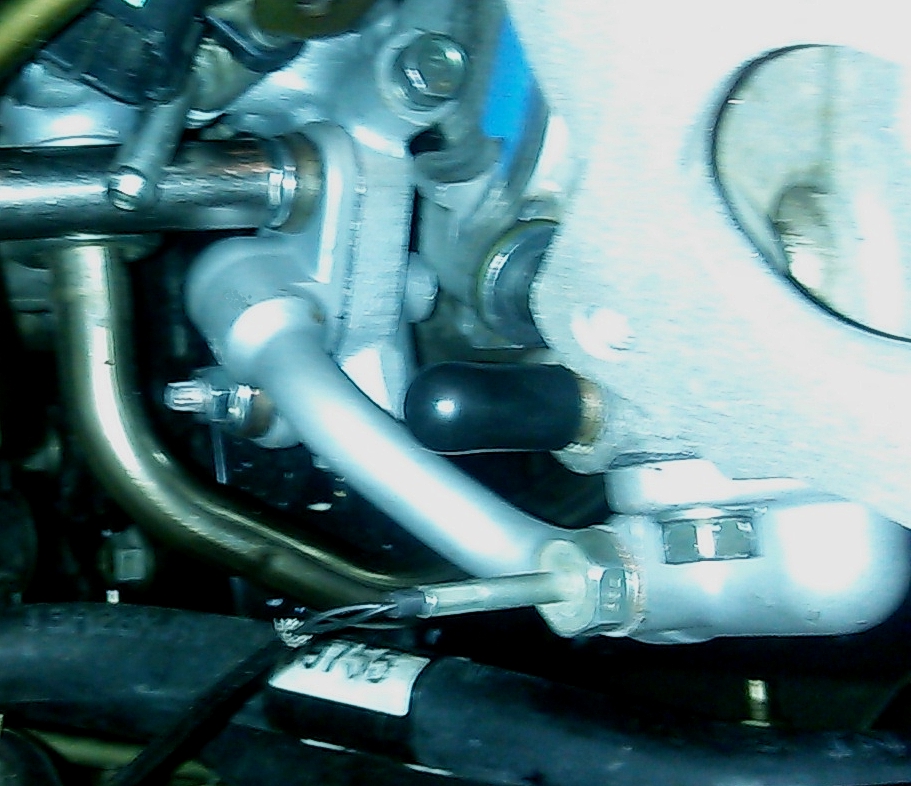
For the rear facing EGR bolt nut, I use a short open/box end wrench that I picked up at Lowe's a couple of years ago in some sale display of cheap tools for a price like $2.99. Sometimes those little cheap sale tools come in handy.

I start by finger tightening the EGR bolt nuts so I can swing the EGR tube into position against the plenum. I've also used a 5mm socket to remove the EGR stud bolts.
I use a Craftsman 3/8 drive flex head wrench with to reach behind the EGR tube to tighten to the plenum. I happened to use a long on barrel socket on the day I replaced the plenum.
For tightening the front facing EGR bolt nut, I use a long barrel.
For the rear facing EGR bolt nut, I use a short open/box end wrench that I picked up at Lowe's a couple of years ago in some sale display of cheap tools for a price like $2.99. Sometimes those little cheap sale tools come in handy.
Last edited by CS_AR; 06-22-2014 at 07:23 PM.
06-27-2014, 05:28 PM
#10
 unfortunately for me, 4 days after i cleaned this tube, i got the cel...same code! anybody experience this?
06-27-2014, 07:13 PM
unfortunately for me, 4 days after i cleaned this tube, i got the cel...same code! anybody experience this?
06-27-2014, 07:13 PM
#11
Senior Member
Join Date: Jan 2011
Location: Central AR
Posts: 3,041
Which code did you get after you cleaned it? What is the year model?
When I took apart my 99 model with the electric EGR, I found the EGR valve was so full of carbon that it was stuck in a semi-open position. I removed the valve from the electric motor and cleaned it until the spring loaded valve would open and close easily. Then I reassembled the valve with motor in installed it with cleaned pipes. A couple of mornings later I got the EGR code. I quickly removed and replaced the failing EGR valve. The carbon filled valve must have been stuck at a position that allowed the car to run without throwing a code but not as good as it does now. The new EGR valve corrected some minor irritations that I could have lived with.
The new EGR resolved the following issues:
1) 200 rpm bounce that occurred around 1,500 RPM in 2nd gear.
2) While the car always started before the new EGR, once I replaced the EGR it seems to start when I barely touch the starter. I don't think it takes more than a few engine revolutions or about a second the car to start now. Before replacing the EGR, it seemed like the starter needed to spin the engine for a 3 or 4 seconds to start. While it always started, it just didn't start like a new car. It starts like a new car now.
3) Idle was ok before the new EGR but after the new EGR it seems to little bit smoother and at a slightly lower RPM.
While I couldn't put my finger on any one of the items that didn't seem the car was running 100%, once I replaced the EGR everything that is now right about the car seemed to fall into place all at once.
Some years ago I had a failing vacuum operated EGR on my 95 model SE 5MT. While I remember replacing the EGR cured a CEL code and showed a slight improvement on the 95 model, I didn't see the same across the board improvement like I got when I replaced the electric EGR on the 99 model.
06-28-2014, 02:15 PM
#12
Which code did you get after you cleaned it? What is the year model?
When I took apart my 99 model with the electric EGR, I found the EGR valve was so full of carbon that it was stuck in a semi-open position. I removed the valve from the electric motor and cleaned it until the spring loaded valve would open and close easily. Then I reassembled the valve with motor in installed it with cleaned pipes. A couple of mornings later I got the EGR code. I quickly removed and replaced the failing EGR valve. The carbon filled valve must have been stuck at a position that allowed the car to run without throwing a code but not as good as it does now. The new EGR valve corrected some minor irritations that I could have lived with.
The new EGR resolved the following issues:
1) 200 rpm bounce that occurred around 1,500 RPM in 2nd gear.
2) While the car always started before the new EGR, once I replaced the EGR it seems to start when I barely touch the starter. I don't think it takes more than a few engine revolutions or about a second the car to start now. Before replacing the EGR, it seemed like the starter needed to spin the engine for a 3 or 4 seconds to start. While it always started, it just didn't start like a new car. It starts like a new car now.
3) Idle was ok before the new EGR but after the new EGR it seems to little bit smoother and at a slightly lower RPM.
While I couldn't put my finger on any one of the items that didn't seem the car was running 100%, once I replaced the EGR everything that is now right about the car seemed to fall into place all at once.
Some years ago I had a failing vacuum operated EGR on my 95 model SE 5MT. While I remember replacing the EGR cured a CEL code and showed a slight improvement on the 95 model, I didn't see the same across the board improvement like I got when I replaced the electric EGR on the 99 model.
When I took apart my 99 model with the electric EGR, I found the EGR valve was so full of carbon that it was stuck in a semi-open position. I removed the valve from the electric motor and cleaned it until the spring loaded valve would open and close easily. Then I reassembled the valve with motor in installed it with cleaned pipes. A couple of mornings later I got the EGR code. I quickly removed and replaced the failing EGR valve. The carbon filled valve must have been stuck at a position that allowed the car to run without throwing a code but not as good as it does now. The new EGR valve corrected some minor irritations that I could have lived with.
The new EGR resolved the following issues:
1) 200 rpm bounce that occurred around 1,500 RPM in 2nd gear.
2) While the car always started before the new EGR, once I replaced the EGR it seems to start when I barely touch the starter. I don't think it takes more than a few engine revolutions or about a second the car to start now. Before replacing the EGR, it seemed like the starter needed to spin the engine for a 3 or 4 seconds to start. While it always started, it just didn't start like a new car. It starts like a new car now.
3) Idle was ok before the new EGR but after the new EGR it seems to little bit smoother and at a slightly lower RPM.
While I couldn't put my finger on any one of the items that didn't seem the car was running 100%, once I replaced the EGR everything that is now right about the car seemed to fall into place all at once.
Some years ago I had a failing vacuum operated EGR on my 95 model SE 5MT. While I remember replacing the EGR cured a CEL code and showed a slight improvement on the 95 model, I didn't see the same across the board improvement like I got when I replaced the electric EGR on the 99 model.
my car starts right up, but dies immediately unless i hold the gas to idle for 2 seconds...may be due to a cheap tps replacement part (dorman) because after it runs for a few seconds, i can turn it off and it starts up and stays on no issues...and on a warm engine no stalling issues.
my idle is also kind of funky...sparatically. 200 rpm sounds about right in the quick fluctuation...then a few seconds later, again, it goes away.
Last edited by Goomz; 06-28-2014 at 03:20 PM.

Thread
Thread Starter
Forum
Replies
Last Post
hez8813
5th Generation Maxima (2000-2003)
11
03-12-2020 12:06 AM
bryants95max
4th Generation Maxima (1995-1999)
10
10-02-2015 12:52 PM