My next project - roof reskin


 12-28-2015, 01:11 PM
#42
2 VE's are better than one!

Thread Starter
iTrader: (31)
Join Date: Sep 2000
Location: Dallas
Posts: 7,358
I also forgot to mention, that if you simply create an account on their website before you order, that they have a rewards points system. They give you 1 reward point for every $10 spent. And each reward point is worth $1 that you can apply to future orders on their site.
Soooo, I actually have $30 something dollars worth of "credit" with them that I can use in the future on their site. I didn't even realize that before ordering (I just ordered as a "guest") and afterwards I noticed it on their site and created an account - I e-mailed them and they said no problem and credited it to my account anyway. Pretty cool of them.
Soooo, I actually have $30 something dollars worth of "credit" with them that I can use in the future on their site. I didn't even realize that before ordering (I just ordered as a "guest") and afterwards I noticed it on their site and created an account - I e-mailed them and they said no problem and credited it to my account anyway. Pretty cool of them.
12-28-2015, 02:03 PM
#43
Thanks James,
Yeah i was poking around that site and was wondering if you can just hook up their gun to your own air compressor. It seems like that's what the little box is? But then to regulate it down to 5psi may not end up with the most precise results lol.
they sell the plastikote stuff by the gallon at HD? in black?
kinda giving me bad ideas on one hand the summit paint seems cheaper, on the other hand this seems more flexible/less of a time commitment at the moment.
Yeah i was poking around that site and was wondering if you can just hook up their gun to your own air compressor. It seems like that's what the little box is? But then to regulate it down to 5psi may not end up with the most precise results lol.
they sell the plastikote stuff by the gallon at HD? in black?
kinda giving me bad ideas
on one hand the summit paint seems cheaper, on the other hand this seems more flexible/less of a time commitment at the moment.
12-28-2015, 03:32 PM
#44
2 VE's are better than one!
Thread Starter
iTrader: (31)
Join Date: Sep 2000
Location: Dallas
Posts: 7,358
Thanks James,
Yeah i was poking around that site and was wondering if you can just hook up their gun to your own air compressor. It seems like that's what the little box is? But then to regulate it down to 5psi may not end up with the most precise results lol.
they sell the plastikote stuff by the gallon at HD? in black?
kinda giving me bad ideas on one hand the summit paint seems cheaper, on the other hand this seems more flexible/less of a time commitment at the moment.
Yeah i was poking around that site and was wondering if you can just hook up their gun to your own air compressor. It seems like that's what the little box is? But then to regulate it down to 5psi may not end up with the most precise results lol.
they sell the plastikote stuff by the gallon at HD? in black?
kinda giving me bad ideas
on one hand the summit paint seems cheaper, on the other hand this seems more flexible/less of a time commitment at the moment.The little turbine box deal sounds just like a vacuum cleaner and blows out air anytime it's turned on. So the air is spraying 24/7 out of the gun, but then only paint comes out when you pull the trigger. It's a little odd at first, but you get used to it quickly.
I've seen the gallons at Home Depot, but looking on their site now it appears that they may only sell it by the case rather than individual gallons. Amazon sells the gallons, for ~$60 shipped. PepBoys sells them too, but PepBoys is like $75 a gallon.
In terms of the actual base/clear itself, "real" paint is on par with the PlastiDip. The UreKem base/clear urethane kits I've bought are ~$240. But that does not include primer costs and any prep material costs.
With the PlastiDip you don't need any of that extra stuff so overall total cost is a lot less. Of course I went a little farther than the average person by removing the handles and my trim and whatnot is off, because I want to try to stretch the lifespan of this dip job and not get any premature peeling.
The biggest advantage with PlastiDip is that a good result is attainable via far less prep and a substantially subpar spraying environment. As far as my "prep", I literally just wiped my car down with alcohol and paper towels. And definitely way less commitment in terms of time. Of course the big tradeoff is that it's not permanent, but most "dippers" prefer that as they like to change it up every 6 months or year or so anyway.
12-28-2015, 04:05 PM
#45
Well, I don't really know if you can buy JUST their gun anyway. I should point out their gun comes with that little turbine box deal too. There's no need to mess with your own compressor at all if you buy their setup.
The little turbine box deal sounds just like a vacuum cleaner and blows out air anytime it's turned on. So the air is spraying 24/7 out of the gun, but then only paint comes out when you pull the trigger. It's a little odd at first, but you get used to it quickly.
I've seen the gallons at Home Depot, but looking on their site now it appears that they may only sell it by the case rather than individual gallons. Amazon sells the gallons, for ~$60 shipped. PepBoys sells them too, but PepBoys is like $75 a gallon.
In terms of the actual base/clear itself, "real" paint is on par with the PlastiDip. The UreKem base/clear urethane kits I've bought are ~$240. But that does not include primer costs and any prep material costs.
With the PlastiDip you don't need any of that extra stuff so overall total cost is a lot less. Of course I went a little farther than the average person by removing the handles and my trim and whatnot is off, because I want to try to stretch the lifespan of this dip job and not get any premature peeling.
The biggest advantage with PlastiDip is that a good result is attainable via far less prep and a substantially subpar spraying environment. As far as my "prep", I literally just wiped my car down with alcohol and paper towels. And definitely way less commitment in terms of time. Of course the big tradeoff is that it's not permanent, but most "dippers" prefer that as they like to change it up every 6 months or year or so anyway.
It's just kind of a toss up. By the time I buy all the plastidip stuff I'm at about the same price as just using paint. And knowing me the prep for the plastidip will turn into the same as paint. Just need to poke around a bit more I suppose haha. I really like the way your car turned out, bummer about the C pillar but it looks sharp.
12-29-2015, 12:21 PM
#46
2 VE's are better than one!
Thread Starter
iTrader: (31)
Join Date: Sep 2000
Location: Dallas
Posts: 7,358
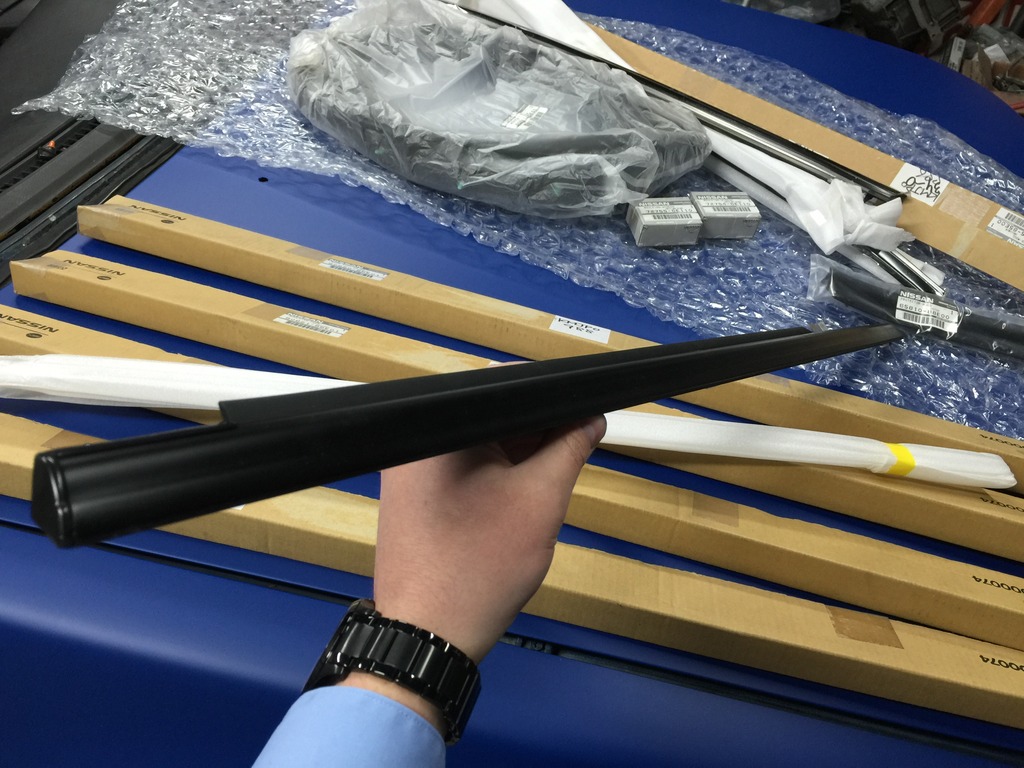
Got some goodies in from the Land of the Rising Sun 
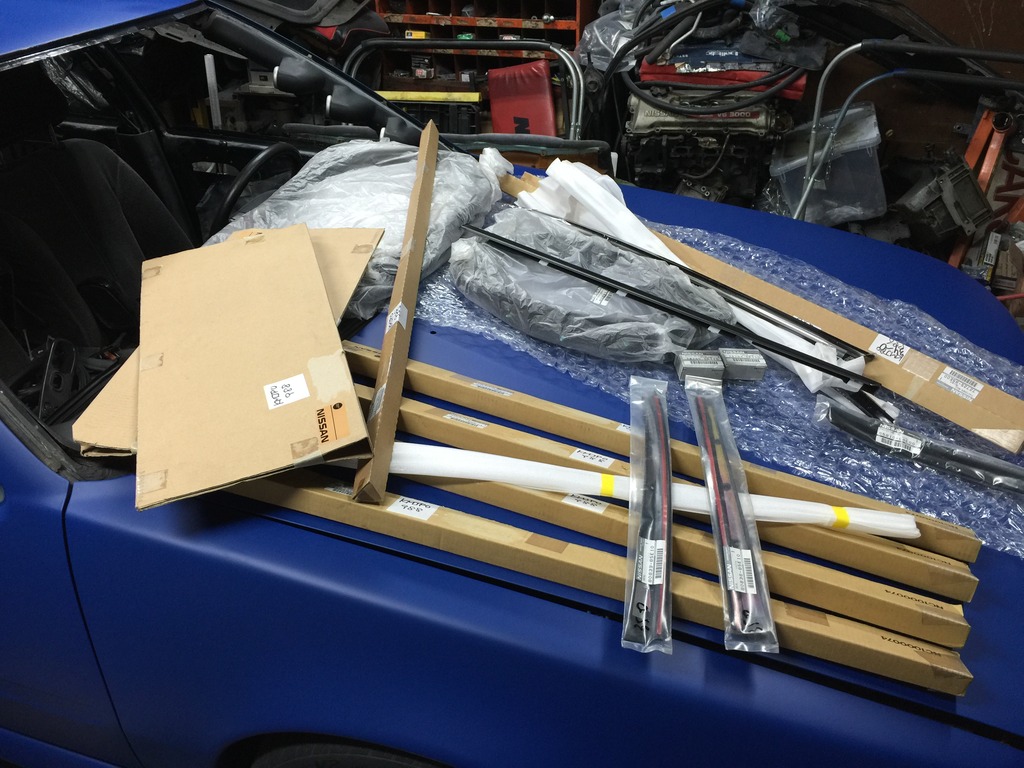
I ordered these corner pieces separate but the main side pieces already come with the corner pieces apparently, even though they are listed as separate parts and have separate part numbers

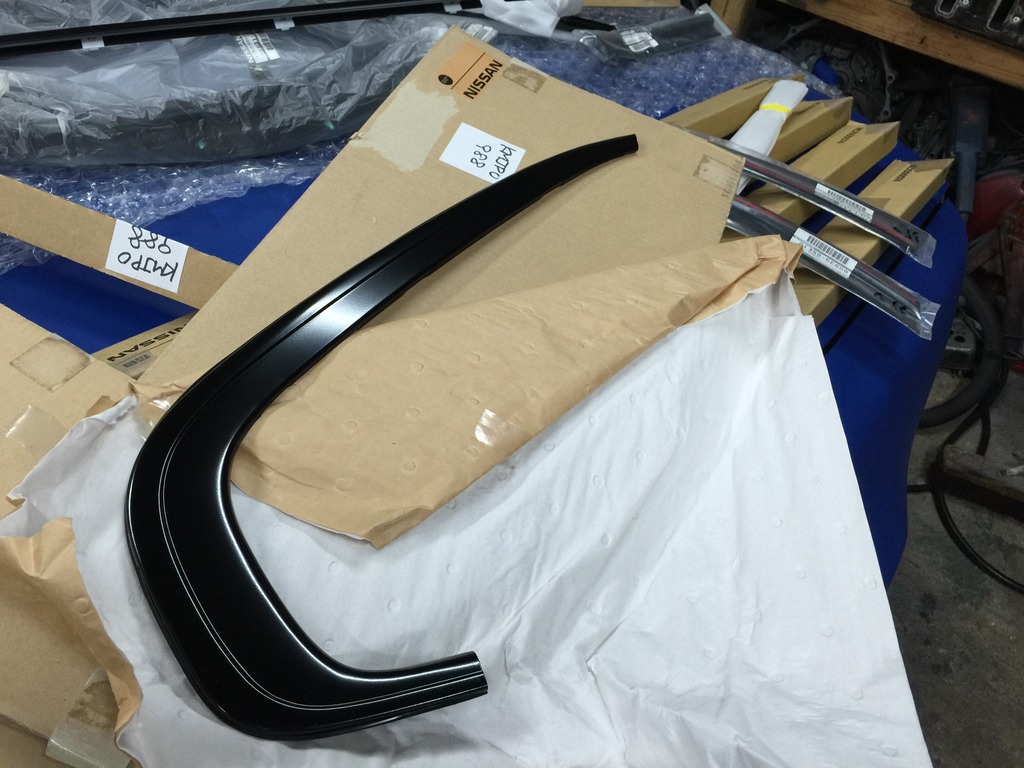


I ordered these corner pieces separate but the main side pieces already come with the corner pieces apparently, even though they are listed as separate parts and have separate part numbers


 12-30-2015, 04:55 AM
#48
2 VE's are better than one!
Thread Starter
iTrader: (31)
Join Date: Sep 2000
Location: Dallas
Posts: 7,358
I bought all 4 doors. They aren't available in North America anymore (I tried to buy them) which is why I bought from Japan. Actually all this stuff I got is obsolete here. What I realllllly wanted were the drip rail seals but those are obsolete there too. Actually, one side is available in Japan but pointless to only get one new side. Japan had all three doors OTHER than the front passenger door weatherstrip available so I got those, and then thankfully the front passenger door is/was the only one available here. So together I was able to get all 4.
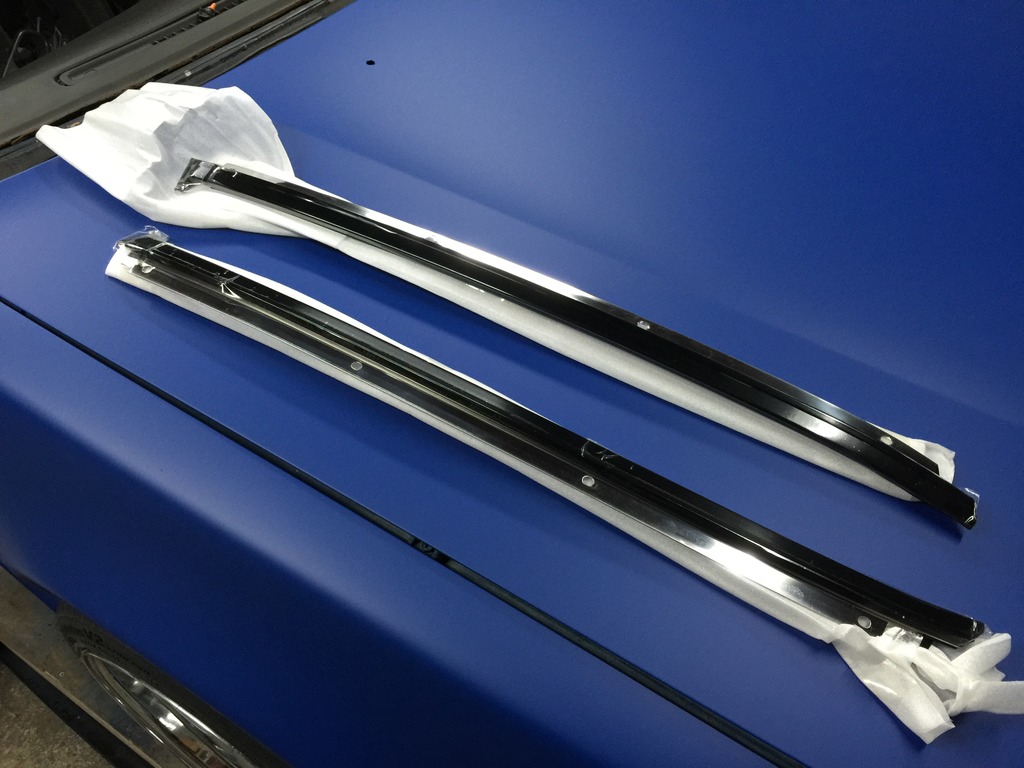
I was also able to score OEM front windshield upper seal/molding stuff from Japan too.
I'm not sure how many more sets of the belt moldings are available in Japan. The UAE has 3rd gen parts too, but they don't seem to have much actually available when you try to buy. I tried to get that other side drip rail seal from there but no luck.
I'm actually not even putting this stuff on (yet), I will save it for my real paint job in a few years. Or if I can ever get my black VE running correctly I will actually more likely put it all on there when I paint it.
01-04-2016, 07:28 AM
#50
2 VE's are better than one!
Thread Starter
iTrader: (31)
Join Date: Sep 2000
Location: Dallas
Posts: 7,358
Ancient Chinese secret 
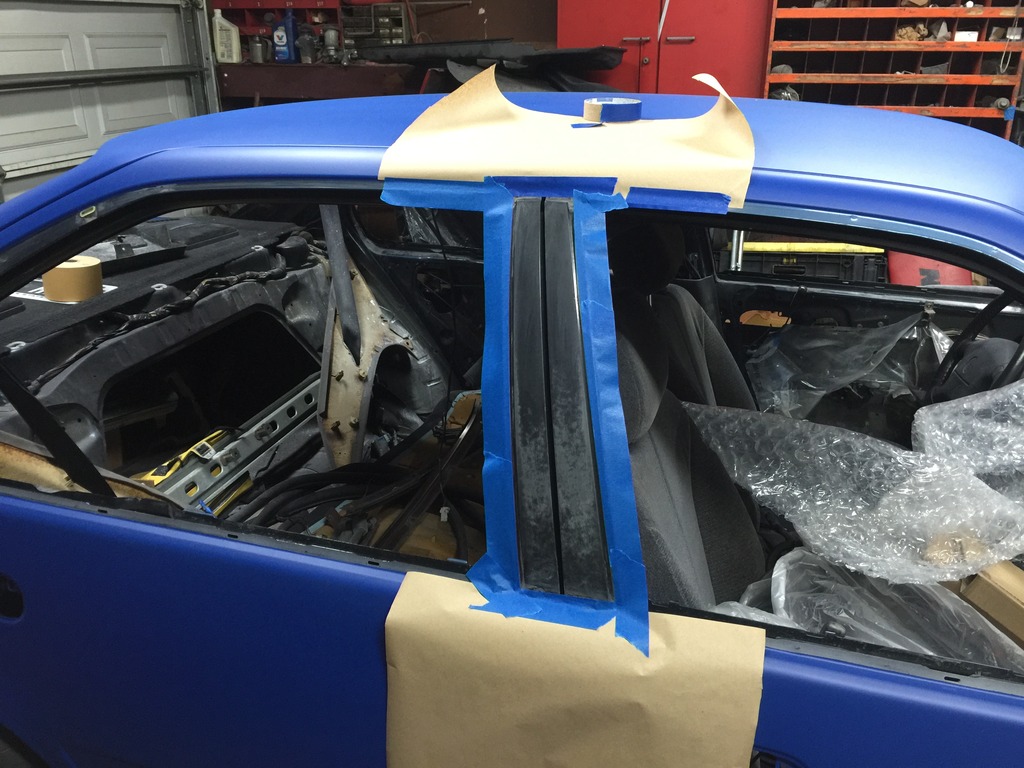
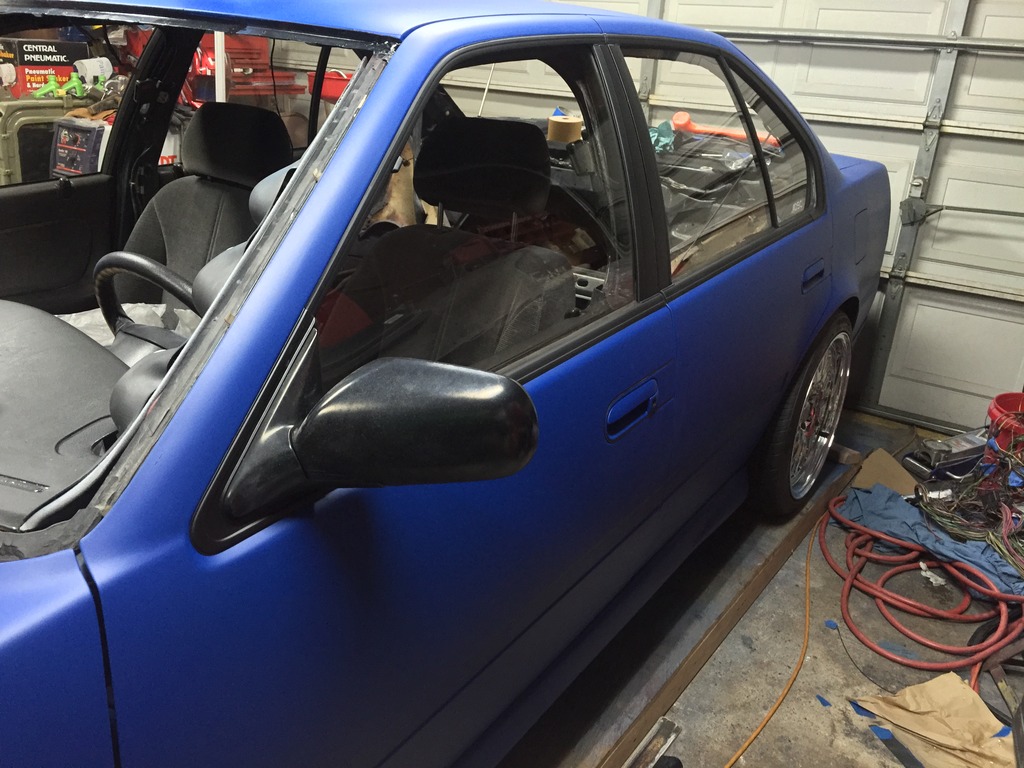
Sooo, I spent this past 3 day weekend working some more on the car. Got all the handles and everything back in. Boy, fooling with the handles is pretty tedious/fiddly/frustrating. I'm really starting to prefer the look of no-tint on older cars these days, so I stripped all the tint off all my glass before installing it. Also installed my new window channel rubber on all four doors as well as new window regulators and motors on all four doors.
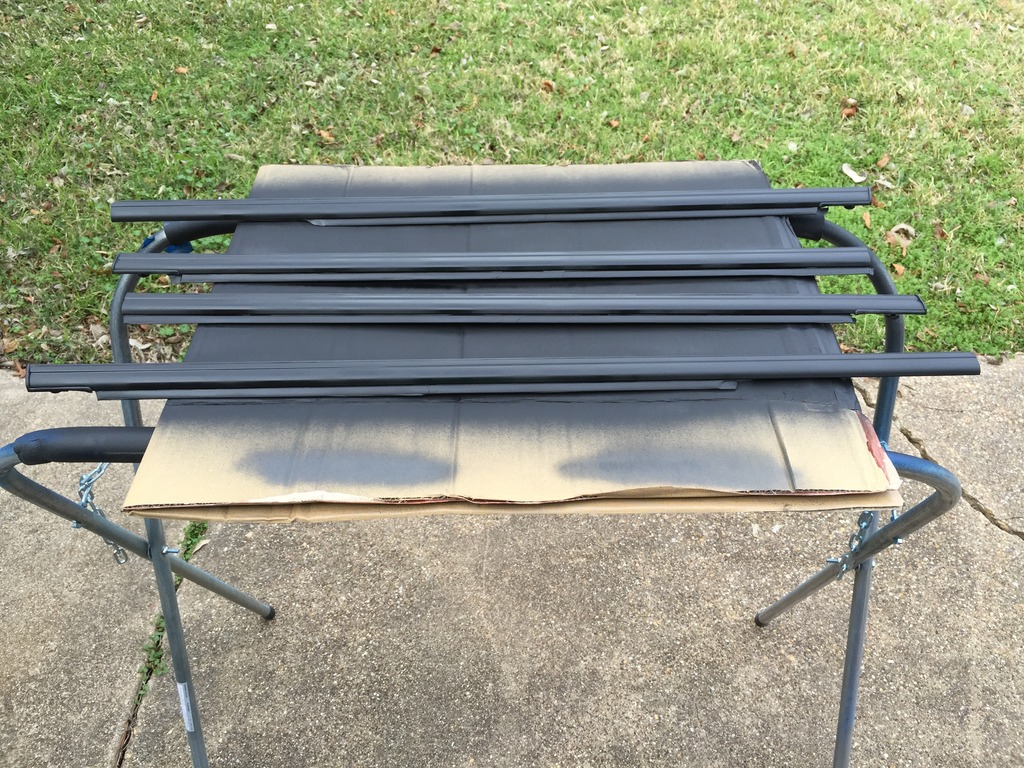
I also stripped all the original window trim/moldings and painted them.
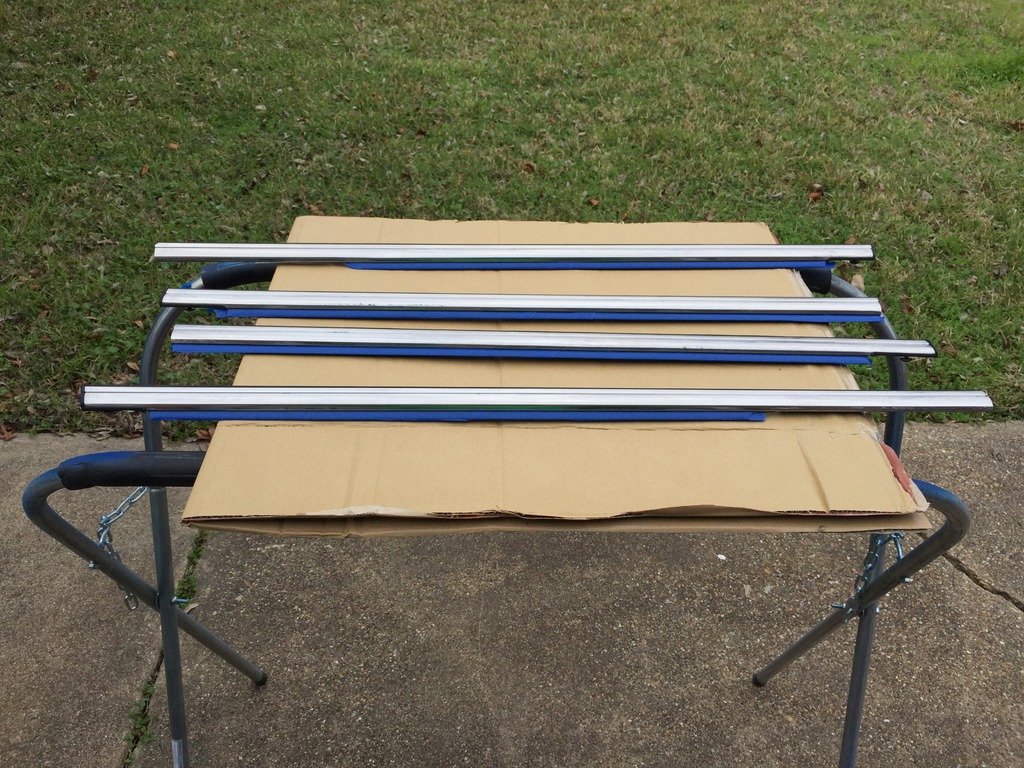
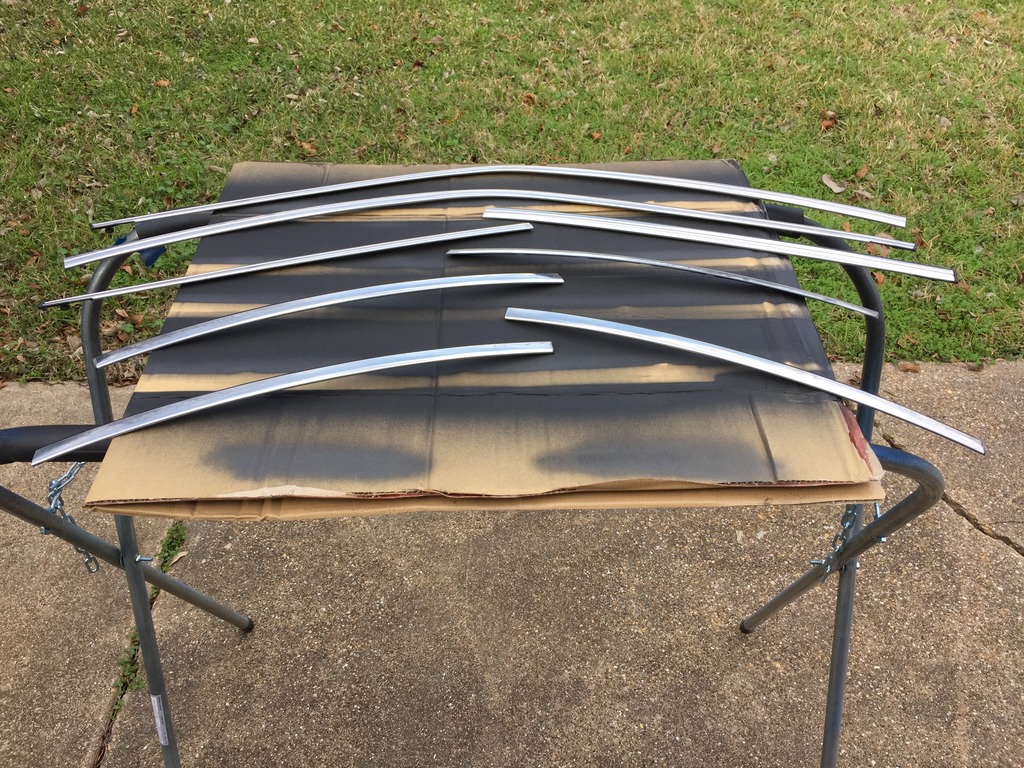
As I'm sure some of you guys know (if you've ever messed with the trim/moldings), these parts aren't actually painted - it's sort of covered in a "tape". However, even though this stuff is tape, it can be loosened up with paint stripper.
When dealing with the stripper, you have to be careful around the edges/perimeter, as the tape actually is joined with the side/endcap ridges/rubber channels that contact the glass/etc.
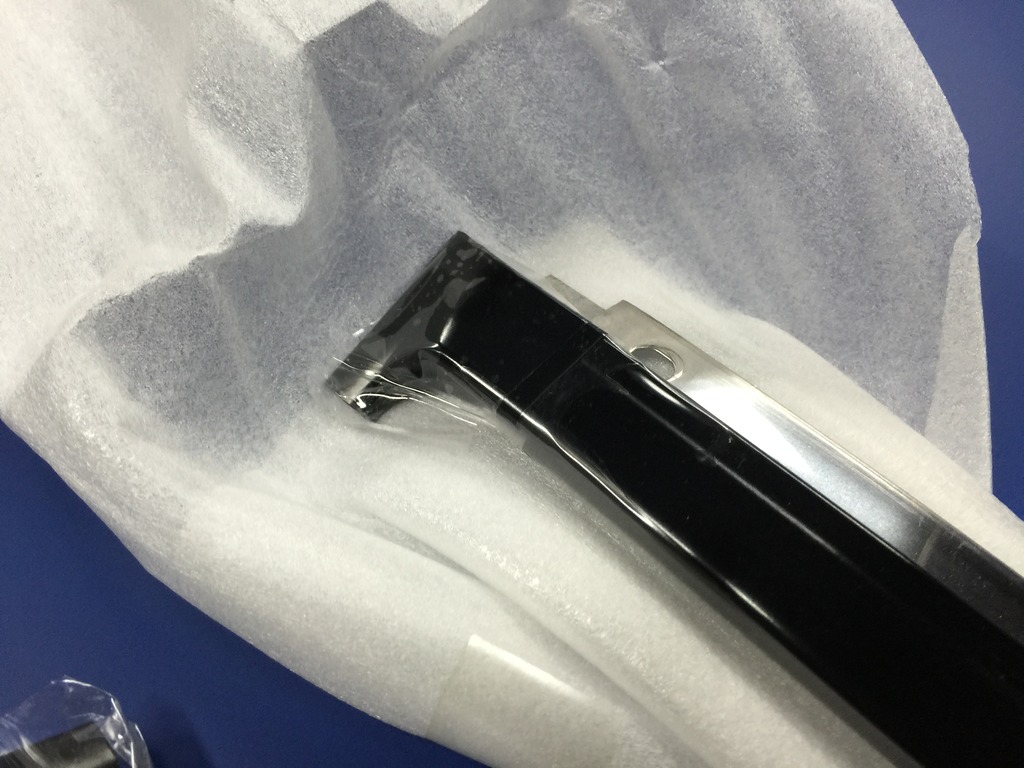
You need to be careful if you cover the entire thing in stripper because you can damage (actually sort of "melt") the plastic edges/trim pieces if you let the stripper sit on those parts too long. The main body of all the pieces are just metal so no issue with the stripper. Anyway, what you need to do is to carefully trim (with a razor blade) the "tape" part off from the plastic edges/trim pieces. If you do this to each piece, you'll wind up with a much better painted outcome. I did this on every single trim piece, even the front windshield moldings. A close-up of what I'm talking about:
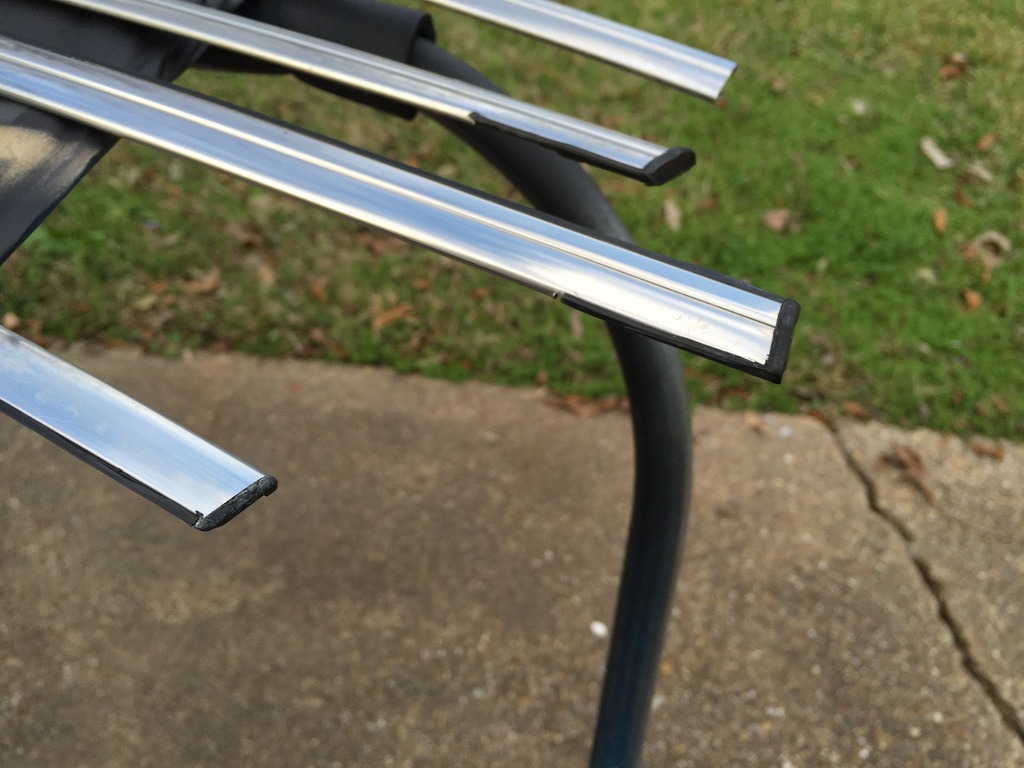
Repainted the B pillar trim too:
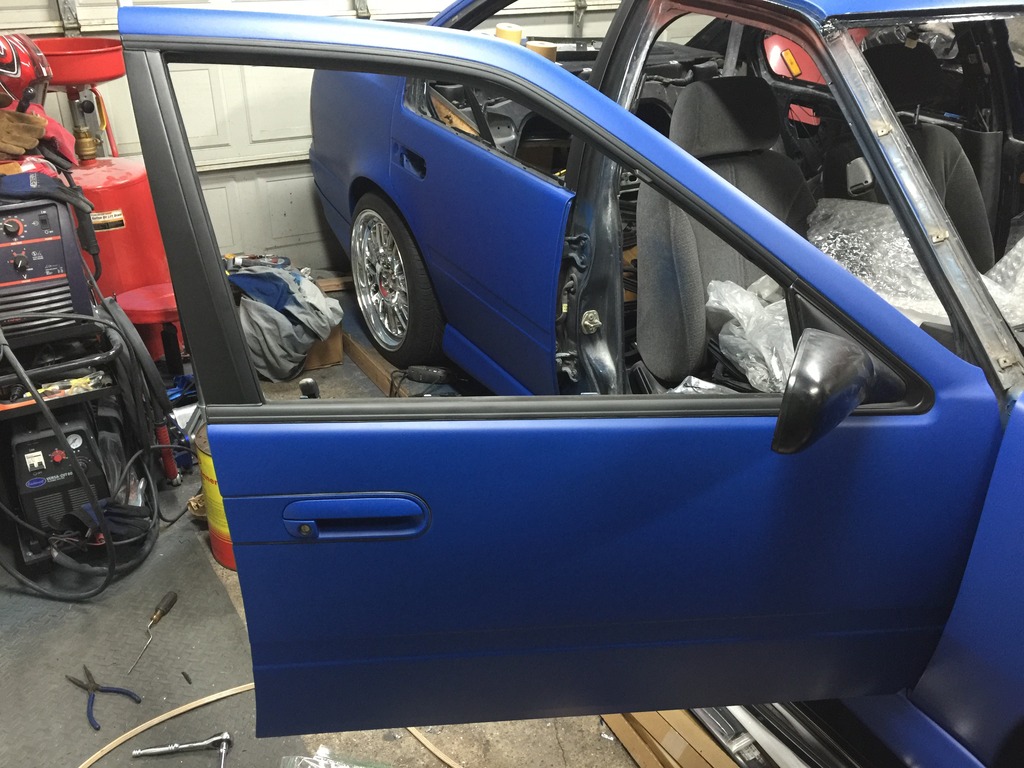
Everything going back on. Thankfully, even though I had some broken clips and stuff, with moving them around judiciously I was able to securely get everything back on and looking great with it all re-painted/matching. Getting all the trim and everything back on needs to go in a fairly specific order - especially if you don't want to scratch/bend anything - and that took some trial and error.
For example, the C pillar outer garnish needs to be installed BEFORE the rear quarter glass goes in. Yet the main door glass needs to be in (not affixed, but in the door) before you install the quarter glass, otherwise you can't get the main glass in. But then that brings up the issue of the window channel rubber, which is difficult to get into place with crap in there. Lots of stuff like that.
I would figure out one side, and then when I did it to the other side of the car I totally forgot the specific order I had already figured out and had to trial and error again.
Hopefully next weekend I'll be done with this project! Just got to put the headliner back in and clean up the interior, and install front and back glass.
Sooo, I spent this past 3 day weekend working some more on the car. Got all the handles and everything back in. Boy, fooling with the handles is pretty tedious/fiddly/frustrating. I'm really starting to prefer the look of no-tint on older cars these days, so I stripped all the tint off all my glass before installing it. Also installed my new window channel rubber on all four doors as well as new window regulators and motors on all four doors.
I also stripped all the original window trim/moldings and painted them.


As I'm sure some of you guys know (if you've ever messed with the trim/moldings), these parts aren't actually painted - it's sort of covered in a "tape". However, even though this stuff is tape, it can be loosened up with paint stripper.
When dealing with the stripper, you have to be careful around the edges/perimeter, as the tape actually is joined with the side/endcap ridges/rubber channels that contact the glass/etc.
You need to be careful if you cover the entire thing in stripper because you can damage (actually sort of "melt") the plastic edges/trim pieces if you let the stripper sit on those parts too long. The main body of all the pieces are just metal so no issue with the stripper. Anyway, what you need to do is to carefully trim (with a razor blade) the "tape" part off from the plastic edges/trim pieces. If you do this to each piece, you'll wind up with a much better painted outcome. I did this on every single trim piece, even the front windshield moldings. A close-up of what I'm talking about:

Repainted the B pillar trim too:

Everything going back on. Thankfully, even though I had some broken clips and stuff, with moving them around judiciously I was able to securely get everything back on and looking great with it all re-painted/matching. Getting all the trim and everything back on needs to go in a fairly specific order - especially if you don't want to scratch/bend anything - and that took some trial and error.
For example, the C pillar outer garnish needs to be installed BEFORE the rear quarter glass goes in. Yet the main door glass needs to be in (not affixed, but in the door) before you install the quarter glass, otherwise you can't get the main glass in. But then that brings up the issue of the window channel rubber, which is difficult to get into place with crap in there. Lots of stuff like that.
I would figure out one side, and then when I did it to the other side of the car I totally forgot the specific order I had already figured out and had to trial and error again.


Hopefully next weekend I'll be done with this project! Just got to put the headliner back in and clean up the interior, and install front and back glass.
01-04-2016, 07:34 AM
#51
You got any other plans for the interior? Different seats or anything? I put a swede headliner in my 4th gen and it definitely improved the look of the car but that **** was a PITA. I'd love to see a 3rd gen with a nicely done interior.
01-04-2016, 08:24 AM
#52
2 VE's are better than one!
Thread Starter
iTrader: (31)
Join Date: Sep 2000
Location: Dallas
Posts: 7,358
What type of headliners do the 4th gens have from the factory? The 3rd gens already have an almost-suede-like-fuzzy-type headliner. I'm not really sure covering it in suede would add anything to it or look much different at all.
01-04-2016, 03:51 PM
#53
Definitely no plans for the interior. The interior on this is pretty minty, so I don't have any plans for it other than just a good cleaning. I will probably upgrade the head unit and add a nice 6.5" component set but definitely no cosmetic changes.
What type of headliners do the 4th gens have from the factory? The 3rd gens already have an almost-suede-like-fuzzy-type headliner. I'm not really sure covering it in suede would add anything to it or look much different at all.
What type of headliners do the 4th gens have from the factory? The 3rd gens already have an almost-suede-like-fuzzy-type headliner. I'm not really sure covering it in suede would add anything to it or look much different at all.
01-05-2016, 05:49 PM
#55
2 VE's are better than one!
Thread Starter
iTrader: (31)
Join Date: Sep 2000
Location: Dallas
Posts: 7,358
In the past I have actually preferred Krylon flat black (matches the interior pretty well, like for painting the glove box handle for example). But then again each time I've done this I painted ALLLLLL the trim and wiper arms etc. all with the same paint, and didn't have to worry about trying to "match" any existing trim or paint.
I've also found that on the B pillar trim, it's quickest and easiest to just wipe down the panels with cleaner (acetone, alcohol, whatever) and spray right over the stock tape stuff. Years ago on my first VE I wasted a long time pointlessly trying to remove the tape. Ever since then I've just been painting right over it and it lasts years.
 01-07-2016, 04:13 PM
#57
typed a paragraph yesterday only to have it tell me my post "had to be more than 2 characters" and would only post "I"
anyway sweet thread, love seeing lots of pics of your car, dont really have much of an opinion on dip to like/dislike it, but its awesome to see your max all one color!
arent you bummed about losing the sunroof?? i figured somebody would have mentioned it by now. guess youre probably saving some weight but all my 3Gs had sunroofs and i loved them.
PS i acquired the other half to that pair i was talking to you about awhile back... had it for a while now. and to think youd lost all hope
01-08-2016, 08:17 AM
#58
2 VE's are better than one!
Thread Starter
iTrader: (31)
Join Date: Sep 2000
Location: Dallas
Posts: 7,358
typed a paragraph yesterday only to have it tell me my post "had to be more than 2 characters" and would only post "I"
anyway sweet thread, love seeing lots of pics of your car, dont really have much of an opinion on dip to like/dislike it, but its awesome to see your max all one color!
arent you bummed about losing the sunroof?? i figured somebody would have mentioned it by now. guess youre probably saving some weight but all my 3Gs had sunroofs and i loved them.
PS i acquired the other half to that pair i was talking to you about awhile back... had it for a while now. and to think youd lost all hope
anyway sweet thread, love seeing lots of pics of your car, dont really have much of an opinion on dip to like/dislike it, but its awesome to see your max all one color!
arent you bummed about losing the sunroof?? i figured somebody would have mentioned it by now. guess youre probably saving some weight but all my 3Gs had sunroofs and i loved them.
PS i acquired the other half to that pair i was talking to you about awhile back... had it for a while now. and to think youd lost all hope
I especially won't miss it because the sunroof leaked like a ****. The rear drains were clogged and so anytime it rained it would pool into the sunroof/headliner and when I backed out of the driveway or turned, it would literally pour out like a faucet directly down my back or my passengers back (depending on the turn angle)
I realize that's not the roof's fault, and of course the drains can be blown out, but you can't access the rear drains to blow them out without dropping the whole headliner. Kind of annoying.
Anyway, beyond that, I actually rarely use(d) the sunroof. There are only a very limited number of days where it's comfortable to use here (early spring-ish, and fall). It always sounds like a nice idea, but frequently I would find that it's merely a direct portal to very hot sun and an instant sweaty head. I will admit though that on the few perfect days that were suitable to use it that I did indeed really enjoy using it. My black VE still has a sunroof anyway. If this were my only Maxima, I'd perhaps be a little bit more patient in waiting to find a sunroof donor car.
And you bastid, are you saying you acquired dual "euro" glass lens headlights??
 01-08-2016, 02:32 PM
#61
Honestly I'm not bummed at all about losing the sunroof. I thought I had mentioned earlier in the thread that I won't really miss it, and that it's saving 40 pounds. I don't really care about the weight savings that much though.
I especially won't miss it because the sunroof leaked like a ****. The rear drains were clogged and so anytime it rained it would pool into the sunroof/headliner and when I backed out of the driveway or turned, it would literally pour out like a faucet directly down my back or my passengers back (depending on the turn angle)
I realize that's not the roof's fault, and of course the drains can be blown out, but you can't access the rear drains to blow them out without dropping the whole headliner. Kind of annoying.
Anyway, beyond that, I actually rarely use(d) the sunroof. There are only a very limited number of days where it's comfortable to use here (early spring-ish, and fall). It always sounds like a nice idea, but frequently I would find that it's merely a direct portal to very hot sun and an instant sweaty head. I will admit though that on the few perfect days that were suitable to use it that I did indeed really enjoy using it. My black VE still has a sunroof anyway. If this were my only Maxima, I'd perhaps be a little bit more patient in waiting to find a sunroof donor car.
And you bastid, are you saying you acquired dual "euro" glass lens headlights??

 01-08-2016, 06:56 PM
#63
a guy named Shiloh got in a wreck with his 3G awhile back and he had some euro clears. you might remember he was throwing around racial slurs because some lady pulled in front of him or something lol. well I got his surviving euro headlight. then months later i was browsing the classifieds and found a partout thread where a guy had a picture of euros in his signature but none listed for sale. I pm'd him and asked about it and he said he had got in an accident and only had the one... well lucky enough it was the match to the one id acquired from Shiloh. and i already owned a pair so now I have two pairs.
James posted about wanting to find some awhile back, i told him i had one and was on the lookout for another, well lets just say he didnt have much faith, lol. and i dont blame him i couldnt believe i managed to acquire another pair myself.
anyways im not sure why James seems bummed about it, as i told him he would be first in line should i sell them.. lol
01-09-2016, 08:39 AM
#64
2 VE's are better than one!
Thread Starter
iTrader: (31)
Join Date: Sep 2000
Location: Dallas
Posts: 7,358
a guy named Shiloh got in a wreck with his 3G awhile back and he had some euro clears. you might remember he was throwing around racial slurs because some lady pulled in front of him or something lol. well I got his surviving euro headlight. then months later i was browsing the classifieds and found a partout thread where a guy had a picture of euros in his signature but none listed for sale. I pm'd him and asked about it and he said he had got in an accident and only had the one... well lucky enough it was the match to the one id acquired from Shiloh. and i already owned a pair so now I have two pairs.
James posted about wanting to find some awhile back, i told him i had one and was on the lookout for another, well lets just say he didnt have much faith, lol. and i dont blame him i couldnt believe i managed to acquire another pair myself.
anyways im not sure why James seems bummed about it, as i told him he would be first in line should i sell them.. lol
James posted about wanting to find some awhile back, i told him i had one and was on the lookout for another, well lets just say he didnt have much faith, lol. and i dont blame him i couldnt believe i managed to acquire another pair myself.
anyways im not sure why James seems bummed about it, as i told him he would be first in line should i sell them.. lol
01-10-2016, 01:02 PM
#65
honestly it was still like pulling teeth to get those headlights from those guys. even though they only had 1 they didnt want to let them go. it took Shiloh like 6 weeks after i'd payed him before he sent the thing, and only after i sent him a nasty message about it lol. in hindsight it was obviously worth it, but at the time it was a real PITA
James did you acquire some UK corners then? saw you sent some US corners to the one guy...
James did you acquire some UK corners then? saw you sent some US corners to the one guy...
01-10-2016, 06:28 PM
#66
2 VE's are better than one!
Thread Starter
iTrader: (31)
Join Date: Sep 2000
Location: Dallas
Posts: 7,358
honestly it was still like pulling teeth to get those headlights from those guys. even though they only had 1 they didnt want to let them go. it took Shiloh like 6 weeks after i'd payed him before he sent the thing, and only after i sent him a nasty message about it lol. in hindsight it was obviously worth it, but at the time it was a real PITA
James did you acquire some UK corners then? saw you sent some US corners to the one guy...
James did you acquire some UK corners then? saw you sent some US corners to the one guy...
No I didn't buy any UK corners. I already have Australian corners that I put Lamin-x tint film on the front halves and they look identical to UK corners now though. Chris (Geordie) was saying that there is only something like 6 (SIX) 3rd gen Maximas still on the roads in all of the UK these days. So I think he'd have a very hard time locating any UK corners for me anyway - not that I asked him to.
Anyway - back to my roof skin/car project. I spent this weekend working on the front and rear glass install.
I have to say, the rear glass is exceedingly difficult and aggravating to work with. I have had two third gens over the years that had rear glass re-installs done by shops - including this current car I'm working on. I was somewhat unhappy with the overall quality of the repair on both cars in terms of how the molding was aligned, etc. and had chalked both up to incompetent glass guys. But after having tried it myself I must say that I bet in the glass-install universe, the 3rd gen rear glass must be on the more difficult side. It must be THAT difficult that even the professionals do somewhat subpar jobs on them.
Aftermarket glass may be to blame, and both of my personal examples had aftermarket glass. The glass on this one didn't fit very well against the body. At the top roof line, it bowed UP in the middle HIGHER than the roof line. It sunk in deep into the passenger side upper corner.
All that said, the main problem for me was that the outer reveal molding was wayyyy too short in terms of total perimeter circumfrence. That really surprised me because I had been keeping it indoors, and even with a heat gun I still couldn't get it "stretched" enough. I don't *think* it would have shrunk up from sitting at Nissan's warehouse for years, as the rubber looks brand new and not aged/damaged, but it was seriously several inches short. I think a 110 degree day and direct sunlight would have helped me but I didn't have that luxury this weekend.
All of this molding trouble is only an issue on the SE I must point out. It appears the GXE rear trim actually has clips and screws and stuff that holds it down. Must be nice!
I will try to explain a bit more as move on with some pictures.
So this is the rear window channel. This inner molding piece attaches to the body with double-sided tape and went in with zero issue:


The front has the same type of stick-on piece on the top. This is the GGG part that I spoke of above:

Usually, when installing glass, you're supposed to leave a thin layer of the original urethane in the pinch weld and then just adhere straight onto that with the new urethane adhesive. I couldn't do that as all my pinch weld had been cleaned entirely out for the roof skin and C pillar work. So I primed the entire pinch weld with 3M 08682 primer.
After that dried, I moved onto the "foam dam" as Nissan calls it:

Nissan actually wants you to put this straight onto the glass itself, based upon measuring X distance from the perimeter of the glass. That sounded like too much room for error to me, so I just stuck mine straight into the pinch weld on the very inside perimeter. I wasn't entirely sure what exactly this foam dam was for, but after doing this project I'm pretty certain the only purpose for the dam is merely to keep the urethane adhesive from getting squeezed into the cabin and getting on your headliner or A or C pillars. The front and rear glass both take the same foam dam, and I'm nearly certain universal stick-on foam would do the same trick. The foam is adhesive on one side and just over 1/4" tall and just under 1/4" wide.
Here's the foam dam installed on the rear:


And on the front:

After that, I primed the glass itself with the 3M primer. It just brushes onto the perimeter of the glass, and also has the added benefit of covering up any of the scraped/chipped off existing black band around the glass.

Now onto the adhesive. I went with 3M 08693, which is NOT the super fast set stuff. I wanted to be able to work with it some should I run into any issues. Since window weld is notoriously frustrating to apply with a manual hand held caulking gun, I picked this up to apply it - *** #63001. It's a very nicely built pneumatic unit and worked like a charm. I should have picked one of these up years ago. Having the handle in the middle really helps balance it when applying:

Now back to the rear glass. How the outer/reveal molding is supposed to work is that it has a little lip on the backside that sits down into the urethane adhesive between the glass edge and that stick-on liner bit. So after you set the glass, you then install the reveal molding. Well this was incredibly difficult to do. Downright impossible actually, even with a second set of hands from my brother.
I mentioned the poor fit from the glass and the molding itself being really short, even with a heat gun. So we would get one part of it set, and as we moved around the glass we'd have to heat/stretch it and it would just continually pull it out of one of the spots we'd already set. Even taping it down didn't help whatsoever - it would just continually pull up and then slime the adhesive all over the glass and onto the body. It was beyond aggravating and halfway through I was cursing myself for really butchering the job. Any glass guy who can even remotely do that by himself I give him big time props. Like I said, if this was a very hot day out in the sun it might have gone smoothly but it was downright impossible for us with the molding being that short.
Another part of the problem was the top middle of the glass was bowing up above the car as I stated previously. I had to set a jug of oil up there to kind of weigh it down.
I finally had to admit defeat and just pulled the molding entirely. I then frantically spent nearly 2 hours trying to clean all the adhesive off the molding before it caked on and ruined it, and then meticulously was (thankfully) able to clean it off of the body with some alcohol. What I will have to do now is to cut off the back "tab" from the molding and glue it on later superficially (which is described in the FSM and is an acceptable method). I would have just preferred to do it the original factory way.
So here is how the rear glass sits now. If the molding glues on without issue as I'm planning to do, it will come out looking good all said and done:


The front was an absolute piece of cake comparatively and came out good. The GGG molding didn't lay quite as flush/even as I would have preferred in a few spots but I don't think anybody would notice unless they're looking for it. It certainly does the job just fine. I have a few little bubbles/discolored parts at the top of my front glass (just under the upper molding) that I was unable to 'paint' with the primer since they're only in the outermost layer of the glass. Kind of annoying but not enough to make me buy new glass entirely. You can see what I'm talking about in the second picture here:


And a full car view of the car as it sits now. I can't remember if I pointed out the very front corner of my roof on the driver side there's that dark spot. That's from the "Dip Coat" stuff spray wax type stuff sprayed on it as a test in that area. I just didn't want anybody to think I have a random dark/poor technique spot there

I stupidly scrapped the brackets from the junkyard donor roof that I needed to re-mount my headliner and pull handles. I will need to go get those next weekend at the junkyard and should be back totally together after next weekend!
01-18-2016, 05:53 PM
#68
2 VE's are better than one!
Thread Starter
iTrader: (31)
Join Date: Sep 2000
Location: Dallas
Posts: 7,358
Well I got up early today and since I was off I went to the Pick N Pull over in west Dallas this morning and got all the headliner pull handle/bracket stuff I needed.
I also stumbled across a complete VE 5 speed in that yard! It pains me so much to have not had the motivation or time to strip all the 5 speed stuff off of it. It's been at least 7 or 8 years since I've seen a VE 5 speed in a junkyard. I think I can count on one hand the number of times I've seen a VE 5 speed in a junkyard actually. Unreal.
Also this past weekend of junkyard hunting was a jarring reminder at how old these cars are getting. For the first time ever, my usual repertoire of junkyards didn't have ONE single 3rd gen in their yards. That's just crazy. As long as I can remember there have always been numerous 3rd gens in any yard I've ever gone to. These cars are dying off fast, it's pretty sad. Same thing happened with my Civic a few years ago. It's very rare now I find a 88-91 Civic or CRX in a junkyard these days.
Anyway, so I'm officially done. Well, actually I still need to put the molding on the rear glass but I can hopefully get to that next weekend. Oh and I need to paint my wiper arms.
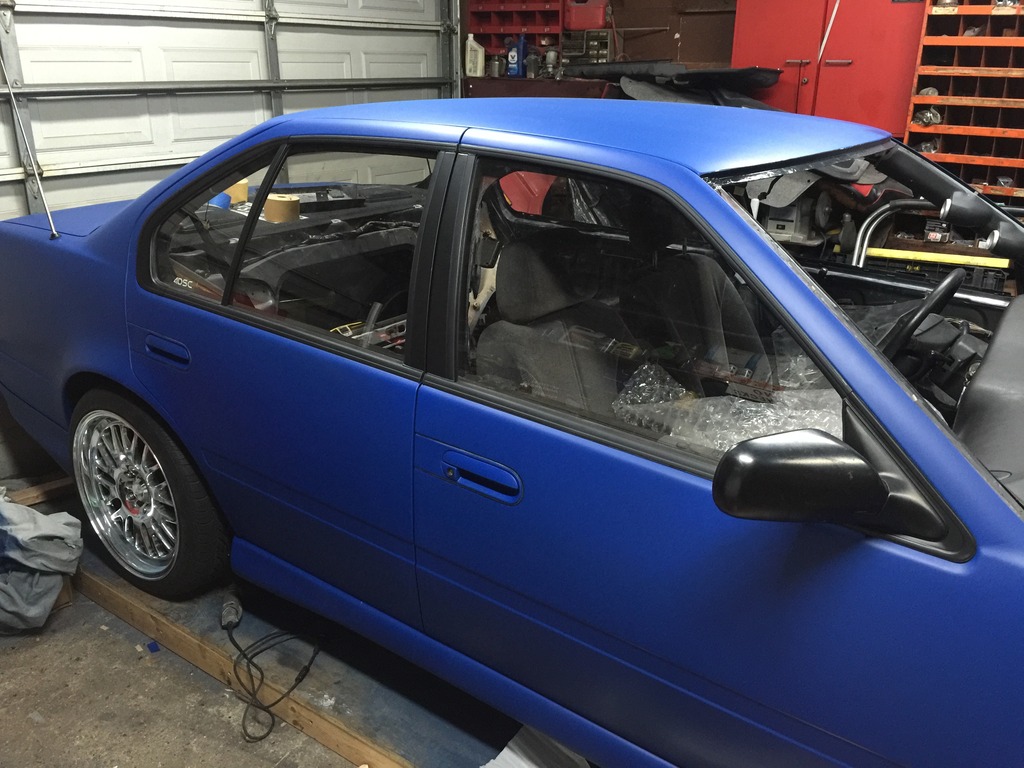
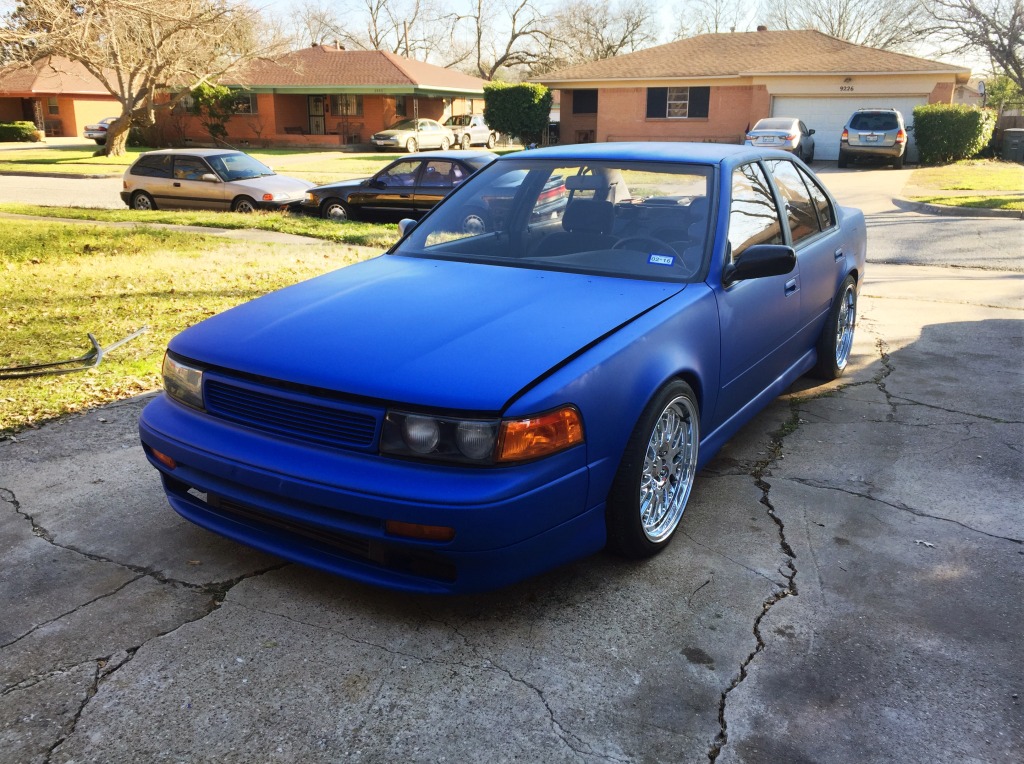
Here's the only pics I took after I got it back together. I can't find my front plate holder screws so I had to put the plate in the windshield. This first picture makes it look like there some wet or shiny stuff on the front driver fender. There's nothing there and I'm not sure why it looks like that in the picture.
I also stumbled across a complete VE 5 speed in that yard!
It pains me so much to have not had the motivation or time to strip all the 5 speed stuff off of it. It's been at least 7 or 8 years since I've seen a VE 5 speed in a junkyard. I think I can count on one hand the number of times I've seen a VE 5 speed in a junkyard actually. Unreal. Also this past weekend of junkyard hunting was a jarring reminder at how old these cars are getting. For the first time ever, my usual repertoire of junkyards didn't have ONE single 3rd gen in their yards. That's just crazy. As long as I can remember there have always been numerous 3rd gens in any yard I've ever gone to. These cars are dying off fast, it's pretty sad. Same thing happened with my Civic a few years ago. It's very rare now I find a 88-91 Civic or CRX in a junkyard these days.
Anyway, so I'm officially done. Well, actually I still need to put the molding on the rear glass but I can hopefully get to that next weekend. Oh and I need to paint my wiper arms.
Here's the only pics I took after I got it back together. I can't find my front plate holder screws so I had to put the plate in the windshield. This first picture makes it look like there some wet or shiny stuff on the front driver fender. There's nothing there and I'm not sure why it looks like that in the picture.


 01-30-2016, 08:45 AM
#73
2 VE's are better than one!
Thread Starter
iTrader: (31)
Join Date: Sep 2000
Location: Dallas
Posts: 7,358
It was probably a good solid week to come off completely. I was able to get most of the black off my hands after that first day but I was never able to get it out from under my fingernails till they grew out some. That picture of me holding the foam dam is as good as it got for about that whole week. I'm sure I looked like a total moron at work.
It's supposed to get into the in 70's this weekend so I plan to finally glue the rear molding on.
02-04-2016, 08:11 AM
#75
2 VE's are better than one!
Thread Starter
iTrader: (31)
Join Date: Sep 2000
Location: Dallas
Posts: 7,358
Still haven't been able to glue the rear glass molding on. I've been non-stop with other car work.
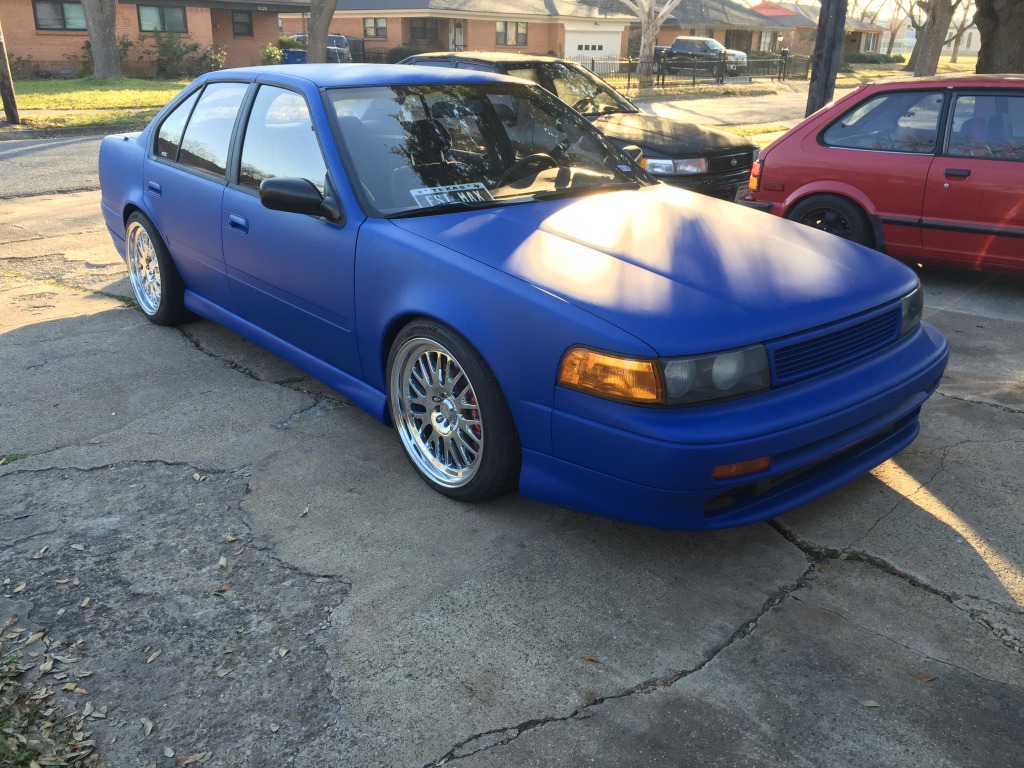
I did take a picture the other morning in the sun and my buddy also took one when I went to spray it off at the car wash. This flex blue really looks a lot different depending on sun/light levels.
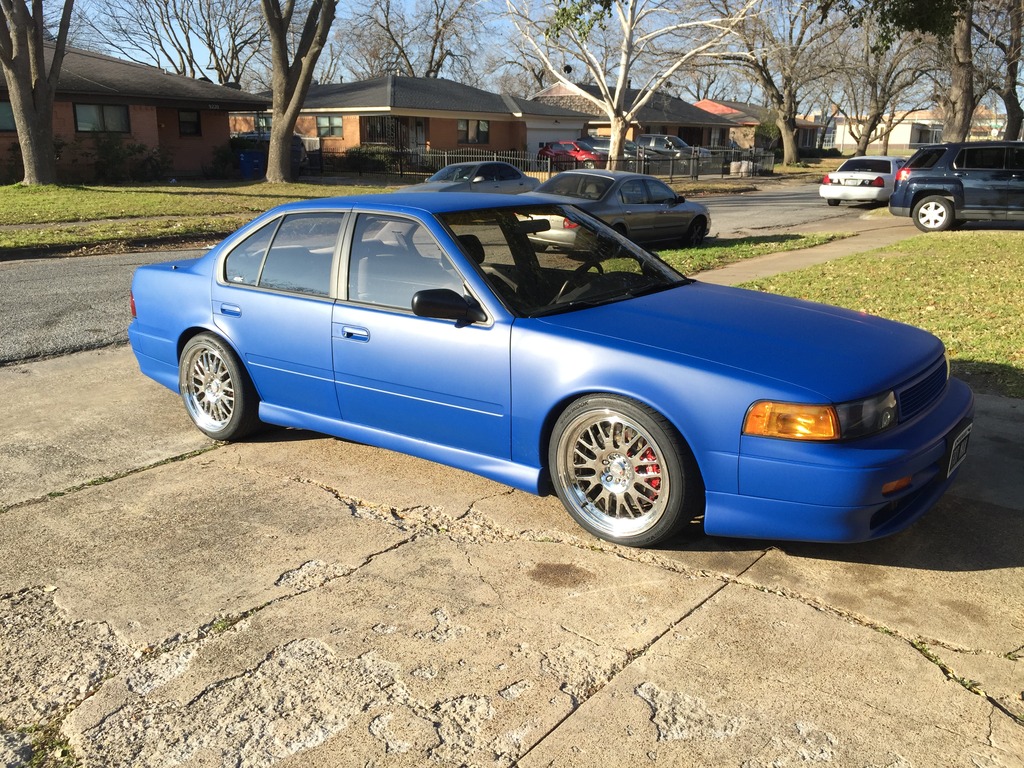
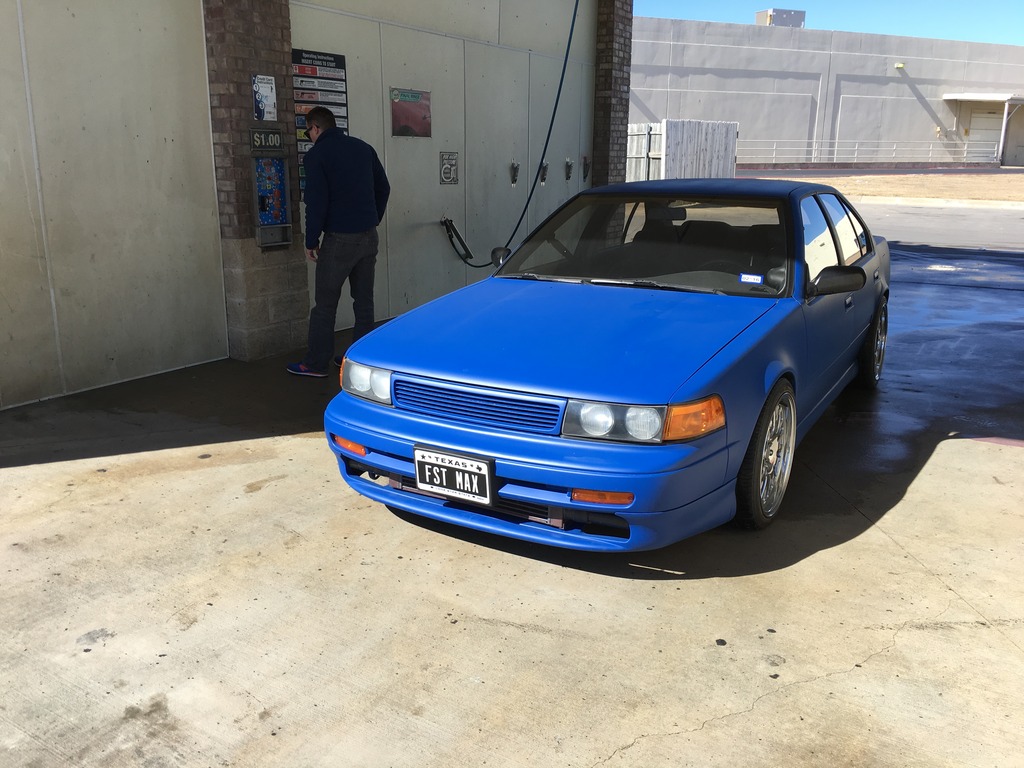
I did take a picture the other morning in the sun and my buddy also took one when I went to spray it off at the car wash. This flex blue really looks a lot different depending on sun/light levels.


Thread
Thread Starter
Forum
Replies
Last Post
RealityCheck
4th Generation Maxima (1995-1999)
7
01-12-2017 02:13 PM